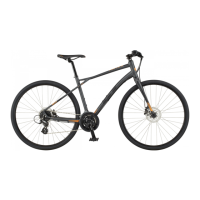
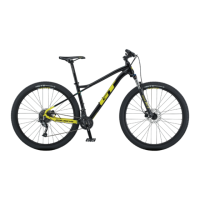
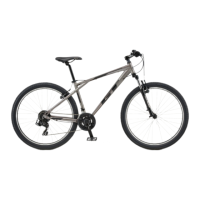
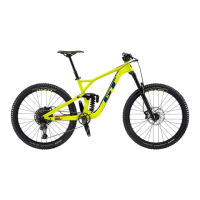
This document serves as a Quick Start Guide for GT Hardtail Rim Brake bicycles, specifically the Laguna and Palomar models. It is designed to help users assemble their new GT bike quickly and efficiently, either independently or with a friend. The guide emphasizes a simple, step-by-step assembly process, complemented by an accompanying video for visual guidance.
Function Description:
This guide facilitates the initial setup and assembly of a new GT Hardtail Rim Brake mountain bike. It breaks down the assembly into four major steps: installing handlebars, installing the seatpost, installing the front wheel, and installing pedals. The primary function is to provide clear, concise instructions to get the bike ready for riding, ensuring key components are correctly fitted and secured. It also includes crucial pre-ride checks to ensure safety and proper functionality before the first ride.
Usage Features:
The guide is structured to be user-friendly, with each major assembly step clearly outlined and accompanied by illustrative images.
-
Getting Started:
- The first step involves unboxing the bike and identifying necessary tools. Tools required include pliers or screwdriver, Philips head screwdriver, boxcutter, cable cutters or scissors, torque wrench, Allen keys, and a pedal wrench.
- Users are instructed to carefully open the box, remove the seat, and locate a smaller box containing parts, tools, and manuals.
- The front wheel and all other packaging should be removed, and the bike positioned with the rear wheel inside the box and the fork hanging off the frame for easier assembly.
-
Step 1: Install Handlebars:
- Users begin by removing the bolts and faceplate from the stem using the provided Allen wrench. The stem connects the handlebar to the fork.
- The handlebar is then inserted into the stem, and the faceplate is loosely reattached with one bolt.
- Crucially, users must ensure that brake and shifter cables are wrapped correctly around the frame, avoiding kinks or twists. The handlebar should be centered in the stem using its markings.
- The remaining three bolts are screwed in a crosswise fashion, but not fully tightened yet. The handlebars are rolled into a comfortable position, and the stem bolts are hand-tightened with the Allen key.
- A final check ensures that the gap on the faceplate is even at the top and bottom of the bar.
-
Step 2: Install the Seatpost:
- The seatpost is inserted into the frame, making sure it goes beyond the minimum insertion line marked on the seatpost.
- The seat should be aligned with the top tube.
- The seat collar is then tightened snugly for temporary security.
-
Step 3: Install the Front Wheel:
- To prepare for wheel installation, the brakes are squeezed together to release the brake cable, spreading the brakes open to allow the tire to slide in easily.
- The quick-release skewer, found in the parts box, consists of an adjusting nut, two springs, and a quick-release lever. One spring is removed by unscrewing the adjusting nut.
- The tire's direction of spin is determined by checking the arrow on the sidewall.
- The quick-release skewer is inserted through the left-hand side of the wheel. The removed spring is reinstalled with its small end facing inward, and the adjusting nut is lightly screwed on. The correct order for the skewer components is: adjusting nut, spring, wheel, another spring, and the quick-release lever.
- The tire is rolled into the fork, and the fork dropouts are set onto the axle. The quick-release lever must be on the left-hand side of the bike.
- If the wheel is too loose, the quick-release lever is opened, the adjusting nut is tightened further, and the lever is closed again. The lever should be positioned below and behind the fork.
- Finally, the brakes are re-attached by squeezing them together and sliding the cable back into place. A quick check of the brakes is performed, and the rubber protector is slid back into place.
-
Step 4: Install Pedals:
- Users identify the left and right pedals and their corresponding crank arms using stickers.
- Pedals are screwed in the direction of the front wheel.
- Both pedals are then very firmly tightened using the pedal wrench provided.
Maintenance Features (Pre-Ride Checks):
After assembly, the guide emphasizes several critical pre-ride checks to ensure the bike is safe and ready for use.
- Seatpost Clamp Tightness: Double-check the seatpost clamp's tightness. It should be firm enough to require effort to close.
- Saddle Height Adjustment: The proper saddle height is approximately at hip level when standing next to the bike. The quick-release collar is loosened, and the saddle is adjusted up or down to this height, then tightened. The saddle height will likely be similar to the stem height.
- Saddle Height Verification: Sit on the bike, holding the brakes, to verify saddle height. When the leg is fully extended, there should be a slight bend in the knee.
- Stem Tightening: Use the provided torque wrench to tighten the stem bolts. The correct bit is selected and installed into the wrench. Each stem bolt is tightened in a crosswise fashion. Torque specification markings on the stem and seatpost should be observed. If no markings are present, all stem and seatpost bolts should be torqued to 7 Nm.
- Quick Release Check: Double-check that the quick release lever is tight. Closing it should leave a mark on the hand.
- Reflector Positioning: Ensure reflectors are tight and correctly positioned. The rear reflector should point straight back, and the front reflector should be perpendicular to the ground.
- Handlebar Security: Secure the front wheel between the legs and attempt to twist the handlebars. If the handlebars and front wheel move independently, the stem fixing bolts are not tight enough and require further tightening.
- Brake Functionality: Check the front brakes to ensure they don't pull back too far. There should be a gap between a fully compressed brake lever and the grip. Roll the bike back and forth slightly while squeezing the brakes to confirm they grip properly.
- Tire Inflation: Inflate the tires to the manufacturer's recommended pressure, which is marked on the tire's sidewall.
- Final Bounce: Give the bike a final bounce to ensure nothing is loose.
The guide also includes a warning that bicycling is an active sport with inherent risks, and users should read the complete GT Bicycle Owner's manual for comprehensive safety information. It encourages users to tag #gtbicycles on social media to share their new bike. For further assistance, GT rider support staff can be contacted via phone or by visiting a local GT retailer.