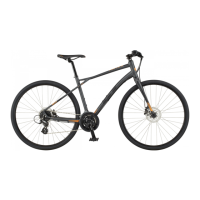
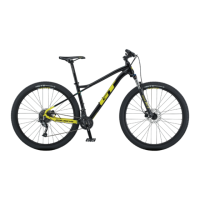
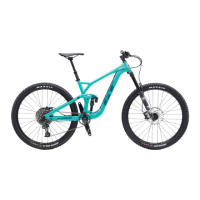
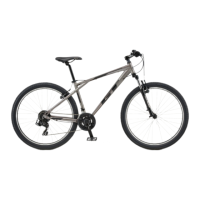
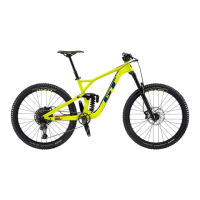
This document serves as a Quick Start Guide for assembling GT Hardtail Disc Brake bicycles, specifically for models like Avalanche, Zaskar, Aggressor, Traffic, and Transeo. It is designed to help users quickly get their new GT bike ready for riding, either by themselves or with a friend, and is intended to be used in conjunction with an assembly video available at help.gtbicycles.com.
Function Description
The primary function of this guide is to provide a simplified, step-by-step process for the initial assembly of a new GT Hardtail Disc Brake bicycle. It covers the four major steps required to get the bike ready for use: installing the handlebars, seatpost, front wheel, and pedals. The guide emphasizes ease of assembly, allowing users to perform the initial setup at home. It also highlights the importance of pre-ride checks to ensure safety and proper function before the first ride.
Usage Features
The guide is structured to be user-friendly and accessible, even for those with limited experience in bike assembly.
- Step-by-Step Instructions: The assembly process is broken down into four distinct steps, each with clear, concise instructions and accompanying images. This modular approach makes it easy to follow along and complete each task.
- Visual Aids: Each step is heavily supported by photographs that illustrate the actions described in the text. These visuals are crucial for understanding the correct positioning of parts, the direction of tightening, and the overall appearance of the bike at various stages of assembly.
- Tools List: A dedicated section lists all the necessary tools for assembly, including pliers or screwdriver, Philips head screwdriver, boxcutter, cable cutters or scissors, torque wrench, Allen keys, and a pedal wrench. This helps users prepare all required items before starting the assembly process.
- Identification of Key Parts: The guide includes a diagram labeling the key parts of the bike (saddle, stem, handlebars, seatpost, pedal axle, pedal, disc brake rotor), which is helpful for users to familiarize themselves with the terminology used throughout the instructions.
- Safety Warnings: A prominent "WARNING" section advises users about the inherent risks of bicycling and emphasizes that this is a Quick Start Guide, not an Owner's Manual. It strongly recommends reading the complete GT Bicycle Owner's Manual for comprehensive safety information and instructions, available online at www.gtbicycles.com.
- Support Information: For additional assistance, the guide provides a customer support phone number ((800) 245-3872) and suggests visiting a local GT retailer or professional bicycle retailer. This ensures that users have multiple avenues for help if they encounter difficulties.
- Social Media Engagement: Users are encouraged to tag #gtbicycles in their social media posts once their bike is assembled, fostering a sense of community and allowing GT to see their new bikes.
- Pre-Ride Checks: After assembly, a critical section outlines essential pre-ride checks to ensure the bike is safe to operate. These checks include verifying reflector orientation, securing wheel reflectors, adjusting seat height, checking handlebar and stem tightness, ensuring quick-release levers are tight, testing brake function, and confirming tire inflation. These steps are vital for user safety and optimal performance.
- Pedal Installation Guidance: Specific instructions are provided for installing pedals, including identifying left (L) and right (R) pedals and the correct direction for tightening (towards the front wheel). This detail is important as incorrect pedal installation can lead to damage or injury.
- Quick-Release Mechanism Instructions: The guide offers detailed instructions on how to properly install and tighten the quick-release skewer for the front wheel, emphasizing the correct order of springs and nut, and how to ensure sufficient tightness for safety.
- Handlebar and Stem Assembly: Clear steps are given for attaching the handlebars to the stem, including removing and reattaching the faceplate, ensuring proper cable routing to avoid kinks, centering the handlebar, and tightening bolts in a crosswise fashion. The importance of checking the gap on the faceplate for evenness is also highlighted.
- Seatpost Installation: Instructions for installing the seatpost include loosening the clamp, locating the minimum insertion mark, inserting the seatpost into the frame, and tightening the quick-release clamp. This ensures the seatpost is securely in place and at a safe depth.
Maintenance Features
While primarily an assembly guide, the document touches upon aspects that relate to initial setup and ongoing safety, which can be considered foundational for maintenance.
- Torque Specifications: The guide mentions using a torque wrench to tighten stem and seatpost bolts to specific torque specifications (7 Nm if markings are absent). This is a crucial maintenance practice that prevents over-tightening (which can damage components) or under-tightening (which can lead to parts coming loose during riding).
- Checking for Loose Parts: The final pre-ride check involves giving the bike a "final bounce" to ensure nothing is loose. This is a general safety and maintenance check that should ideally be performed before every ride.
- Tire Inflation: Users are instructed to check tire inflation and inflate tires to the pressure marked on the tire sidewall if necessary. Proper tire pressure is essential for ride quality, tire longevity, and safety.
- Brake Function Check: The guide includes steps to check the front brakes, ensuring they don't pull back too far and grip effectively. Regular brake checks are a fundamental part of bicycle maintenance to ensure safe stopping power.
- Handlebar and Saddle Stability Checks: Instructions to vigorously twist the bars and saddle to ensure they don't move are included. This is a critical safety check that, if failed, indicates a need for further tightening or adjustment, which falls under routine maintenance.
In summary, this Quick Start Guide is an invaluable resource for new GT Hardtail Disc Brake bicycle owners, providing clear, visual instructions for initial assembly and crucial pre-ride safety checks, laying the groundwork for a safe and enjoyable riding experience.