EasyManua.ls Logo

GTO F3100MBC User Manual

GTO F3100MBC
11 pages
To Next Page IconTo Next Page
Page #1 background imageLoading...
Page #1 background image
Moving Gate
Area
2`WdSeOg




NEVER INSTALL
any control device
within gray area
Crystal clear two-way communication up to 500 feet wireless or 1000 feet with extended antenna.
Wireless Gate Entry Intercom
Thank you for purchasing the GTO Wireless Gate Entry Intercom. Please
read the directions carefully and completely before installing.
Instructions for Wireless and Wired Installations
GTO, Inc. • 3121 Hartsfield Road • Tallahassee, Florida 32303
Telephone (850) 575-0176 • Fax (850) 575-8912 • website www.gtoinc.com
SAFETY NOTE: Never install the keypad
portion of this unit where a person can
reach through the gate to activate it, or
where a person can touch the gate while
activating the keypad. The recommended
minimum distance between the gate and
keypad is 10 ft.
©2005 GTO, Inc.rev - 05-01-07
IMPORTANT: Allow the
intercom base unit’s battery
to charge for 12 hours before
using the system for the first
time. See page 7 for details.
Keypad Unit
Base Unit

Other manuals for GTO F3100MBC

Question and Answer IconNeed help?

Do you have a question about the GTO F3100MBC and is the answer not in the manual?

GTO F3100MBC Specifications

General IconGeneral
Housing MaterialABS Plastic
Audio Output1W
Operating Temperature-10°C to +50°C
Microphone Sensitivity-40dB
Speaker Impedance8 Ohms

Summary

Wireless Gate Entry Intercom Overview

Keypad Placement Safety

Critical safety note regarding the minimum distance for keypad installation near gates.

Intercom and Keypad Features

Entry Code Programming and Security

Information on programming entry codes, keypad feedback, and security lockout features.

Keypad and Installation Guide

Wireless Keypad Installation

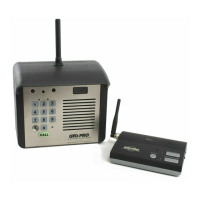
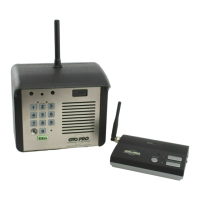
Steps for wireless mounting, DIP switch setting, and range considerations.

Wired Keypad Installation

Steps for hard-wiring the keypad to the gate opener control board and battery.

Wired Installation and Control Board Connections

Wired Installation Steps

Detailed steps for wiring the keypad, power supply, and setting jumpers.

Keypad Programming

Intercom Description and Operation

Intercom Base Unit Installation

Intercom ID Codes and Range Extension

Extending Antenna Range

Instructions for extending the keypad antenna using coaxial cable in RF-interference areas.

System Testing and Troubleshooting

Troubleshooting Communication Issues

Steps to troubleshoot communication problems, including resetting the ID code.

Related product manuals