2
77117
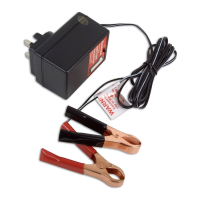
Gunson Automatic Battery Charger
The Gunson 77117 battery charger is a fully automatic, microprocessor
controlled unit delivering a maximum charge rate of 10 amps. It is suitable
for 12 volt batteries with capacities between 2AH to 200AH.
It charges in four stages: the initial pre-charge stage brings the discharged
battery up to a preset voltage level to enable the second stage pulse-
charging which assists with battery desulphurisation; the third (absorption)
stage brings the battery up to 100% capacity. The final stage is a
‘maintenance’ pulse charge (float mode) which will maintain the battery in
a fully charged state without overcharging. The charger will automatically
select the appropriate stage of charging depending on the battery’s level
of charge.
It features short-circuit protection, overload current protection, over
voltage protection and over temperature protection.
The 77117 is suitable for regular (sealed or unsealed) Lead Acid batteries,
and AGM (absorbed glass mat) batteries used on motorcycles, cars and
light commercial vehicles. It is also suitable for charging Deep Cycle
batteries (e.g. certain marine applications, golf carts, etc).
CONNECTION:
Note: The charger should be connected to the battery before connecting
to the mains supply. When finished, switch off at the mains supply before
disconnecting the charger from the battery.
1. Identify the polarity of the battery terminals (if not clearly indicated,
the positive terminal or post is normally larger than the negative).
2. Connect the positive (red) clip to the positive battery terminal first.
Then connect the negative (black) clip to the negative battery
terminal.
OPERATION:
3. Once connections to the battery have been made (see above) plug in
| switch on the AC mains supply.
4. The green (power) LED will light indicating that the charger is
switched on.
5. Select the battery type by pressing the button (regular lead-acid,
AGM, or switch to deep cycle). LED will light to indicate battery
type.
6. Select level of charging (2A or 10A). LED will light to indicate
charge level setting.
Tool Connection Copyright
Tool connection Copyright
Tool Connection Copyright
Tool Connection Copyright
Tool Connection Copyright
Tool Connection Copyright
Tool Connection Copyright
 Loading...