14
GYSPACK AUTO / 400 / 600
EN
Translation of the original instructions
WARRANTY
The warranty covers faulty workmanship for 2 years from the date of purchase (parts and labour).
The warranty does not cover:
• Transit damage.
• Normal wear of parts (eg. : cables, clamps, etc..).
• Damages due to misuse (power supply error, dropping of equipment, disassembling).
• Environment related failures (pollution, rust, dust).
In case of failure, return the unit to your distributor together with:
- The proof of purchase (receipt etc ...)
- A description of the fault reported
BATTERY REPLACEMENT
21
Product Battery Type Voltage (V)
Capacity
(Ah)
Dimensions
(cm)
Battery ref
GYSPACK
AUTO / 400
6FM - 18
Lead-acid
battery
12
18 33 x 14 x 43 53139
GYSPACK 600 6FM - 22 22 33 x 20 x 43 53151
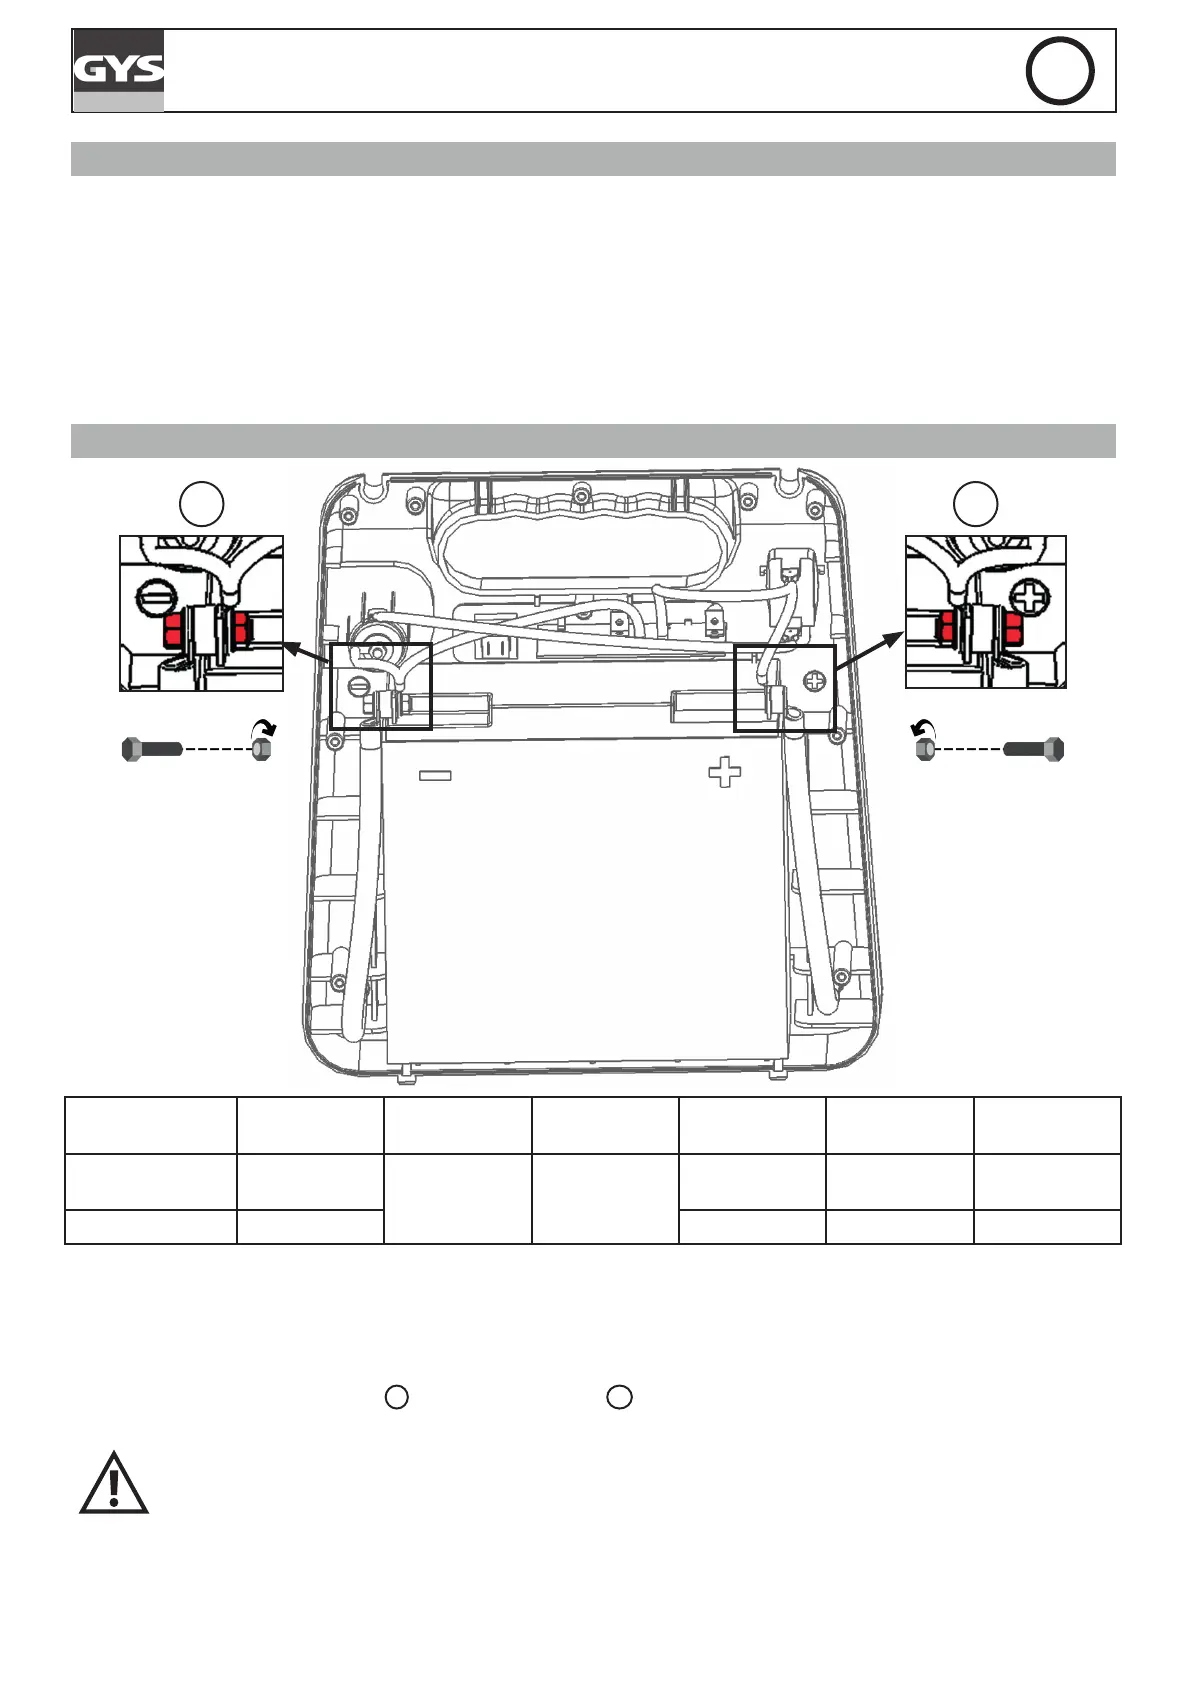
To replace the battery :
• First the booster must be disconnected form the power supply.
• The back panel must be unscrewed (9 screws) and removed.
• Once the back panel is removed, the battery front appears (cf illustration). The battery is connected to the GYSPACK
at two points : at the - terminal
1
and at the + terminal
2
. To remove the battery, remove the screw that enables
the connection between the battery and the GYSPACK.
When putting a new battery, make sure to observe the polarities of both the battery and the
GYSPACK. Terminal - on the left, terminal + on the right (cf illustration). Put the 2 screws and
washers back, tighten the nuts (recommended torque wrench 4 N.m).
• Place the booster’s backpanel screws back on.
 Loading...