Do you have a question about the H.C Duke & Son 959R and is the answer not in the manual?
| Brand | H.C Duke & Son |
|---|---|
| Model | 959R |
| Category | Freezer |
| Language | English |
Explains the importance and usage of the safety alert symbol in the manual.
Defines signal words like DANGER, WARNING, and CAUTION used with safety symbols.
Instructs users to read all safety messages and keep decals in good condition.
Warns against untrained personnel, operating with covers removed, or servicing before power disconnect.
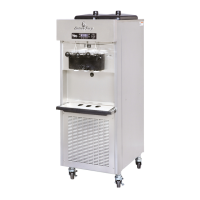
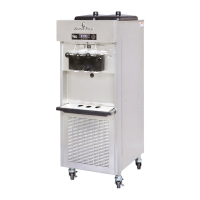
Lists specific technical details like dimensions, compressor, and motor specs.
Provides physical dimensions of the freezer unit.
Diagram and list of parts for the head assembly of the freezer.
Encloses the freezing cylinder and provides an opening for product dispensing.
Seals the product opening in the head when closed, allows flow when open.
Starts the freezer when dispensing; must be in place for operation.
Seals the air bleed opening, allows excess air removal during priming.
Diagram and list of parts for the beater shaft assembly.
Rotates in the freezing cylinder, blending mix as it ejects product.
Scrapes the frozen product from the freezing cylinder wall.
Seals the opening between the cylinder and beater shaft.
Describes optional accessories available for the freezer.
Diagram and description of the optional RMT system.
Explains the three positions (CLEAN, OFF, AUTO) of the selector switch.
Describes the ON/OFF positions of the mix pump switch.
Details the function and reset procedure for the overload protection.
Explains the function of the timer for quick start-ups or fast recovery.
Explains the meaning of the amber and red pilot lights.
Describes the purpose and limitations of the 115v receptacle outlets.
Emphasizes depressurizing the freezer before disassembly, cleaning, or servicing.
Diagram illustrating the assembly of the shaft seal components.
Diagram showing the assembly of the beater shaft components.
Illustration detailing the correct installation method for beater blades.
Provides instructions for sanitizing the freezer before initial start-up.
Provides daily procedures for rinsing, disassembling, and cleaning the freezer parts.
Provides guidelines and specifications for using Dairy Queen® mix.
Explains how to assess product consistency through temperature and overrun.
Details how to measure and maintain the correct product temperature.
Explains the concept of overrun and its importance for product quality.
Provides a step-by-step guide and formula for measuring product overrun.
Presents a chart correlating product weight to overrun percentage.
Guides on adjusting pump settings to correct overrun variations.
Addresses the policy and issues related to reprocessing melted product.
Outlines daily tasks for cleaning, sanitizing, and inspecting parts.
Details weekly checks for wear on seals, O-rings, blades, and beater shank.
Instructions for testing the head switch function monthly.
Instructions for checking water condenser performance monthly.
Recommends professional checks of the refrigeration system quarterly.
Advises changing gear reducer oil every six months or 2500 hours.
Lists annual tasks like replacing drive belts and cleaning the freezer interior.
Provides procedures for proper storage of the freezer during off-season.
Lists probable causes and remedies for the unit failing to operate.
Identifies causes and solutions for leaks in the drain tray system.
Addresses issues related to mix leakage from the dispensing head.
Lists causes and remedies for product dispensing too soft.
Lists causes and remedies for slow product dispensing.
Lists causes and remedies for product dispensing too hard.
Addresses issues where the freezer runs continuously and product gets too cold.
Lists causes and remedies for poor or slow product recovery.
Lists causes and remedies for the beater motor not operating.
Addresses issues with compressor operation or lack thereof.
Lists causes and remedies for compressor/beater motor not operating during dispensing.
Addresses compressor/beater motor operation tied to dispensing or timer.
Lists causes and remedies for capacitor failures in single-phase units.
Addresses causes and remedies for low discharge pressure.
Diagnoses issues with single-phase compressors starting but not running.
Addresses intermittent compressor start issues or overload cycling.
Lists causes and remedies for the unit running continuously.
Addresses causes and remedies for excessively high discharge pressure.
Lists causes and remedies for a noisy compressor.
Detailed diagram and part list for the head assembly.
Diagram and part list for the beater shaft assembly.
Diagram and part list for the contactor box components.
Diagrams and part lists for side and center switch assemblies.
Diagram of the electrical box components, top and front views.
Exploded view and part list for the freezer panels and decals.
Exploded view of major freezer components with numbered parts.
Continued exploded view and comprehensive part list for the freezer.
Diagram and part list for the gear reducer assembly.
Diagram and part list for the remote air-cooled condenser unit.
Illustrates O-ring sizes and part numbers for the dispensing heads.
Instructs to complete a checklist for proper installation and start-up.
Provides instructions for uncrating the freezer and inspecting for shipping damage.
Details checks for cabinet exterior damage, tubing, pulleys, and condenser fan.
Guides on selecting a suitable location and ensuring proper ventilation and leveling.
Provides instructions for making water and drain connections for water-cooled models.
Outlines critical electrical specifications, grounding, and voltage requirements.
Explains the importance of the data plate for operator reference.
Provides fields to record freezer installation details for future reference.
Guides on selecting an optimal location for the remote condenser unit.
Details procedures for connecting the pre-charged refrigerant line sets.
Explains how to properly connect refrigerant line couplings, including torque values.
Provides instructions for wiring the condenser fan motor and electrical disconnects.
Details how to test the head switch to ensure it prevents accidental beater activation.
Explains how to check the refrigeration system's performance via frost pattern.
Describes how to test and adjust the spigot switch for proper operation.
Explains how to check the beater shaft rotation direction, especially for three-phase models.
Guides on setting the cylinder thermostat for optimal product temperature and cycle times.
Provides pressure settings for water-cooled and air-cooled refrigeration systems.
Outlines checks for refrigeration pressure, mix leaks, product temperature, and pump operation.
Explains the basic principles of the refrigeration system in the freezer.
Explains how the selector switch and spigot switch control electrical operations.
Provides instructions for lubricating the gear reducer, including oil type and changing frequency.
Details cleaning procedures for air-cooled and water-cooled condensers, and fan motor inspection.
Explains how to check and adjust pulley alignment and belt tension.
Guides on replacing the beater drive coupling and adjusting end play.
Lists probable causes and remedies for the unit failing to operate.
Identifies causes and solutions for leaks in the drain tray system.
Addresses issues related to mix leakage from the dispensing head.
Lists causes and remedies for product dispensing too soft.
Lists causes and remedies for slow product dispensing.
Lists causes and remedies for product dispensing too hard.
Addresses issues where the freezer runs continuously and product gets too cold.
Lists causes and remedies for poor or slow product recovery.
Lists causes and remedies for the beater motor not operating.
Addresses issues with compressor operation or lack thereof.
Lists causes and remedies for compressor/beater motor not operating during dispensing.
Addresses compressor/beater motor operation tied to dispensing or timer.
Lists causes and remedies for capacitor failures in single-phase units.
Addresses causes and remedies for low discharge pressure.
Diagnoses issues with single-phase compressors starting but not running.
Addresses intermittent compressor start issues or overload cycling.
Lists causes and remedies for the unit running continuously.
Addresses causes and remedies for excessively high discharge pressure.
Lists causes and remedies for a noisy compressor.