26
Smart Power
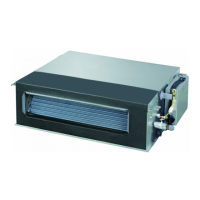
7.4 Installation of indoor unit
Installation sequence on new ceiling: (1) → (3) → (4) → (5)
(1) Temporary installation of indoor unit
• Attach hangers to hanging screws, and make sure to
use nuts and washers on both upper and lower ends of
hangers so as to x them rmly. A washer xing plate
(to be provided on site) can prevent the washer from
dropping off.
<Work at ceilings>
(2) Adjust units to appropriate installation locations.
Refer to "7.3 Preparation before installation."
(3) Correct levelness of air conditioner units.
• The indoor unit is equipped with a built-in drainage
pump and a oat switch. Correct levelness with a level
or water-lled polyethylene pipe.
Note:
If the unit inclines towards reverse direction of
condensate ow, the oat switch can not work normally
and water leakage will be resulted.
(4) Pull out the original xing plate that prevents the
washer from dropping off, and tighten nuts.
(5) Remove the installation cardboard.
7.5 Installation of drain pipe
(1) Install drain pipe
• Diameter of the drain pipe shall be greater than or equal to that of the connecting pipe.
(PE pipe: size: I.D.: 25mm; O.D.: 32mm)
• The drain pipe shall be short and have a downward slope of at least 1/100 to prevent pockets.
• If it is impossible to provide sufcient slope to the drain pipe, a drain lift pipe shall be installed.
• To avoid bending of the drain pipe, hangers shall be kept 1-1.5m away from each other.
Nut (to be provided on site)
Washer (to be provided on site)
Tighten (double nuts)
[secure hanger]
Hanger
Insert
Washer xing plate
(to be provided on site)
[secure the washer]
Polythene pipe
Level
1-1.5m
Slope over 1/100
Correct
Wrong
 Loading...