Do you have a question about the Haier GE GFD14ESSNWW and is the answer not in the manual?
Essential safety precautions and personal protective equipment for service technicians.
Explanation of the alphanumeric code used to identify the dryer model and its features.
Details on how to identify the month and year of manufacture from the serial number.
Resistance values for motors, heaters, inlet, and outlet thermistors.
Temperature thresholds for limit and auto-reset thermostats in open and close states.
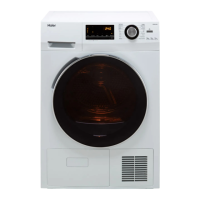
Basic operation steps and introduction to control panel functions and cycles.
Using the Power button and detailed explanations of available drying cycles.
Adjusting settings like temperature, dryness level, using Damp Alert, and Timed Dry.
Utilizing energy saving, custom cycle, and wrinkle-reducing features.
Managing cycle start times, pausing, locking controls, and setting signals.
Understanding the dryer's display indicators for time, status, and feature selections.
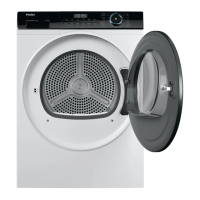
Interpreting care labels, sorting clothes, and using the drying rack accessory.
Guidance on cleaning the dryer's interior, exterior, lint filter, and stainless steel components.
Instructions for replacing the drum lamp bulb, including safety precautions.
Identifying compatible washers, the stacking kit, and installation location clearances.
Steps to install the stacking bracket onto the washer and secure the dryer.
Final steps to position the stacked washer and dryer and protect flooring.
How air circulates through the dryer for proper operation and the importance of seals.
Details on drum rotation speed and drive motor specifications.
Identification of key components visible from the front with the panel removed.
Mapping of connectors on the main control board to specific components and functions.
Mapping of connectors on the user interface board to other components.
Description of the DC voltage communication connection to the touch board.
Procedure for accessing and removing the dryer's control panel.
Steps to remove the dryer's top cover and user interface board.
Procedure for removing the front panel to access sensors and drum lamp.
Detailed steps for removing the door switch from the front panel.
Steps to remove the door latch mechanism from the front panel.
How to diagnose and replace the drum lamp assembly.
Procedure for removing and testing the outlet thermistor in the blower housing.
Steps for removing the sensor rods from the drum support housing.
Instructions for removing the heater access panel on the back of the dryer.
Detailed procedure for removing the heater assembly from the dryer.
Information on testing and accessing the inlet thermistor.
How the inlet thermostat functions, its tripping point, and replacement considerations.
How the high limit thermostat operates and its tripping temperature.
Instructions for opening the fuse holder and replacing the outlet fuse.
Steps to remove the drum support and its roller wheel shaft.
Procedure for removing the drum roller wheel from its shaft.
Detailed steps for removing the drum belt from the dryer.
Steps to remove the rear drum bearing assembly.
Procedure for removing the motor drive belt from the idler pulley.
Detailed steps for removing the dryer's motor assembly.
Steps for disconnecting and removing the main wiring harness.
Pre-testing checks, consumer mode, and general navigation for service mode.
Tests for software versions, fault codes, and user interface functionality.
Tests for door switch, motor, heaters, thermistors, and sensor rods.
Test to display software version for different dryer types.
Details on thermistor, EEPROM, button, and door signal fault codes.
Details on heating and communication fault codes and their resolution.
Schematic illustrating electrical connections between main board, UI board, and components.
| Brand | Haier |
|---|---|
| Model | GE GFD14ESSNWW |
| Appliance Category | Dryer |
| Type | Electric |
| Capacity | 4.0 cu. ft. |
| Color | White |
| Energy Star Certified | No |
| Control Type | Electronic |
| Weight | 120 lbs |
| Fuel Type | Electric |
| Ventless | No |
| Dryer Type | Vented |
| Voltage | 240V |
| No. of Temperature Settings | 4 |
| Drum Material | Stainless Steel |
| Width | 27 in. |