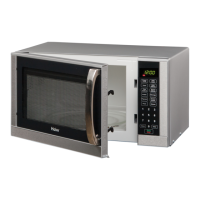
A
Adaptateur
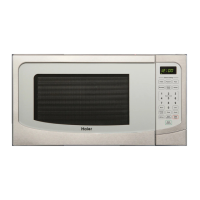
INSTALLER LES FILTRES À GRAISSE
Les
ltres à graisse sont situés sur la partie inférieure du four à micro-ondes. Pour
instructions d'installation, voir le manuel d'utilisation livré avec le micro-ondes.
A
Lampes de
surface
B
Porte
C
Filtres à graisse
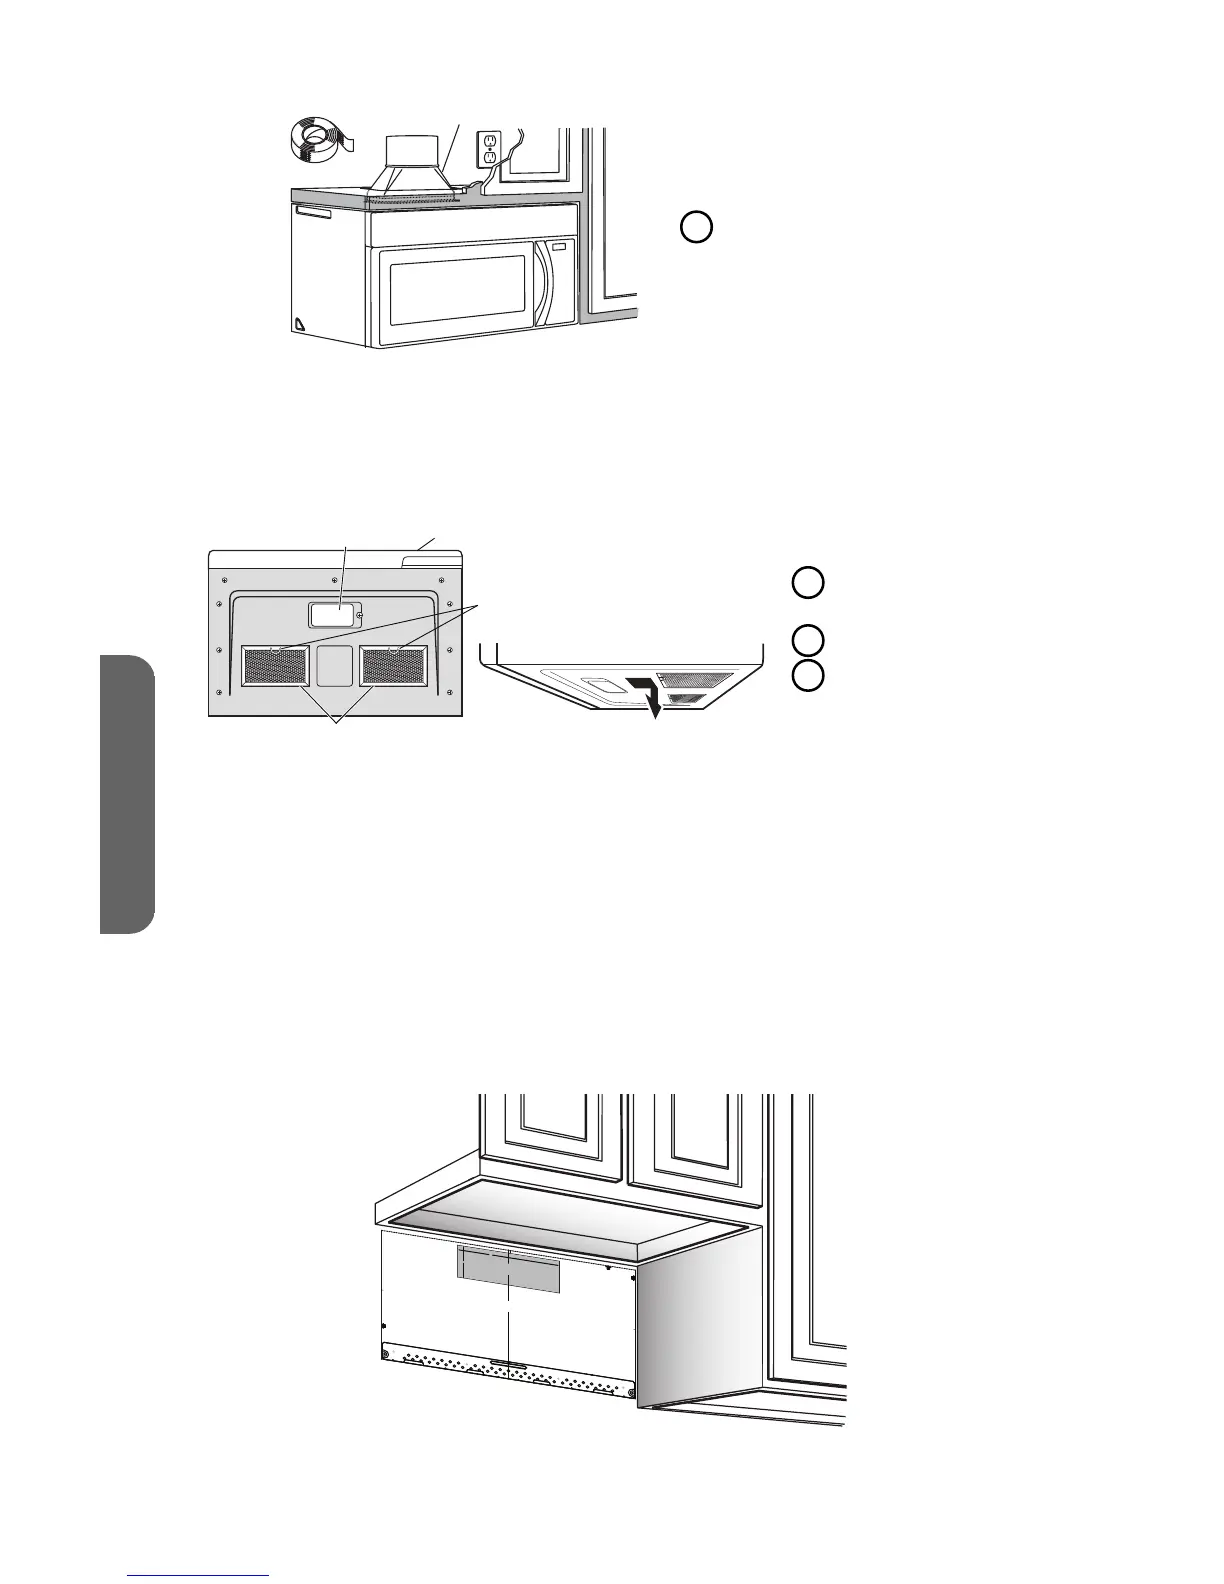
MÉTHODE B - ÉVACUATION EXTÉRIEURE PAR L’ARRIÈRE
(CONDUIT HORIZONTAL)
IMPORTANT :
•
S’assurer que les vis du moteur du ventilateur et du couvercle du ventilateur
sont bien serrées lors de leur réinstallation. Cela évitera des vibrations
excessives.
•
S’assurer que le câblage du moteur a été correctement raccordé et
xé
solidement, et que les câbles ne sont pas coincés.
CRÉER UNE OUVERTURE D'ÉVACUATION SUR LE MUR ARRIÈRE
3
/8" TO E
DGE
NO
TE: IT IS VE
RY IM
PORTAN
T TO
RE
AD
AND
FOLL
OW
TH
E
DIR
EC
TIONS
IN T
HE IN
STA
L
LATION INSTRU
CTIONS
BEFORE
PR
OCEED
ING
WITH
THIS
RE
AR
W
ALL
TEMPLA
TE.
This
Re
ar
Wall Tem
plate
serv
es
t
o posit
i
on th
e bot
tom
mounting plate and to loc
a
te the horizontal exhaust
ou
tlet.
1. Use
a level t
o
check that th
e templat
e
is
positioned
accurately.
2.
Locat
e
and
mark at
l
ea
st
one
stud on
t
he left
or
right
side o
f
t
he c
ent
erl
ine.
It is
important to
use at least
on
e
wood
scr
ew moun
te
d
f
irmly in a
st
ud
t
o sup
port
t
he
weight
of th
e
m
i
crowave.
Mark two
a
dditional, e
venly spaced
locat
ions f
or
the suppl
ied toggle bolts.
3. Dri
ll
holes in
th
e
m
arked locations.
Where t
here is
a st
ud, drill a
3/
1
6"
hole for wood screws.
F
or h
oles
that do n
ot
line up wit
h
a
stud,
d
rill
5
/
8
"
hole
s for
t
oggle
bolts.
DO
NOT
I
N
S
T
ALL
THE
MOUNTING
PLATE
AT T
HI
S
T
I
M
E.
4.
Rem
o
v
e
the template from the rear wall.
5. Review the Installa
t
ion Instruction boo
k for y
our
installation sit
u
a
t
io
n.
Lo
cate and mar
k hol
es to
a
lig
n with holes
in the
mo
unti
ng plate
.
IMP
ORTANT:
LOCATE
AT LEAST ON
E STUD
ON
EITHER
S
ID
E
OF
TH
E
C
ENTER
LIN
E.
MARK THE L
OCATION FOR
2 ADD
ITIO
NAL, EVEN
LY
SP
ACED TOGGLE BO
LTS IN
THE
MOU
NTING PLATE
AREA.
Locate and mar
k hol
es to
a
lig
n with holes in the
mo
unting
plate.
IMPORTA
NT:
LO
CATE
AT LE
AST ON
E STU
D O
N EITH
ER
SIDE OF
THE CE
NTERLINE.
MA
RK TH
E LOCATION FOR
2 AD
DIT
IO
NAL, EVEN
LY
SP
ACE
D
TOGG
LE
BOLTS
IN THE
M
OU
NTI
N
G PLA
TE
AR
EA.
Trim the r
ea
r wall templa
te a
l
ong the dotted
line.
Trim the
r
ea
r
wall te
mpla
te
alo
ng
the
d
otted
lin
e.
12"
4"
Darle vuelta a la hoja
par
a co
nsultar
la
versión en E
spañol.
1. Lire les instructions sur la plaque de montage/gabarit du mur arrière.
2. Scotcher la plaque de montage/gabarit au mur arrière en l’alignant sur les trous
percés précédemment pour les trous A et B dans la plaque murale.
44
FRANÇAIS
 Loading...