EasyManua.ls Logo

Haier HSU-18H03 User Manual

Haier HSU-18H03
8 pages
To Next Page IconTo Next Page
Page #1 background imageLoading...
Page #1 background image
No.0010515846
Installation Manual of Room Air Conditioner
The marks from to in the figure are the parts numbers.
The distance between the indoor unit and the floor should be
more than 2m.
Read this manual before installation
1.Driver
2.Hacksaw
3.Hole core drill
4.Spanner(17,19 and 26mm)
5.Torque wrench(17mm,22mm,26mm)
6.Pipe cutter
7.Flaring tool
8.Knife
9.Nipper 12.Reamer
10.Gas leakage detector or
soap-and-water solution
11.Measuring tape
Explain sufficiently the operating means to the user
according to this manual.
A
G
No. Accessory parts
Remote controller
R-03 dry battery
Mounting plate
Drain hose
Steel nail, cement
Screw
Plastic cap
Drain-elbow
Cover
Cushion
1
1
2
3
4
5
6
7
8
9
2
1
1
6
4
1
1
4
Number
of
articles
Accessory parts
4X50
4X25
more than 5cm
more than 10cm
more than 60cm
more than 15cm
more than 10cm
more than 10cm
more than 10cm
Attention must be paid to
the rising up of drain hose
G
F
A
Drawing for the installation of indoor and outdoor units
Necessary Tools for Installation
A
B
C
D
E
F
G
Optional parts for piping
Mark
Parts name
Non-adhesive tape
Adhesive tape
Saddle(L.S) with screws
Connecting electric cable
for indoor and outdoor
Drain hose
Heating insulating material
Piping hole cover
Arrangement of piping directions
Rear left
Rear
right
Left
Below
Right
C
D
E
Question and Answer IconNeed help?

Do you have a question about the Haier HSU-18H03 and is the answer not in the manual?

Haier HSU-18H03 Specifications

General IconGeneral
BrandHaier
ModelHSU-18H03
CategoryAir Conditioner
LanguageEnglish

Summary

Fixing of outdoor unit

Selection of Installation Place

Indoor Unit Installation Place

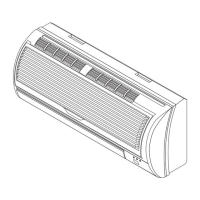
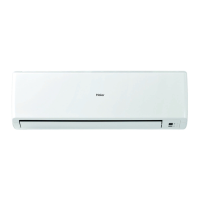
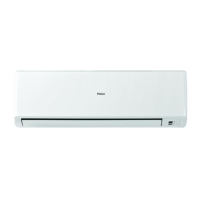
Details on selecting an appropriate location for the indoor unit, considering factors like heat, steam, and air spread.

Outdoor Unit Installation Place

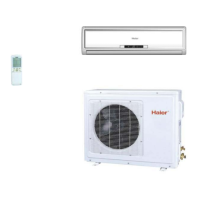
Details on selecting an appropriate location for the outdoor unit, considering ventilation, sunlight, and noise.

Power Source

Selection of pipe

Indoor unit

Fitting the Mounting Plate and Positioning the Wall Hole

Instructions for accurately fitting the mounting plate and determining the wall hole location using measurement tools.

Making a Hole on the Wall and Fitting the Piping Hole Cover

Guidance on drilling the wall hole and installing the piping hole cover, ensuring proper sealing with putty.

Installation of the Indoor Unit - Drawing of pipe

Steps for drawing pipes and drain hose, and securing them with adhesive tape for various piping directions.

Indoor unit

Connecting the Indoor/Outdoor Electric Cable

Procedure for connecting the indoor/outdoor electric cable, including routing and securing with insulation materials.

Fixing the indoor unit body

Instructions on how to securely hang and fix the indoor unit body onto the mounting plate, verifying its stability.

Indoor unit

Connecting the cable before installing the indoor unit

Steps for connecting the electric cable to the indoor unit before installation, ensuring proper terminal insertion and wiring.

Easily-demount cleaning of indoor unit

Guide on how to detach the top inlet, horizontal flap, and vertical louvers for cleaning purposes.

Outdoor unit

Installation of Outdoor Unit

Instructions for installing the outdoor unit according to the provided diagrams for indoor and outdoor unit placement.

Connection of pipes

Guidance on bending pipes, connecting gas and liquid sides, and maximum pipe length and vertical distance.

Connection

Procedure for connecting the electrical cable to the terminal block of the outdoor unit, ensuring correct wiring.

Attaching Drain-Elbow

Instructions on attaching the drain-elbow, noting it is only for heat pump units.

Outdoor unit

Purging Method: To use vacuum pump

Steps for purging air from the indoor unit and piping using a vacuum pump, including valve operations and torque specifications.

Power Source Installation

Cutting and Flaring Work of Piping

On Drainage

Check for Installation and Test Run

Related product manuals