Maintenance and replacement of the recorder's standby battery
When the recorder’s LED light blinks green, check the recorder performance as follows.
1) Remove the standby battery. If the LED light is off and the recorder stops working, the
main power supply of the recorder fails. Check the main power supply for connection and
any other issues. When the main power is available and the recorder starts working
properly, Install the standby power supply. If the LED light stops blinking, it means the
standby battery is in good condition. If the LED light continues to blink, it indicates the
standby battery is low in power and it should be replaced. The green LED light will stay on
and the does not blink any more.
2) Remove standby power. If the LED light continues blinking and the recorder works
properly, it means the main power supply is in good condition and the standby battery is low
and should be replaced.
Replace recorder paper
Please follow the steps below for the replacement of recording paper:
1. Find the pressing button (3#) at the top left corner in the front of the recorder panel;
2. Press and hold the button (3#) for about 1 second till the recording pen begins to move toward the
left of the paper;
3. After the recording pen completely moves outside the recording paper, loosen the central bolt and
remove the old recording paper. When replacing a new recording paper, carefully align the timeline
on the paper to the time slot on the panel (there is a small indentation at the left of the panel);
4. Retighten the central bolt, press and hold the button 3# for about 1 second to make the recording
pen reset and start to record temperature;
5. Examine whether the recording pen is easy to use on the paper; if it is not easy to use, adjust the
crossbeam of the recording pen to make the nib contact with the recording paper. (Note: Do not
damage the nib and crossbeam. If it is difficult to be adjusted, use a screwdriver to dismount the
crossbeam. After bending the crossbeam with a little strength, install back the crossbeam and repeat
the above operations);
6. Ensure the accuracy of the recorder. Calibrate the preciseness of the recording pen after each
replacement of paper. Methods are set as follows: Press and hold the button (3#) till the recording
pen leaves the recording paper; then repress and hold the button (3#) till the pen get back to the
recording paper. At the moment, the pen will pause at the outermost temperature scale of the
recording paper (such a scale may not be marked with temperature value, but it is the outermost
scale). If the pen does not pause at the above location, you may utilize arrow key of 1# or 2# to
adjust the location of the pen within 5 seconds to make the nib aligning to the outermost scale.
Repeat step 6 if you do not complete the adjustment of the location of pen within 5 seconds.
24
21
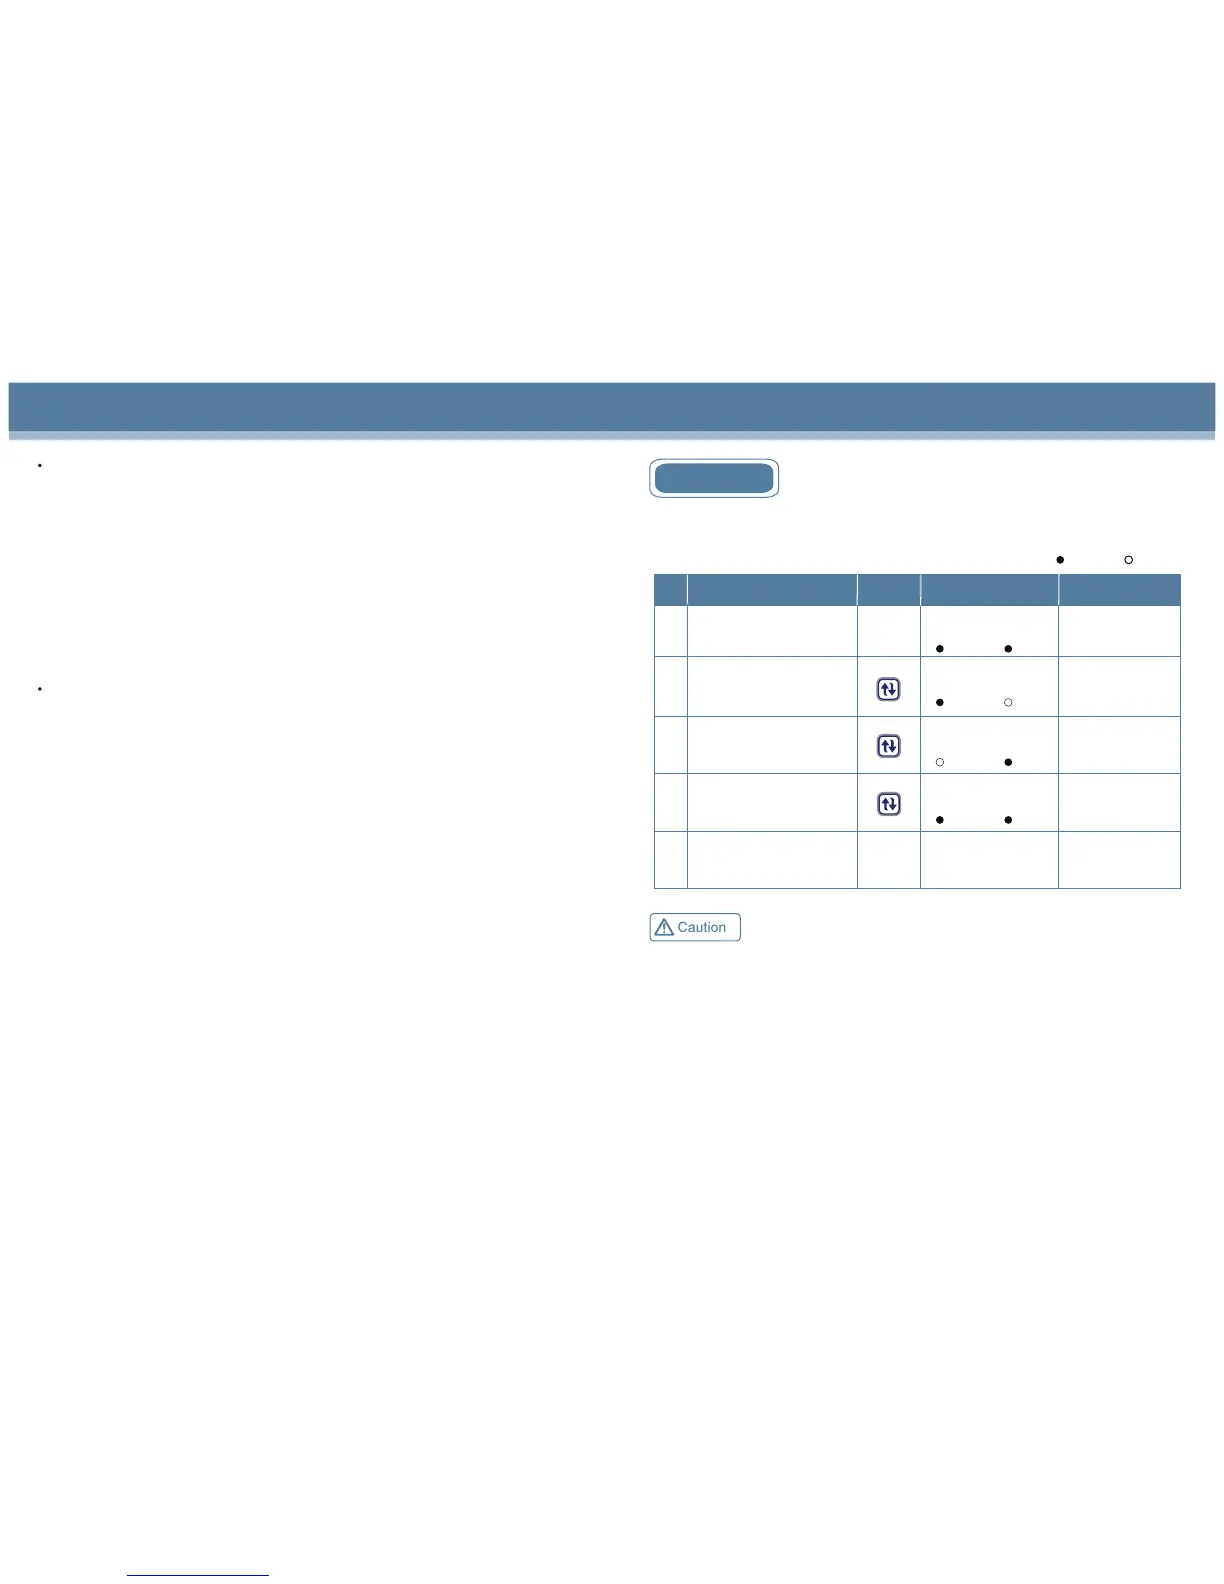
Temperature display
This refrigerator has been set capable of reaching appropriate temperature (2~8℃) automatically
before delivery.
Display Temperature
2
1
3
4
5
Operation
Key
Operation
Display
Display Mode
Plug in, switch on power
Press Display
Temperature key
Press Display
Temperature key
Press Display
Temperature key
Repeat operation from 2
Average temperature
of monitoring bottle
up
low
Temperature of
upper monitoring bottle
up
low
Temperature of
lower monitoring bottle
up
low
Average temperature
of monitoring bottle
up
low
Average temperature
Temperature of upper
monitoring bottle
Temperature of lower
monitoring bottle
Average temperature
The displayed temperatures indicate upper and lower temperatures of the refrigerator perceived by
the sensor in glycerin bottle. It is not always of 5℃. Temperature sensor indicates average temperature
inside the refrigerator.
Application method
Light on
Light off
 Loading...