Do you have a question about the HAIOOU HO-SC001 and is the answer not in the manual?
Read and understand the manual before beginning assembly and ensure all parts are present.
Contains important safety information. Please read and keep for future reference.
Instructions for cleaning the cabinet and removing labels to maintain its appearance.
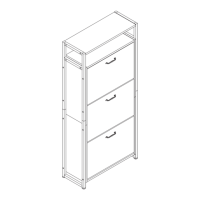
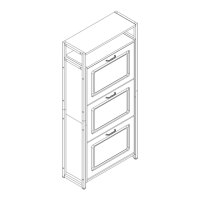
Visual identification of all numbered parts included in the shoe cabinet assembly.
Lists and illustrates all hardware required for assembly, with notes on screw usage.
Connect parts to boards and splice panels using cam bolts, cam locks, and wood dowels.
Install sided steel frames and connect sided boards using bolts and allen key.
Connect shelves and internal boards to the side panels using cam locks and wood dowels.
Connect the top board and attach plastic sides to the doors using screws.
Attach inner boards to the plastic door sides using screws for drawer fronts.
Install drawer latches and insert inner boards into the plastic side slots.
Fasten handles to doors and install the anti-toppling set for safety.
Specifies maximum load limits per shelf and overall product dimensions and weight.
Provides information on the one-year warranty against defects in workmanship and materials.
| Brand | HAIOOU |
|---|---|
| Model | HO-SC001 |
| Category | Indoor Furnishing |
| Language | English |