DEAR CUSTOMER
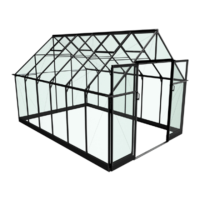
Congratulaons on purchasing your new
greenhouse. It is important that you follow these
assembly instrucons step-by-step.
The assembly instrucons are a combinaon of text
and illustraons. The proles are packed in separate,
numbered packs corresponding to their order of use
in the instrucons. Assemble one pack at a me. All
nuts, bolts and ngs are contained in one box.
Each pack is specied on separate lists of
components.
All detailed illustraons are marked with the
following symbols:
Seen from the inside Seen from the outside
SOME SAFETY PRECAUTIONS
• Only carry out assembly in dry and calm
weather
• Always wear work gloves when installing the
glazing. Greenhouse glass has sharp edges,
especially if it breaks
• Assistants and especially children must be
warned that broken glass presents a safety
hazard. Pick up all broken glass at once and
remove it with care
• Any ladders used must be placed on a level
surface.
• Make sure you have an assistant to help you.
PAGE 12: TOOLS
Assembling the greenhouse requires the tools
shown on page 12.
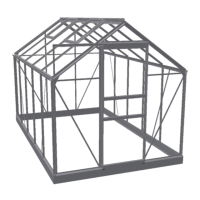
No base is included with this product. However, an
original base can be purchased separately. This base
is easy to construct and will guarantee you a stable
base for your greenhouse.
If you construct your own base, the specied
dimensions must be external dimensions.
Anchor holes must be deep enough to extend below
the frost line (800mm). Place the assembled base
with anchor legs over the holes so the anchor legs t
into the holes; it takes about 75-90 litres of concrete
to ll up the holes.
Make sure the base is completely level and square.
To square the base, make sure the two diagonal
measurements are idencal (see page 14).
Posion the components as shown on the
illustraon and assemble in the order shown on the
pictures.
Do not fully ghten the nuts unl the enre
subassembly has been assembled.
Upon seeing this icon, note you may need to loosen
and then thighten bolts in order to ease assembly.
Window glass must be ed at the same me as
the proles. Glass for the door must be ed aer
assembly of the door.
Important before assembly!
Make sure that the gables and sides are level and
square and that door(s) and window(s) open and
shut perfectly.
The best order of assembly for the glazing is as
follows:
Roof – Gables – Sides – Doors – Windows
Apply 20-1230 to proles marked with a doed line
on the illustraon. Fit one piece of glass at a me.
80,81,82,83,84 strips are ed as shown on pages
40-43.
Place the upper part of the strip under the
aluminium prole along the full length of the sheet
and then click the strip into posion from above.
Your greenhouse is now fully assembled. However,
please note the following:
MAINTENANCE
• Grease the doors (hinges and locks).
• Keep the guers free from leaves, etc.
• Adjust the windows as necessary.
• Replace any broken glass.
• Clean the greenhouse with disinfectant before
and aer the growing season.
If you ancipate snow during the winter, we
recommend the following winter precauons:
• Support the apex of the roof in the middle.
• Remove any deep snow from the roof.
• Take precauons to prevent snow falling from
a tree or roof, for example.
• Remove the cylinders for the automac
window openers, if ed (oponal extras).
• Secure the door(s) and window(s) to prevent
wind damage to the greenhouse.
Please note that your greenhouse is not like a
conservatory, for example, and that you should
therefore be aware that the greenhouse may leak
during or aer precipitaon and that condensaon
will occur on the inside of the greenhouse. Good
venlaon will help prevent condensaon.
INSURANCE
Please note that not all insurance companies cover
greenhouses automacally. Please contact your
insurance company to ensure that your greenhouse
is covered.
GUARANTEE
Juliana greenhouses come with a 12-year guarantee,
covering the replacement or repair of faulty parts.
The guarantee does not cover polycarbonate, glass,
transport, assembly, freight, etc.
Juliana greenhouses come with a two-year
guarantee, covering painted parts, if any. Please
note that suspension of the proles may leave marks
in the paint.
The guarantee will become void if the greenhouse is
not assembled in accordance with these instrucons
COMPLAINTS
All our greenhouses are built to the highest quality
standards. However, should you nd any defects,
please contact your dealer immediately. When
describing the defect, please state the greenhouse
model and component number.
A list of components per package can be found just
inside the rear cover which provides all component
numbers.
Suspension marks and unpainted ends on painted
proles, if any, will not be visible aer assembly of
the greenhouse.
Congratulaons on your new greenhouse! We hope
it will bring you many years of gardening pleasure.
1 2 3
etc..
B
www.hallsgreenhouses.com
Please refer to website for the most up to date instruction
May we congratulate you on your new greenhouse
GB USA
 Loading...