7
3. Other setting possibilities:
3.1 Setting of the mouse speed:
- There is the possibility to adapt the mouse speed to your demands. You can select a value
between 1 = slow and 9 = very fast.
- Press the button "ESC" and the red programme LED flashes slowly.
- Now press the button "ALT" and alternatively the button 1-9.
- The LED goes out and the value is stored.
3.2 Quiet zone / deadzone setting:
It depends on the game how far you have to press the analogue stick of your controller in one
direction before you can see a reaction on the screen. This minimal and short period of time
during which an action is not yet carried out although you move your analogue stick is called
quiet zone (deadzone). You can configure this stroke sensitivity as well and store it in the com-
plete configuration.
- Press the button "ESC" and the red programme LED flashes slowly.
- Now press the button "0-9" (0 = no quiet zone to 9 = big quiet zone ).
- The LED goes out and the value is stored.
The majority of the games function with a value between 3-5.
3.3 Inverting of the mouse:
Inverting of the y-axis of your mouse (up/down):
Activate:
- Press the button "ESC" and the red programme LED flashes slowly.
- Press the button "END" and the red programme LED goes out.
Deactivate:
- Press the button "ESC" and the red programme LED flashes slowly.
- Press the button "POS1" and the red programme LED goes out.
3.4 Assignment of the mouse movement to the analogue sticks:
The right analogue stick of the controller is normally used for aiming/looking around, the left
one for moving the game figure. However, so-called Lightgunshooters like Silent Scope® use
the left analogue stick for moving the cross hairs. The following combination determines there-
fore to which analogue stick the mouse movement is applied.
Mouse movement (left stick)
- Press the button “ESC” and the red programme LED flashes.
- Press the button “Picture Up” and the LED goes out.
Mouse movement (right stick)
- Press the button “ESC” and the red programme LED flashes.
- Press the button “Picture Down” and the LED goes out.
6
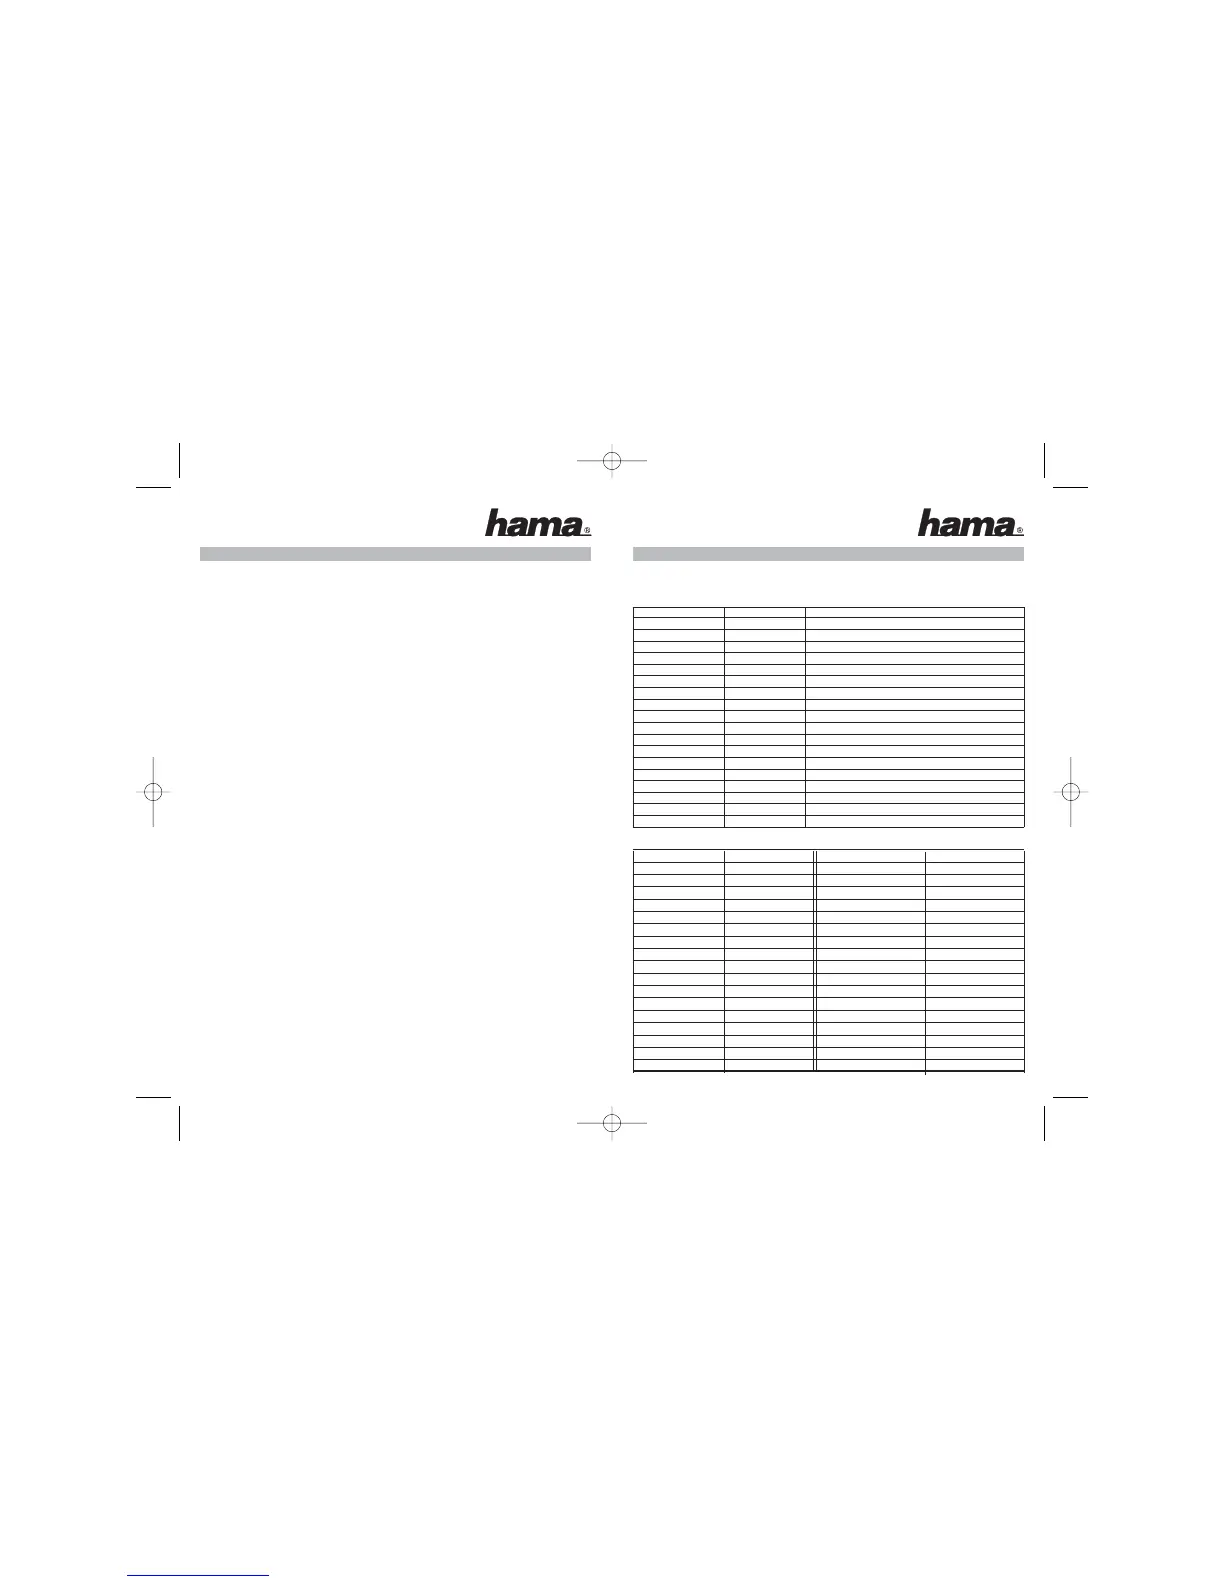
4. Tables
4.1 Standard configuration (Xbox
®
)
Controller Keyboard Mouse
Left Stick W,A,S,D
Right Stick I,M,J,L Mouse Move
A SPACEBAR
B E
X R
YY
Left Trigger T Left Button
Right Trigger F Right Button
Left Thumb Z
Right Thumb G
Start ENTER
Back BACKSPACE
Black B
White CAPS LOCK
D-Pad
UP ·
D-Pad Down ‚
D-Pad Left fl
D-Pad Right ‡
4.2 Different setting possibilities (Xbox
®
)
Xbox
®
Controller Keyboard Xbox
®
Controller Keyboard
(Controller map keys) (Controller map keys)
A A Left Stick Up Left ALT+·
B B Left Stick Down Left ALT+‚
X X Left Stick Left Left ALT+
fl
Y Y Left Stick Right Left ALT+
‡
SW Tab Right Stick Up Right ALT+·
SB Caps Lock Right Stick Down Right ALT+‚
Left Trigger L Right Stick Left Right ALT+
fl
Right Trigger R Right Stick Right Right ALT+
‡
Start Enter
Back BACK SPACE
Left Thumb Q
Right Thumb P
Up ·
Down ‚
Left
fl
Right
‡
 Loading...