5
Blending Tips
• When not installed on the Base, Blade Guard can be used as a
measuring cup or to store and transport dry ingredients. Place
ingredients in the Blade Guard, then place Travel Lid on the Blade
Guard and turn clockwise to tighten.
NOTE: The Blade Guard is NOT intended to transport liquid
ingredients.
• For best results, always add liquid (at least 1/2 cup [119 mL] to MIN
liquid line) first and then, ice, greens, frozen fruit, or powder.
• Do not chop or process hard foods such as cheese, crackers, or meat.
• If blending stops, shake Blender several times to dislodge food
stuck on Blades.
• If food is stuck to Blender Jar side, while Blender is still blending,
shake Blender several times to remove stuck-on food.
• Avoid bumping or dropping Blender.
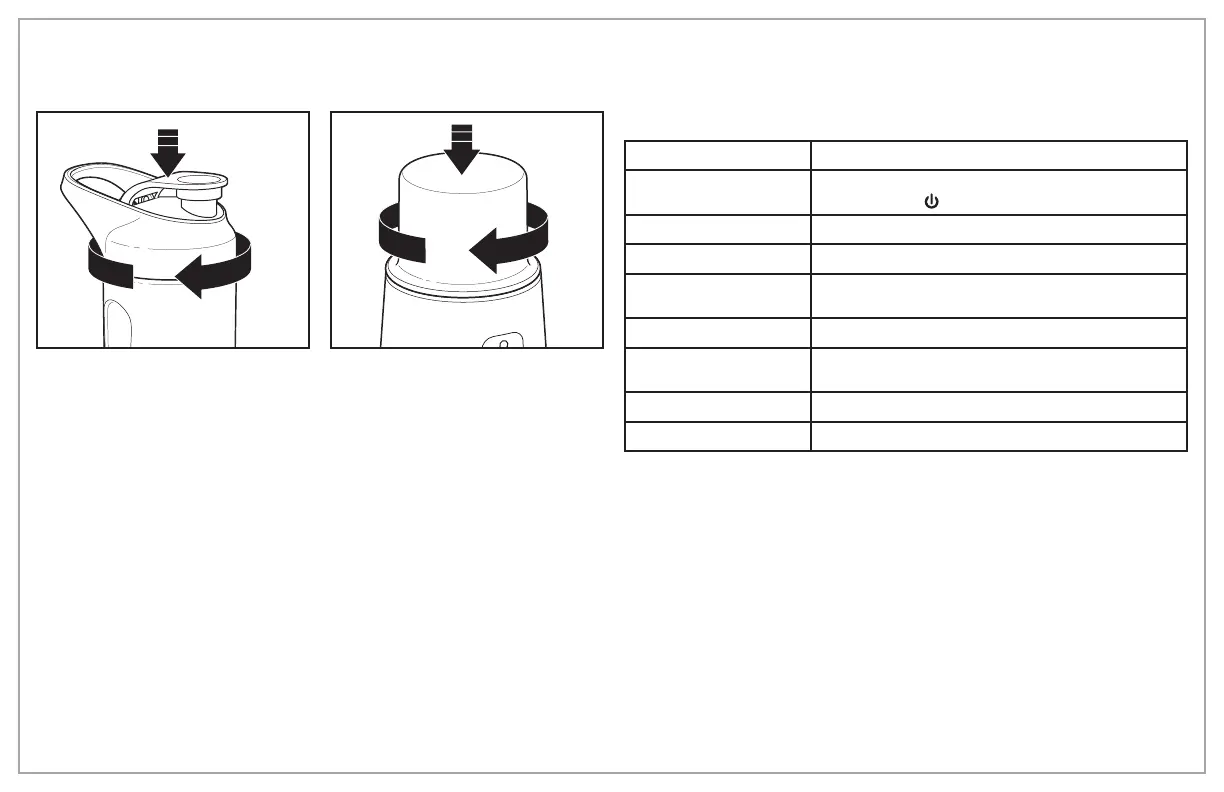
4.
Place Travel Lid on Blending Jar
and turn clockwise to tighten.
5.
Place Blade Guard on Base
and turn clockwise to secure.
Always add Blade Guard to
Base when not in use.
How to Use (cont.)
LED Light Indicates
Solid Blue Unit is plugged in and fully charged OR
Blending cycle is in process (after pressing
START/STOP ( ) two times)
Flashing Blue Jar is locked onto Base and ready to blend OR
Blending cycle is complete
Flashing Blue & Red Jar is not locked. Twist clockwise until only blue
light flashes
Solid Red Unit is plugged in and charging OR
Blender has overheated during use and needs to
cool
Flashing Red (fast) Blades are locked. Dislodge food and restart
Flashing Red (slow) Battery charge is depleted. Charge battery