34000 Autry Street, Livonia, MI 48150 • 800.968.5530 • Fax 734.419.0209 • www.hamiltonengineering.com • LIT91178 REV 5/2017
Page 2 of 9
INTRODUCTION
All high efciency condensing appliances will require more regular maintenance (cleaning) than their non-condensing
counterparts. Failure to do so may result in damage to the appliance that is not covered under warranty. Failure to follow all of
the instructions contained in this manual may also cause premature product failure that may not be covered under warranty.
Periodic maintenance should be performed at least once a year by a qualied service technician to ensure that all the equipment
is in safe, efcient operation. Failure to do so may eliminate warranty coverage. In the rst year of operation, it is highly
recommended that inspections of all connection points and the combustion chamber be done at three month intervals,
any signs of fouling or leaks must be thoroughly investigated immediately as failure to do so may void warranty. Assuming
no cause for excessive fouling is found, then the period of months from initial start up that it was found that cleaning was
required, shall become the required future minimum cleaning interval, but at no time should it exceed 12 months. The owner
MUST make necessary arrangements with a qualied heating contractor for proper maintenance of the heater. Installer must
also inform the owner that the lack of proper care and maintenance of the heater may result in a hazardous condition and
lack of warranty coverage. The installer should discuss the contents of the User’s Information Manual with the owner.
An inspection should cover, at a minimum, the following areas:
• Download and review operating hour data and fault history
•Inspectallttings,controlsandconnectionsforleaks,damage,orfouling
• Fire side:
Heat exchanger
Burner and ignitor
Burner door and rear wall insulation
• Drain system components:
Hoses & clamps
Trap assembly
Condensate neutralizer
• Test all safeties and operating controls
•Watersidetemperaturerise(∆T)test
DATA DOWNLOAD
Alwaysretrievefaulthistoryandpoweronhoursfromthecontrolboardrst,usingyourlaptoporPDAandtheSITcableand
software.Besuretousetheproperversionsoftwareandcommunicationcable,thensavetheleandnameappropriately
for future reference. Should the servicing contractor not have the proper software, cables, and training to do this, have them
contact the factory or their local distributor.
INSPECTION AND CLEANING (photos illustrating each step follow sets of instructions)
Caution: Before removing the door of the appliance, switch off the electrical power supply to it.
•Removethefrontcoverandcheckthesensors,owswitch,allpipes,linesandconnections,
andtheheatexchanger(top,bottom)fortracesofwaterandwaterleakage.
• Inspect the top of the casing and/or the top of the appliance for water leakage or traces of
waterfromtheairsupplypipeortheairvent(ifapplicable).
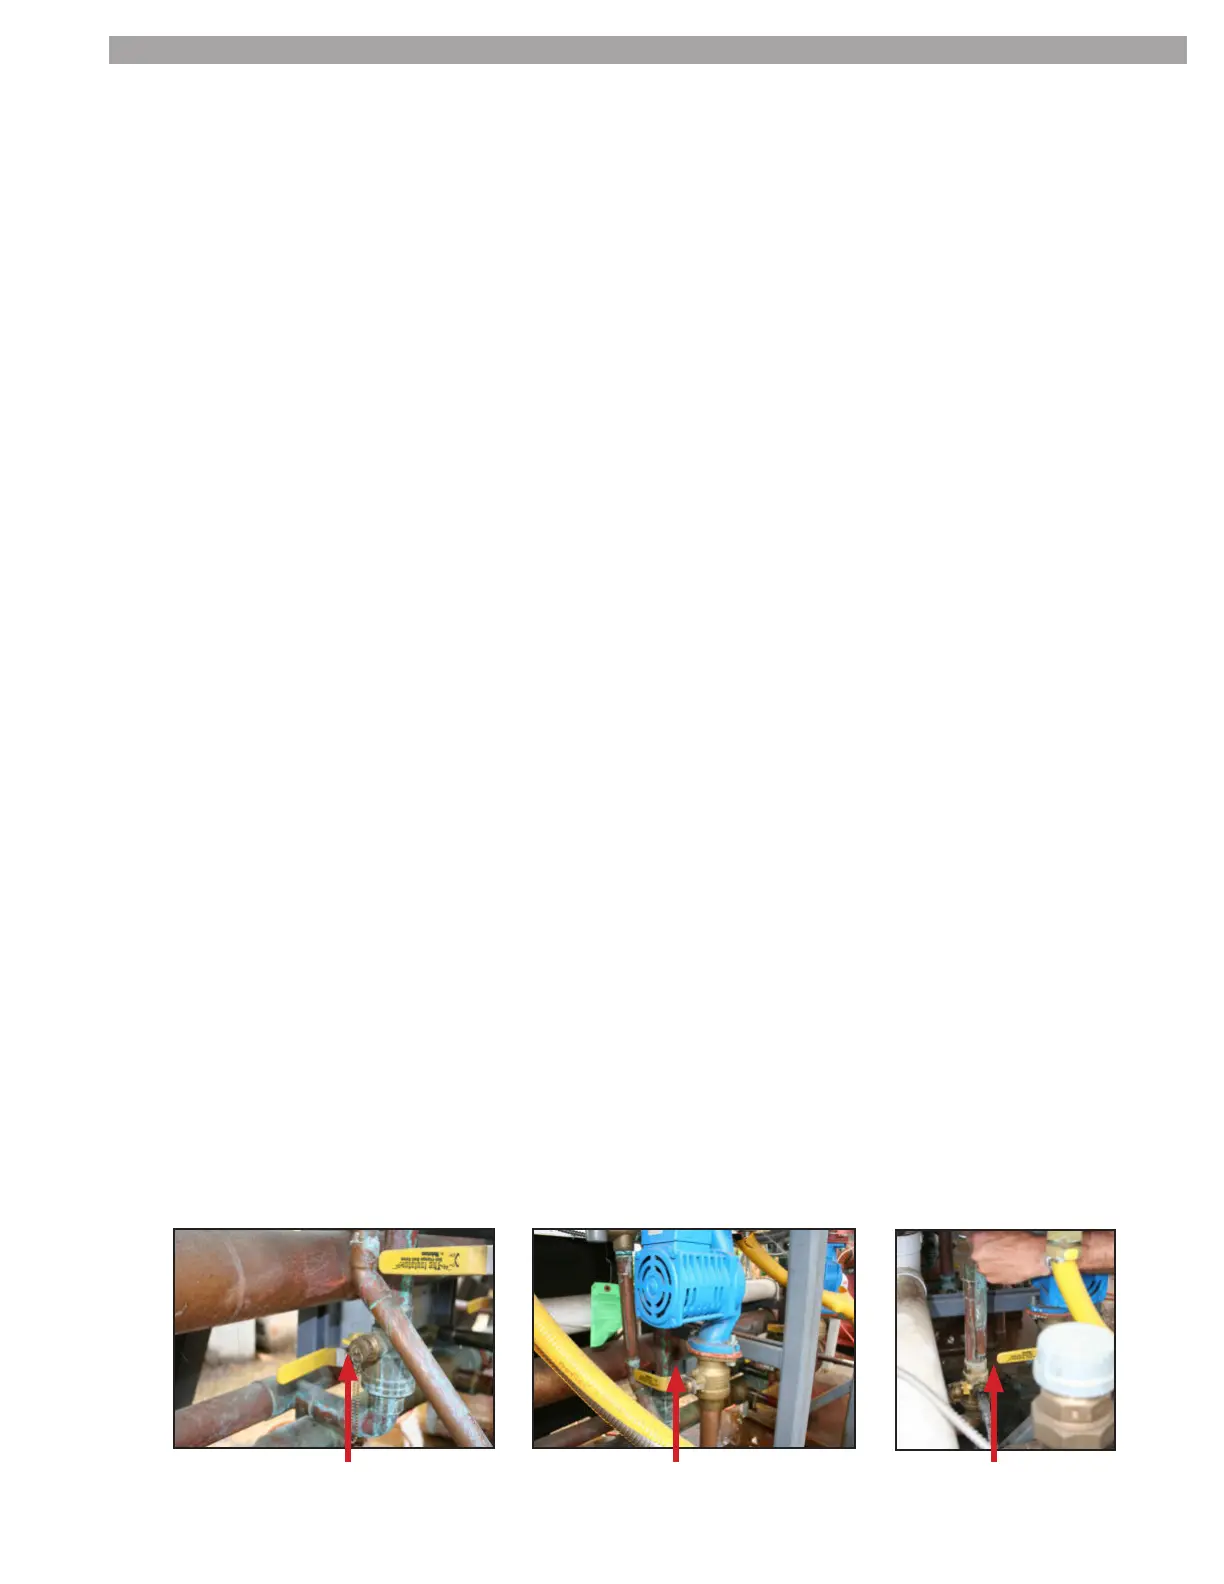
• Inspecttheowswitch;theappliancemustrstbe drained by closing the inlet and outlet valves on
each appliance. Then, by opening the drain on the ball valve and the relief valve, the appliance will drain.
Isolation and drain
valve appliance outlet
Isolation valve for pump
& appliance outlet
Relief valve - check operation
and open to drain unit
ANNUAL INSPECTION (See LIT91179 Maintenance Checklist for required tools and materials)
 Loading...