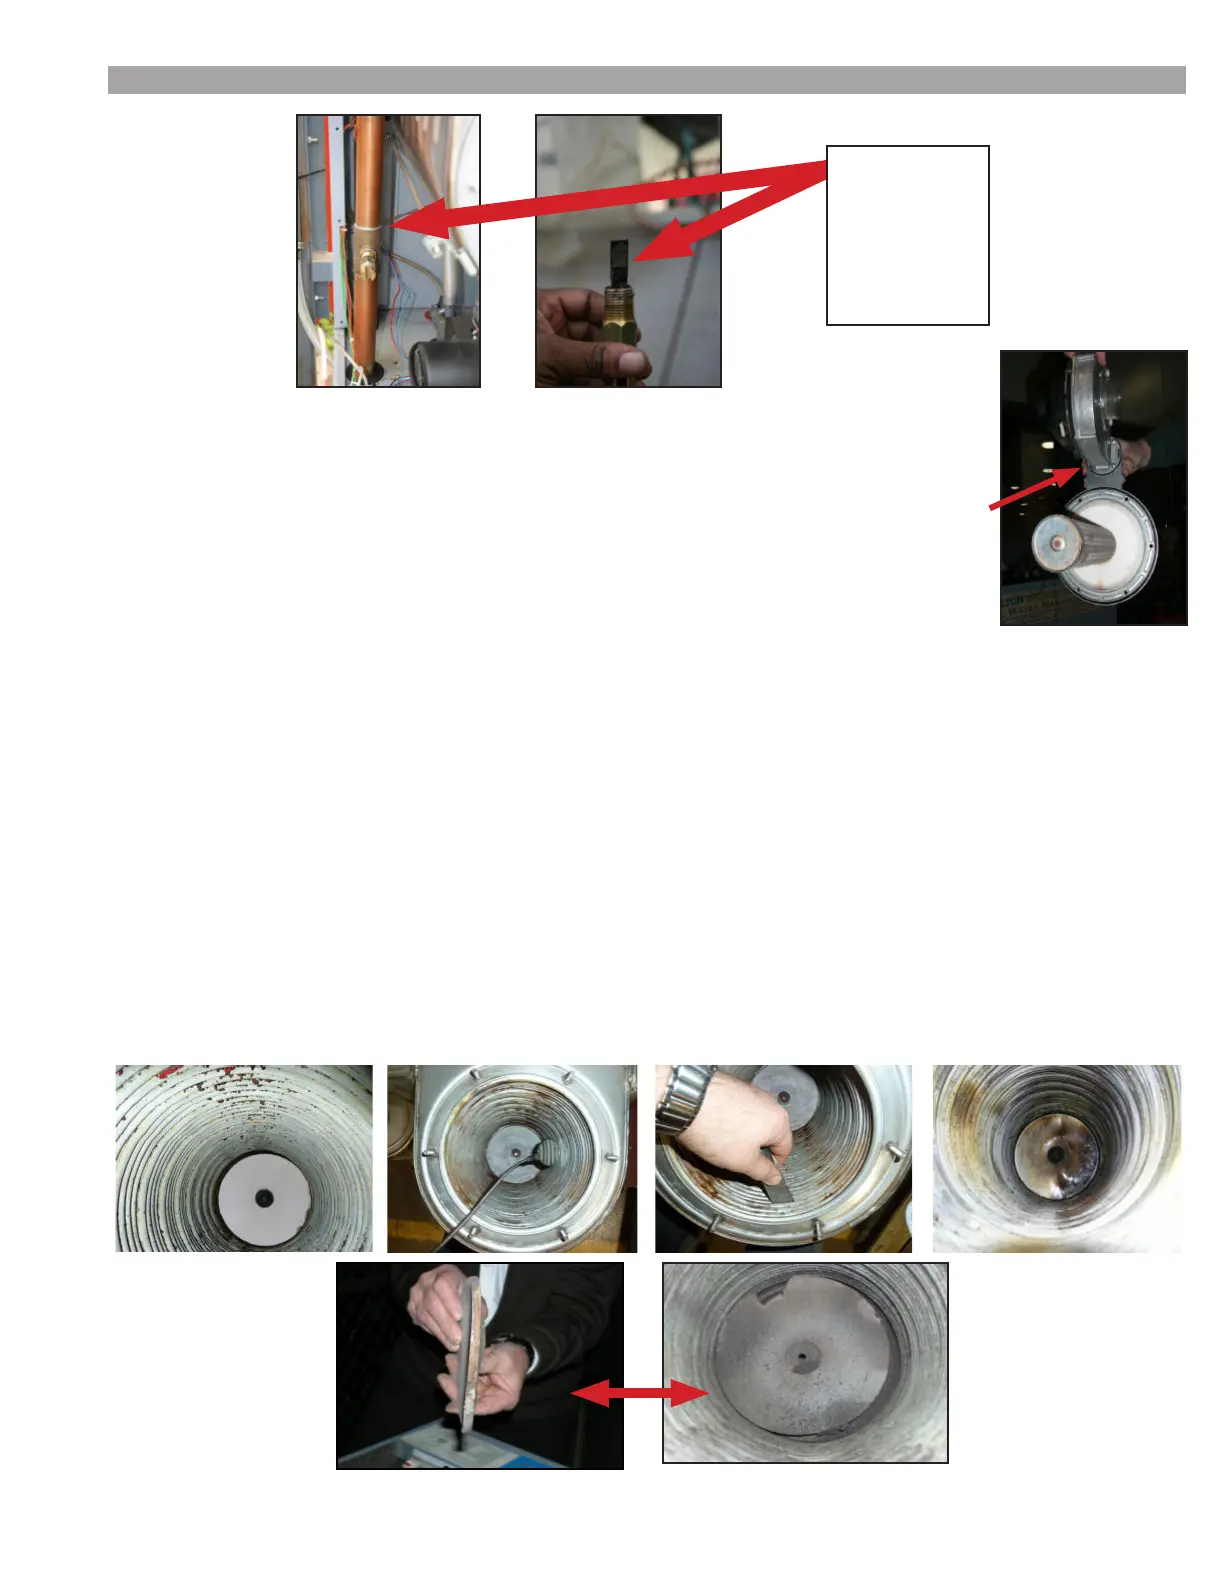
FLOW
SWITCH:
Check paddle for
fouling and free
movement by
spring!
34000 Autry Street, Livonia, MI 48150 • 800.968.5530 • Fax 734.419.0209 • www.hamiltonengineering.com • LIT91178 REV 5/2017
Page 3 of 9
•Dismantletheburnerunit:removethe(6)6mmnuts(witha10mmsocket),theignition
cable, the power and speed control plugs, and the ground wire from the fan, and
remove the burner/fan unit from the heat exchanger and cabinet.
• After the burner door is removed, it should be thoroughly inspected
before being put back into service. There are two gaskets on the
burnerdoor;therstistheinnerropegasket,whichispermanentlyafxedtotheburner
door.Ifthisgasketiscompletelycompressed(havingnosealingability),thedoormust
bereplaced.Thesecondgasketisontheperimeterandismadeofrubber;thisgasket
is easily replaced, and comes as a standard part of a maintenance kit (and should always be replaced
during the annual maintenance procedure.
Note: Over-tightening the M6 nuts may cause the threaded
rods on the front of the heat exchanger to break! If excess resistance is encountered when installing
a M6 nut, discard that nut and use one of the spares shipped with the unit. The maximum torque for
assembling a burner door nut is 3.7 ft-lb or 44.4 in-lb. Use a torque wrench suitable for this torque
range to tighten the nuts.
•Removeandinspecttherearberboard.Ifanyresistanceisencounteredwiththeremovalofthescrew
securingtheberboardinplace,donotexertundoforce;breaktheberboardouttoprovideaccesstothe
screw. Apply penetrating oil to the screw, let it sit, then remove. See photos below for details. Replace only
aftercleaningprocedure.Useanewberboardifmoisturehasfouleditorifthereisanyphysicaldamage
preventingitfromprotectingtherearwall,suchascracksorwarping.Warpedberboardswillallowtheback
walltooverheat,thiscouldleadtoabreachofthebackwall.Thiswillalsocausealossofefciencyanda
rise in stack temperature.
Note: Failure to replace front and rear berboard when damaged may result
in irreparable damage to the appliance!
Complete burner,
door & fan assembly
removed for inspection
Both of
these
must be
replaced!
ANNUAL INSPECTION CONT.
 Loading...