CAUTION: Insert an 0.1 mfd, 400 volt DC capacitor in series with the headset to
prevent DC voltage from damaging it.
3-10. HUM.
3-11. Hum in the loud speakers may indicate trouble in the reverberation spring
system assembly. (Reference paragraph 3-28.) If a sustained hum or howl is heard,
starting only when a low note is played at high volume, check for
the following:
a. Microphonic tubes in the amplifier. Replace all tubes if necessary.
b. Improper grounding of all plug connections to and from the amplifier.
c. Defective bypass capacitors in the reverberation portion of the amplifier.
d. Locked spring system.
e. Improper mounting of the reverberation unit.
f. Presence of undesirable magnetic fields, such as motors, generators, supply
transformers, and other equipment generating heavy magnetic field patterns.
3-12. LOCATING AND CORRECTING DEFECTIVE INDIVIDUAL TONES.
3-13. Silent or weak individual tones are usually caused by defects in the circuit
ahead of the amplification system. Such defects can be traced to the tone generator
and filter circuits, key circuits and board connections, and signal wiring between
the manual chassis, generators, and pedal switch. Trouble occurring over the full
range of tones and present at the input to the console preamplifier can usually be
traced to a defect in the mixing transformer or associated circuitry.
3-14. LOCATING DEFECTIVE TONES.
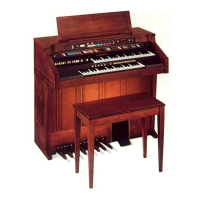
3-15. Depress preset key A# on the upper manual. (See figure 1 in Manuals, Pedals,
etc.)
3-16. Pull out the first (No.1) brown drawbar only in the first set of drawbars in
the left-hand group.
3-17. Start with the first key, C, (frequency No. 13) of the upper manual and strike
each higher note on this manual in succession. The last note at the right end of the
keyboard is C (frequency No. 61). Note the frequency numbers of all weak or dead
notes. Figures 4 (p. 5) & 13 (p.15) in Manuals, Pedals, etc. indicates all key
numbers and notes and the corresponding frequency numbers for each drawbar.
3-18. Return the first brown drawbar to its original position and then pull out the
last white drawbar only, in the same draw bar set. (Reference paragraph 3-16.) Start
at the second C note (frequency No. 61), and strike each higher note on the upper
manual in succession until the second F# note from the top of the keyboard is
reached. This F# note corresponds to frequency #91, the highest frequency produced
by the generator. Note the frequency number of all weak or dead notes.
6