ALIGNMENT PROCEDURES
4-1. PRESET PANEL TONE SELECTION.
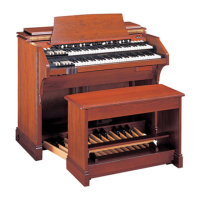
4-2. The preset keys shown in figure 1-2 are used to select the ready-mixed tone
colors. Nine color-coded wires from each preset key are fastened to the busbars of
the preset panel by slotted screws. Each group of nine color-coded wires is fed
through individual holes below the preset panel. The color coding of each group is
identical to the color coding of the nine wires from the drawbars (above the preset
panel). The drawbars can be withdrawn to numbered stops. The frequency relationship
of the wire color coding is indicated below. Note that the color sequence is the
same as the EIA color code for resistors.
Brown ................. Sub-fundamental
Red .................. Sub-3rd harmonic
Orange .................Fundamental
Yellow .................2nd harmonic
Green ................. 3rd harmonic
Blue ...................4th harmonic
Violet .................5th harmonic
Gray .................. 6th harmonic
White ................. 8th harmonic
4-3. The tone color or quality of any note, played on either the upper or lower
manual, is determined by the intensity of the harmonics in relation to the
fundamental note as selected either by the preset key or drawbars. The numbers of
the preset panel and drawbars indicate a progressive increase in intensity, starting
from 0 (drawbar fully pushed in) to 8 inclusive. Any tone color may be identified by
a number containing 9 digits, each digit representative of the intensity of the
fundamental tone or 1 harmonic as selected on the drawbars or preset panel.
4-4. The Hammond Organ has its preset panel arranged to make available to the
organist tonalities similar to those ordinarily found in the small church or chapel
pipe organ, as well as tones for religious services and congregational singing,
without the use of the adjustable drawbars. Table IV illustrates the approved preset
panel arrangement for chapel organs. Remove the rear panel of the console, examine,
and check the preset panel to determine that the preset panel corresponds exactly to
Table IV. Change the position of any lead by loosening the slotted screw which
secures it in place, removing the lead, and then securing it in correct position by
means of the slotted screw provided. Refer to console wiring diagrams.
10