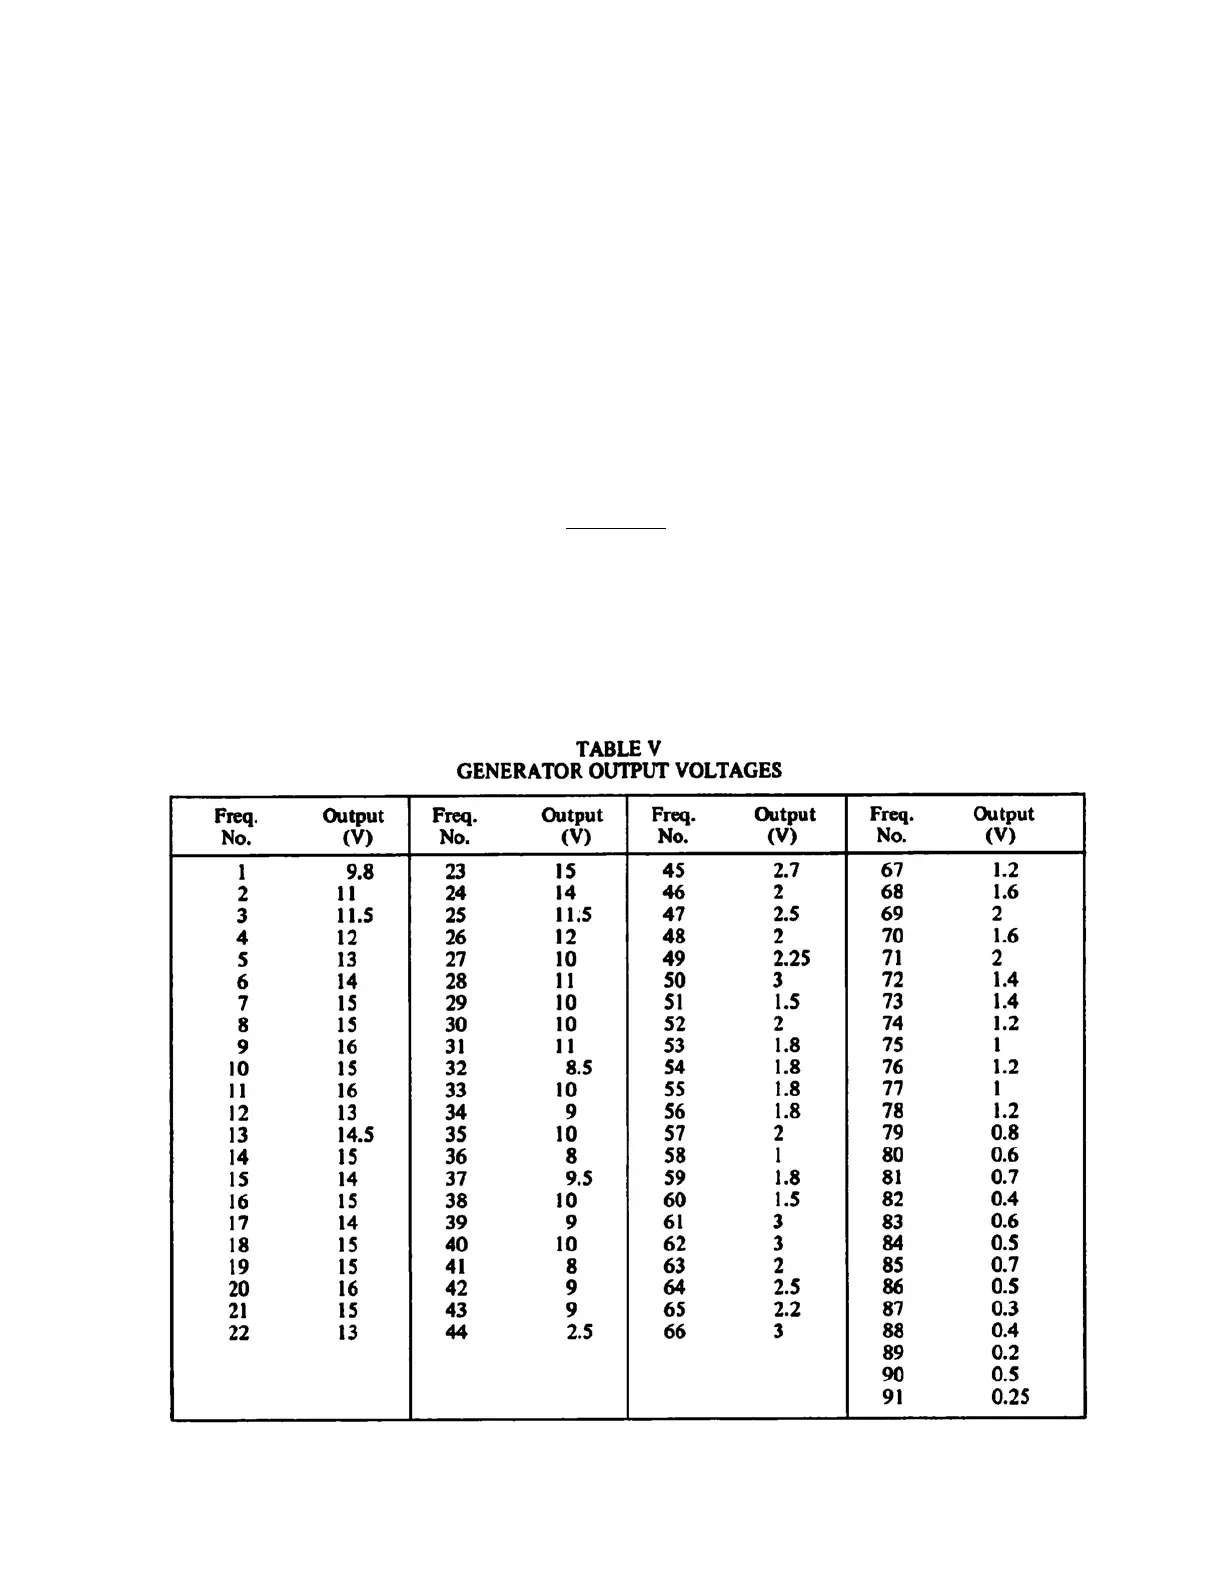
4-7. If it is ascertained that the coil assemblies require alignment, proceed as
follows:
a. Disconnect the generator assembly only when absolutely necessary. Make
adjustments from the rear whenever possible. Do not remove the cover as this
necessitates unsoldering and resoldering 91 leads, in addition to realigning all
coil assemblies.
b. Refer to figure 4 in Main Generator section and determine which coil
assemblies require alignment.
c. Loosen the set screw which holds the coil assembly in position.
d. Compare the intensity of the note associated with the aligned coil with
the intensity of adjacent notes.
e. Tap the coil assembly gently until it moves close enough to the tone
wheel to bring the intensity up to the intensity of the adjacent notes; pull coil
assembly back if necessary. Do not turn magnet during this operation.
f. Tighten the set screw.
CAUTION:
These coil assemblies are locked into position
at the factory and seldom require
adjustment. Do not pull back with a twisting
motion, as damage will result.
12
 Loading...