Assembly and Installation (Continued)
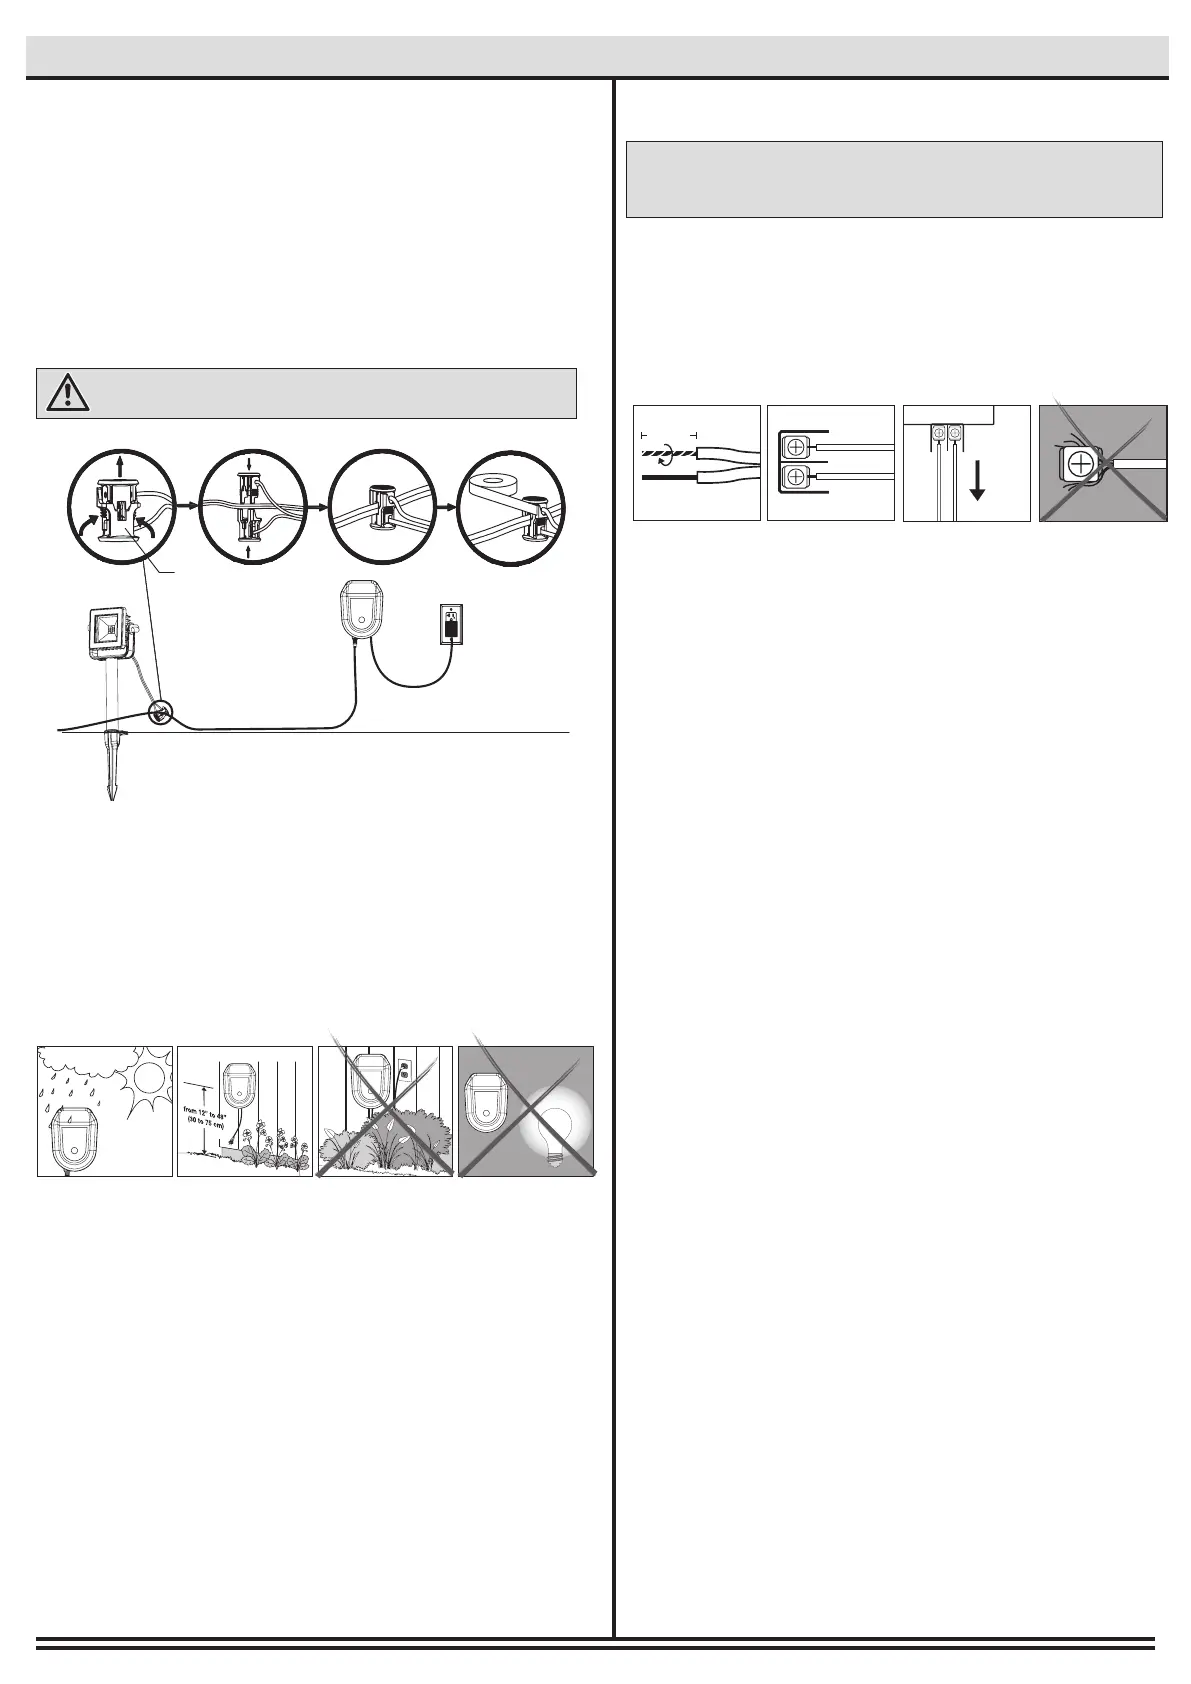
□ Remove the landscape wire insulation 1/2 in. from both wires
and twist ends.
□
Insert wires under each terminal plate on the transformer and
tighten screws.
□ Gently pull on the landscape wire to verify if the connection is
strong.
□ Verify that there are no loose cable strands.
4
Connecting the cable to the transformer
5
How to operate the transformer
□ Simply press on the push button on the front of the
transformer until the desired mode is selected. The modes
are ON, Auto, 2H, 4H, 6H and 8H. Auto is the dusk-to-dawn
function. The lights turn on at dusk and then turn off at dawn.
2H, 4H, 6H and 8H will turn on at dusk and then turn off based
on the selected hours setting.
Note: Prior to installing and powering the transformer, a safety approved GFCI receptacle
and GFCI watertight protective cover must be installed by a qualied electrician. GFCI
receptacle and cover must be mounted a minimum of 12 in. (0.3 m) above ground level.
The transformer must be mounted at least 1 ft. (0.3 m) above ground level.
12 in. (12.7 mm)
1/2 in.
(12.7 mm)
PULL
□ This transformer is weatherproof and suitable for outdoor and
indoor use.
□ Install the transformer at a level where the controls are
visible and accessible.
□ Do not install behind shrubs. It will affect the dusk-to-dawn
photocell.
□ Photocell will not operate properly if installed too close to a
nighttime light source.
□ MOUNT AT LEAST 12 INCHES (30CM) ABOVE GROUND.
3
Installing the transformer
□ SAFE
Mount the transformer
□ Option 1: Standard wall mounting
Insert the included support screw (H) in a wall near an electrical
outlet and mount the transformer.
□ Option 2: Brick or cement wall mounting
Drill a 5/16 in. (8 mm) hole in a wall near an electrical outlet and
place the plastic anchor (I) included. Insert the screw in the
anchor
until it has about 1/4 in. (6 mm) of space left to mount the
transformer.
□ Place the wire connector (E) on opposite sides of the low
voltage cable (G) where the xture will be located.
□ Align and t the main low voltage cable (G) vertically to the
slot of the wire connector (E) as shown.
□ Press the wire connector (E) together until fully seated and
locked around the cable (G). Pre-set prongs will pierce the
cable insulation and establish contact. Turn on the power unit.
If the light xture does not turn on, repeat previous steps.
□ Once the clip-on connector (E) is in place, wrap it with
electrical tape for additional protection.
□ After all xtures are installed, turn on the transformer.
E
CAUTION: BE CAREFUL! THE WIRE STABS ARE VERY SHARP!

 Loading...