EasyManua.ls Logo

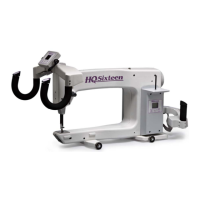
handi quilter Simply Sixteen User Manual

handi quilter Simply Sixteen
21 pages
To Next Page IconTo Next Page
Page #1 background imageLoading...
Page #1 background image
(v. 1.1)
User Manual
Copyright© 2006 “All Rights Reserved”
No part of this manual may be reproduced in whole or part without
express written consent from Handi Quilter, LLC

Questions and Answers:

handi quilter Simply Sixteen Specifications

General IconGeneral
Machine TypeLongarm Quilting Machine
Throat Space16 inches
Stitch RegulationYes
BobbinM-size bobbin
Warranty5 years
DisplayLED
Bobbin TypeM-Class
Frame CompatibilityCompatible with HQ Studio Frame
SpeedUp to 1, 800 stitches per minute

Summary

Safety Section

Quick Facts

Provides key specifications for the Simply Sixteen quilting machine.

Package Contents

Optional Accessories

Lists optional accessories available for the Simply Sixteen quilting machine.

Simply Sixteen™ Components

Identifies and labels the main components of the Simply Sixteen quilting machine.

Installing Front Handlebar

Installing the Power Cord

Details the process of connecting the power cord to the machine and power source.

Inserting (or changing) the Needle

Adjusting the Hopping Foot

Explains that the hopping foot is pre-adjusted and should not be moved without consultation.

Installing the Thread Mast

Installing the Laser Stylus

Provides instructions for attaching the laser stylus to the machine.

Laser Stylus Safety and Use Guidelines

Laser Focus/Laser Image Size

Explains how to adjust the laser's focus and image size.

Clamp Adjustment

Describes how to adjust the laser stylus clamp for positioning.

Threading the Machine

Optional Horizontal Spool Holder

Bobbin and Thread Tension Adjustments

Inserting the Bobbin

Guides on correctly inserting the bobbin into the bobbin case.

Drawing up the Bobbin Thread to the Top of the Quilt

Steps to bring the bobbin thread up to the needle area.

Bobbin Tension

Explains how to check and adjust the bobbin tension using the small screw.

Top Tension

Maintenance

Covers cleaning and lubricating the machine, focusing on the bobbin basket assembly.

Front Handlebar Controls

Indicator Lights

Explains the function of the Power On and Needle in Motion LED lights.

Needle Speed Dial

Describes how to adjust the machine's stitching speed using the dial.

Handlebar Button Functions

Needle Stop Cycle Operations

Details the Needle Up and Needle Down functions for stopping the machine.

Start and Stop Operations

Explains the Start button and the Stop button with its position setting.

POD Controls

Indicator Lights

Explains the function of the Power On and Needle in Motion LED lights on the POD.

Needle Stop Cycle

Details how to use the Needle Up and Needle Down buttons on the POD.

Start Control

Explains how to start the machine using the Start button on the POD.

To Begin Quilting

Thread Requirements

Recommends using high-quality threads for quilting.

Needle Requirements

Advises on selecting appropriate needle sizes for different threads and fabrics.

Preparing for Quilting

Guides on synchronizing machine speed and movement for consistent stitches.

Troubleshooting Common Issues

Stitch Skipping and Breaks

Addresses causes and solutions for skipped stitches and needle breaks.

Puckering and Poor Stitch Quality

Provides corrective measures for puckered stitches and overall poor stitch quality.

Tension Imbalances

Explains how to resolve issues with unbalanced or poor thread tension.

Machine Operation Troubleshooting

Hand Wheel and Threading Issues

Resolves hand wheel rotation problems and improper threading issues.

Guiding and Motor Problems

Addresses difficulties in guiding the machine and motor failure to run.

Needle Thread Break Causes

Thread and Tension Factors

Lists common reasons for needle thread breakage related to thread and tension.

Motor Stall Issues

Motor Stall Diagnosis

Explains how to troubleshoot and resolve motor stall conditions.

Related product manuals