Do you have a question about the Handy Home Products MONARCH and is the answer not in the manual?
Crucial warning to read all instructions thoroughly before beginning assembly.
Key preparatory steps before starting assembly, including checks and approvals.
Contact details for assembly or product information assistance.
Comprehensive list of all parts included in the shed kit.
Detailed steps for the recommended floor leveling method using 4x4 runners.
Instructions for orienting parts and securing the floor frame components.
Procedures to ensure the floor frame is level and square before decking.
Fastening the completed floor frame to the 4x4 leveling runners.
Instructions for installing the initial floor panel onto the frame.
Installing the second floor panel, ensuring proper alignment.
Completing the installation of all floor panels according to the layout.
Verifying the floor frame's levelness after all panels are attached.
Assembling the basic structural components of the back wall frame.
Installing the first panel onto the assembled back wall frame.
Constructing the wing wall structures for the back of the shed.
Attaching the gable end panels to the top of the back wall.
Assembling the primary structural components of the front wall frame.
Installing the first panel onto the assembled front wall frame.
Building the structural frames for both side walls.
Installing the first set of panels onto the side wall frames.
| Nominal Width (ft.) | 8 |
|---|---|
| Material | Wood |
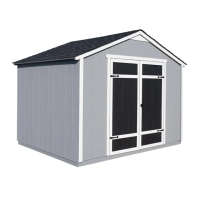
| Roof Style | Gable |
| Floor Included | Yes |
| Doors | 1 |
| Assembled Width (in.) | 96 in |