Do you have a question about the Happy HCS2-1201 and is the answer not in the manual?
Explores the machine's major parts, systems, sewing cycle, and proper environment.
Covers powering on the machine and navigating the main sewing screen and other key interface screens.
Discusses stitch length, factors affecting sewing quality, and common embroidery file formats.
Details on upper and bobbin thread types, handling, installation, and thread path routing.
Information on needle types, shaft width, groove, and the importance of frequent needle changes.
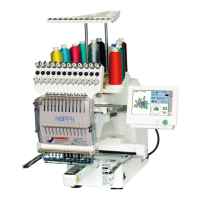
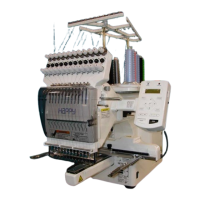
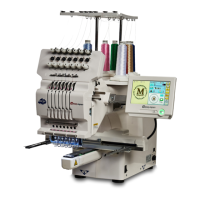
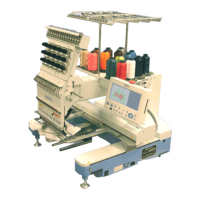
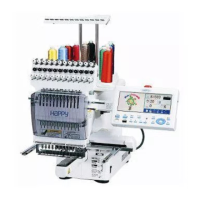
The HAPPY HCS2-1201 Voyager is an embroidery machine designed for commercial use, featuring a touch screen interface for operation and maintenance. This machine is built for precision and efficiency in creating embroidered designs on various garments and tubular goods.
The core function of the HAPPY HCS2-1201 Voyager is to perform lock stitch embroidery. It utilizes a multi-needle system, allowing for designs with multiple colors without manual thread changes during the sewing process. The machine's mechanical systems work in concert to achieve this:
Color Change System: This system features a moving head that positions the currently selected needle directly over the presser foot. During a thread trim, the needle descends, the thread is cut below the needle plate by fixed and moving knives, and then a "catcher" hook grabs the cut end and docks it into the thread holder as the needle retracts. This automated process ensures seamless color transitions within a design.
Sewing System: This is where the actual stitch formation occurs. Key components include the take-up lever, needle bar, and rotary hook/bobbin. The take-up lever lowers to provide slack for loop formation, then pulls back up to close the loop and finish the stitch. The needle bar moves the needle up and down, pushing a half-loop of thread below the garment surface. The rotary hook, spinning on a lower shaft, catches this half-loop, twists it around the bobbin thread, and forms the lock stitch. The presser foot plays a crucial role by pressing down on the garment, ensuring clean needle entry and assisting in loop formation as the needle lifts.
X-Y Pantograph: This system controls the movement of the embroidery frame (hoop) in both X and Y directions, allowing the machine to precisely position the garment for each stitch according to the design data.
The machine can read various sewing file formats, primarily DST (commercial embroidery format), as well as HAPPY (.TAP) and Melco (.EXP) formats. While DST files do not contain color information, the machine allows the user to assign needle colors to the design.
The HAPPY HCS2-1201 Voyager is operated via a touch screen control panel, providing an intuitive interface for managing embroidery tasks.
Power On and Main (Drive) Screen: The machine is powered on using a black switch. The initial screen displays the currently selected hoop and offers an option to select a different hoop. Pressing "NEXT" leads to the main "drive" screen, which is essential for sewing and receiving design transfers from a PC. This screen provides critical information such as current stitch position, color block number, and sewing speed. Lights turn green when the machine is ready to sew. The origin symbol indicates the sewing position is at the beginning of the design.
Design Management: Designs can be read from a USB jump drive or transferred from a PC via a network cable. The "PATTERN" sub-screen allows users to view, select, delete, or rename designs stored in memory.
Color and Needle Assignment: Users can assign needle (color) numbers to a design, set applique stops, and frame out commands using the "Set Colors for Current Design" screen. The "Needle Selector" screen allows for selecting a different needle and toggling jump/drive mode.
Hoop Selection and Position Adjustment: The "Select hoop, Adjust Sewing Position" screen enables users to choose the appropriate hoop, ensuring the machine accurately displays the design's position within it.
Sewing Position Control: The "Sewing Position Screen" allows users to jump to any specific position within a design, either by piece number, color block number, or stitch number.
Speed Adjustment: The "Adjust Max Speed" screen provides control over the sewing speed during sewout or when the machine is stopped.
Onboard Lettering: The "LETTER" feature offers an onboard lettering capability for creating text-based designs.
Queue Management: The "QUEUE" function allows users to sequence multiple designs to be sewn consecutively.
Settings and Customization: The "SETTING" screen enables basic edits and adjustments to the current design. The "OPTION" screen allows for adjusting machine, design, and stitch data settings. Users can also customize drive screen icons and screensaver settings.
Proper maintenance is crucial for the longevity and performance of the HAPPY HCS2-1201 Voyager.
Environmental Control: The machine should be set up and stored in a temperature and humidity-controlled environment to prevent corrosion and protect electronics.
Electrical Power: It requires a grounded 3-prong 110v household current. A basic surge protector is recommended to protect against power spikes, with higher-end surge protectors offering better protection and guarantees.
Stable Mounting: The machine performs best on a strong, level, and steady mounting surface. The optional stand, with wheels rotated to outermost positions and brakes applied, provides excellent stability.
Thread Management:
Needle Maintenance: The machine uses Type DB-K5 needles, typically 75/11 ballpoint for most applications, or 80/12 sharp point for heavy canvas. Needles are subject to wear and can develop burred surfaces, leading to problems. Frequent needle changes are necessary, especially with heavy use. The scarf of the needle should face towards the back of the machine, and the groove helps in finding the front of the needle by feel.
Machine Adjustments: Chapter 4 of the manual details how to check key adjustments to maintain performance, ensuring optimal sewing quality.
Reports and Diagnostics: The "REPORT" function provides machine production reports, and "OTHER" offers access to date/time, network settings, machine reset, and version/update information. "GUIDE" provides onboard help.
| Type | Embroidery |
|---|---|
| Number of Needles | 12 |
| Number of Heads | 1 |
| Needle Threader | Automatic |
| Free Arm | No |
| Buttonhole Styles | Not Applicable |
| Presser Feet | Embroidery foot |
| Max Stitch Length | 4 mm |
| Max Stitch Width | 5 mm |