EasyManua.ls Logo

Harbor Freight Tools 91006 - User Manual

Harbor Freight Tools 91006
7 pages
Print Icon
To Next Page IconTo Next Page
Loading...
Digital Floor SafeDigital Floor Safe
Digital Floor Safe
1.5 cu. ft.1.5 cu. ft.
1.5 cu. ft.
ASSEMBLY AND OPERATING INSTRUCTIONS
3491 Mission Oaks Blvd., Camarillo, CA 93011
Visit our Web site at http://www.harborfreight.com
Copyright
©
2004 by Harbor Freight Tools
®
. All rights reserved. No portion of
this manual or any artwork contained herein may be reproduced in any shape
or form without the express written consent of Harbor Freight Tools.
For technical questions and replacement parts, please call 1-800-444-3353
91006
Question and Answer IconNeed help?

Do you have a question about the Harbor Freight Tools 91006 and is the answer not in the manual?

Summary

Specifications

Safety Warnings and Precautions

General Safety Precautions

Essential safety guidelines for operating the safe to prevent injury or damage.

Unpacking

Wheel Assembly

Instructions for attaching the removable wheels to the safe.

Operation

Electronic Opening

Steps for opening the safe using the electronic keypad and code.

Mechanical Opening

Procedure for opening the safe using the override keys.

Changing the Code

Guide on how to set a new electronic code for the safe.

Secure Installation

Instructions for mounting the safe to a wall or vertical surface.

Shelf Adjustment

Steps for repositioning the interior shelf to desired height.

Maintenance

Battery Installation and Care

Guidance on installing batteries and recognizing low battery indicators.

Cleaning and Lubrication

Procedures for cleaning the safe, lubricating the lock and wheels.

Environmental Protection

Advice on protecting the safe from moisture and wet conditions.

Assembly Drawing and Parts List

Assembly Diagram

Visual representation of the safe's components and their assembly.

Parts Identification

List and identification of all parts included with the safe.

Overview

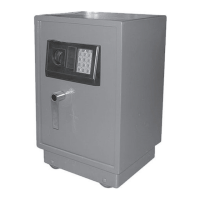
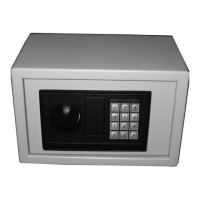
This document describes the Digital Floor Safe, Model 91006, a 1.5 cubic foot safe designed for home and business use.

Function Description

The Digital Floor Safe is a secure storage unit intended to protect valuables from theft. It features a dual locking mechanism: an electronic keypad for quick access and an override key for mechanical entry, particularly useful if batteries are depleted or not installed. The safe can be used as a portable unit with removable wheels or permanently mounted to a wall for enhanced security.

Important Technical Specifications

  • Overall Dimensions: 22.82" (H) x 14.17" (W) x 13" (D)
  • Inside Dimensions: 18.25" (H) x 12.75" (W) x 11.25" (D)
  • Capacity: 1.5 cubic feet
  • Construction:
    • Housing: 9 gauge steel plate
    • Door Frame: 6 gauge steel plate
    • Door: 5 gauge steel
  • Weight: 76.5 lbs.
  • Keypad Features:
    • 0-9, A & B key code set
    • Green LED for "OPEN" indication
    • Red LED for "Battery Change" warning
    • Yellow LED for "Change Accepted" during code programming
  • Emergency Keys: Includes 2 emergency override keys.
  • Interior: Padded floor, adjustable shelf.
  • Placement/Mounting: Features 4 removable wheels and can be wall-mounted (hardware not included).
  • Finish: Dark gray powder coat.
  • Power: Requires 4 'C' batteries for electronic operation.

Usage Features

  • Electronic Opening: To open electronically, input the default code "159" (or a user-programmed code) on the keypad, then press the "A" key. A green light will illuminate, indicating successful code entry. The knob must be turned within 5 seconds of the green light appearing, followed by turning the handle to open the door. If the knob is not turned within this timeframe, the green light will extinguish, and the code must be re-entered.
  • Mechanical Opening (Override): In situations where batteries are not installed or are depleted, the safe can be opened using one of the provided override keys. The front panel of the keypad can be gently detached to reveal a key-operated lock. Insert the override key, turn it, then turn the knob and handle to open the door. It is crucial to store override keys separately and never lock them inside the safe.
  • Closing and Locking: To close and lock the safe, simply close the door, turn the handle, and then turn the knob in the opposite direction. Gently pull the door to ensure it is securely locked.
  • Changing the Code: The default code is "159-A". To change it, first open the safe. Locate the small red "reset" button on the inside of the door near the hinge. Press this button until the Yellow LED on the front panel lights up. Immediately input a new code (up to 8 characters) followed by either "A" or "B". The Yellow LED will flash to confirm the new code has been accepted. If the Yellow LED does not flash, the code has not been accepted, and the process must be restarted. It is strongly recommended to test the new combination before closing the door and to have the override key accessible when changing codes or batteries.
  • Mounting: For enhanced security, the safe can be bolted to a wall or other vertical surface. It features two mounting holes in the back wall. Users should mark the locations, drill suitable pilot holes (hardware not included), and then secure the safe. The manual emphasizes that the safe's weight should primarily be supported by its wheels on the floor or a strong surface, not solely by the mounting bolts.
  • Adjustable Shelf: The safe includes an adjustable shelf. To reposition it, remove all items, lift the sides of the shelf to disengage mounting tabs, move it to the desired location, ensure it is level, and then engage the tabs into the supports by gently pressing the shelf downward.
  • Removable Wheels: The safe comes with 4 removable wheels, axles, and cotter pins. To install, place the safe on its side, assemble each wheel using the included axles, and secure them with cotter pins.

Maintenance Features

  • Battery Installation/Replacement: The battery compartment is located on the inside of the safe door. Slide off the cover, remove old batteries, and install 4 new 'C' batteries, ensuring correct polarity. Replace the cover. After battery replacement, the code should be reset (refer to instructions on page 5).
  • Low Battery Warning: A red LED on the keypad will illuminate when the batteries are running low, signaling that they need immediate replacement.
  • Protection from Moisture: The safe should be protected from moist or wet conditions to prevent electronic faults in the keypad and corrosion of the steel.
  • Cleaning: Periodically wipe the safe and keypad with a soft, dry cloth or brush to remove dust.
  • Lubrication: Occasionally apply a small amount of light oil or lock lubricant to the mechanical lock mechanism. Care should be taken to avoid getting oil or other liquids on or near the electronic mechanism.
  • Wheel Maintenance: Occasionally apply a small amount of oil to the wheel axles.
  • Interior Cleaning: Periodically vacuum or brush dust from the carpet lining inside the safe.

Important Safety Note: Harbor Freight Tools is not responsible for the loss of any property stored within this safe due to theft, fire, or any other circumstance. This safe is not fire-resistant. Users are reminded to read all instructions, maintain a clean work area, keep children away, and ensure the safe is mounted in a dry location. All repairs and parts replacements should be undertaken by certified and licensed technicians.

Harbor Freight Tools 91006 Specifications

General IconGeneral
BrandHarbor Freight Tools
Model91006
CategorySafes
LanguageEnglish

Related product manuals