Do you have a question about the Harbor Freight Tools 99681 and is the answer not in the manual?
Explains the meaning and use of the safety alert symbol for personal injury hazards.
Defines DANGER, WARNING, and CAUTION symbols used to indicate hazardous situations.
Explains NOTICE and CAUTION when not used with the safety alert symbol.
Provides guidelines for maintaining a safe and well-lit work area and keeping bystanders away.
Outlines precautions for electrical safety, including plug matching and cord care.
Explains how tools with three-prong plugs must be grounded for shock prevention.
Describes double insulated tools that do not require grounding and their compatible outlets.
Provides guidelines on selecting, using, and maintaining extension cords for safe operation.
Explains various symbols used in the manual, including certifications and electrical units.
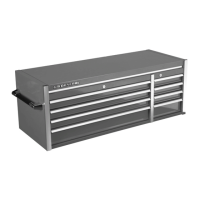
Lists key specifications such as power strip rating, bulb type, and maximum weight capacity.
Instructions to check for intactness and report missing or broken parts immediately.
Connects rear posts to their extensions using bolts, washers, and nuts as shown in Figure 1.
Connects rear beams, side beams, and drawer mounts to the frame using specified hardware.
Attaches front posts to side beams and bottom beams, connecting the front center beam.
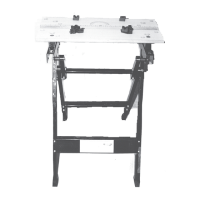
Stands the frame upright and attaches the front "L" bracket to the center beam.
Assembles drawer plates and mounts them to the frame, advising on final tightening.
Attaches the peg board and top shelf side beams and front beam to the assembly.
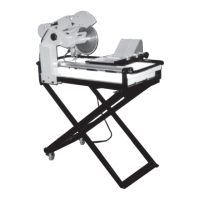
Places the top shelf, bench top, drawer boards, and bottom board, securing the top shelf.
Installs lamp mounting sliders and bolts through the top shelf for lamp attachment.
Connects the lamp power cord to the lamp receptacle, ensuring correct orientation.
Emphasizes that procedures not in the manual must be performed by a qualified technician.
Inspects the bench for loose screws, misalignment, and general condition before each use.
Instructions for cleaning external surfaces, vacuuming the bench top, and wiping it clean.
Step-by-step guide for safely removing and replacing the light bulb in the fixture.
Lists all parts with their descriptions and quantities required for assembly.
Provides a visual representation of how the parts assemble together.
| Model Number | 99681 |
|---|---|
| Material | Steel |
| Color | Red |
| Wheels Included | Yes |
| Gauge | 20 gauge |