EN
11
INSTALLATION
INSERTING THE BATTERIES
1. Open the door.
2. Insert four AA batteries in the battery
compartment.
3. In normal circumstances the batteries
should be replaced if both the red and
green lights go on at the same time.
INSTALLING THE SAFE
1. Drill a screw holes at the required place.
2. Screw expander screws anticlockwise to
separate.
3. Mount the safe on the wall with expander
screws, or the like.
4. Check that the safe is correctly positioned
and tighten the screw unions.
IMPORTANT:
• Use screws suitable for the underlying
surface.
• Insert four new batteries with the correct
polarity as shown by the markings in the
battery compartment.
• If the power supply has been interrupted
for more than 30 minutes, you must
enter a new user code.
USE
OPENING THE SAFE FOR THE FIRST
TIME
Use the emergency key to open the safe the
rst time. Follow the instructions in the section
on opening the safe with the emergency key.
1. Remove the emergency lock cover,
insert the emergency key and turn it
anticlockwise.
SAFETY INSTRUCTIONS
• Never store emergency keys in the safe.
SYMBOLS
Conforms with the
requirements in the relevant
EU directives.
Recycle as electrical waste.
TECHNICAL DATA
Battery 4 x 1.5 V AA
Size B200 x W310 x D20 mm
Weight 4,5 kg
Volume 8,5 L
Material Sheet steel
Wall thickness 1 mm
Door thickness 3 mm
Emergency keys 2
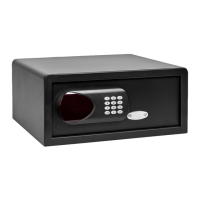
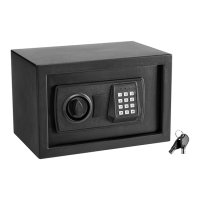
DESCRIPTION
1. Lock bolts
2. Reset button
3. Battery compartment
4. Knob (main key)
5. Emergency lock cover
6. Green light
7. Red light
8. Yellow light
9. Conrm button
FIG. 1
 Loading...