14
www.hardlifeutility.c om
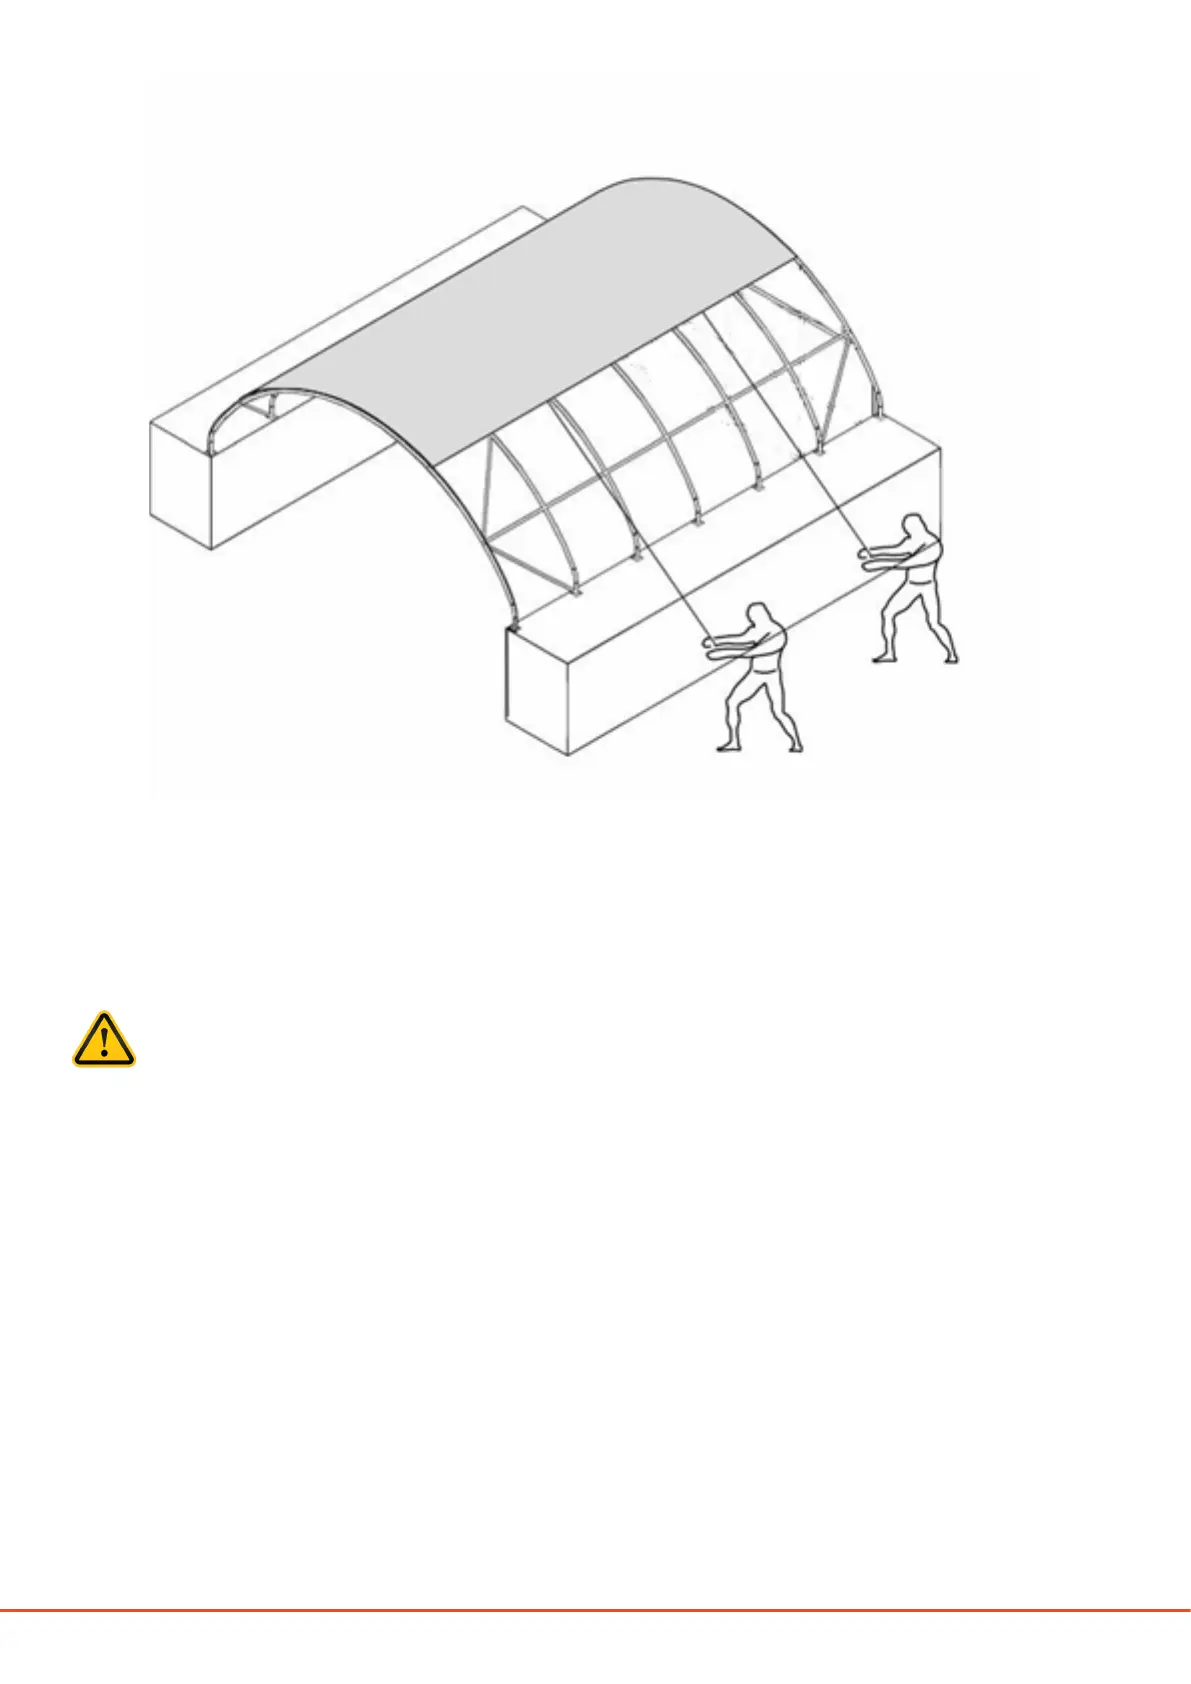
4. Pull the roof cover over the frame evenly, carefully, and slowly as shown in Figures 11 and 12. Use the
ropes that have been attached to the roof cover to pull the roof cover over the frame.
Figure 12 (C2640)
CAUTION
Ensure that the roof cover does not get snagged on any part of the frame as it can result in tears.
5. Adjust the cover such that it is evenly centred on the frame, and smooten to remove all wrinkles on the
cover, as shown in Figures 11 and 12.
6. Make small slits in the cover pocket at the ends of the roof cover, using a scissors, for the ratchet tie-down
straps (component code 13) to go through. e cuts should be made exactly at the ratchet locations. Loop
the ratchet tie-down strap around the lower tensioning tube through the cuts on the cover, to secure
the lower tensioning tube. Pull the ratchet tie-down straps through the reels of the ratchets, which are
attached to the base plates, and crank the ratchet back and forth till the roof cover is taut, as shown in
Figures 13 and 14.
7. For the C2620 shelter, weld the 4 angle seats (component code 14) on the two containers (2 angle seats
per container on the front and back), as shown in Figure 15.
 Loading...