Do you have a question about the Harken MKIII and is the answer not in the manual?
Guidance for sailmakers on preparing sails for the furling system.
Essential steps and considerations before beginning the unit's assembly.
Detailed instructions for assembling the furling system unit.
Procedures for installing and making the assembled unit operational on the boat.
Instructions on how to properly use the furling system.
Guidance on identifying and correcting problems with the system.
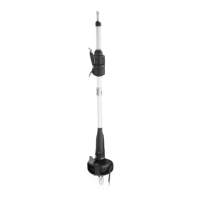
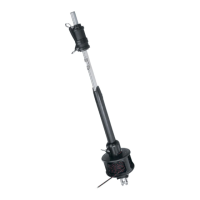
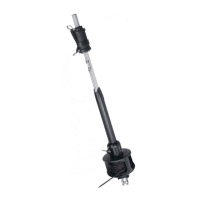
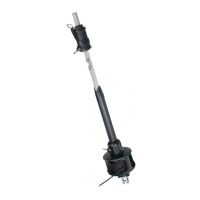
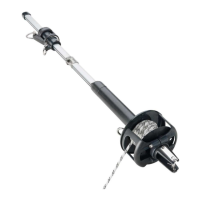
A comprehensive list of all components included in the system.
Information and specifications regarding the use of Dyform cable.
Guidance on selecting and ordering the correct headstay terminal stud.
Specifications for the maximum size of Dyform wire usable.
Listing of various small parts included in the kit.
Components that are mounted on the headstay before assembly.
Items found loose within the product packaging.
Crucial note regarding the separate sale of the headstay terminal.
Information on sail types compatible with the Harken furler.
Considerations for sail luff length and its impact on system setup.
Guidance on positioning the tack shackle and cutting the sail accordingly.
Specifies the required size for the sail's luff tape.
Instructions on how to cut the luff tape for optimal performance.
Requirements and dimensions for tack and head shackles.
Instructions for installing a suncover on the sail.
A list of all the tools required for assembling the furling system.
Specific wrench sizes needed for Norseman or Sta-Lok® terminal installations.
Recommendations for setting up a suitable workspace for assembly.
Notes and differences for installing systems with Norseman, Sta-Lok®, or rod headstays.
Information on fitting additional toggles for height adjustment.
Specific instructions and adapter details for Isomat masts.
Details and guidelines for T-ball swage fittings.
Steps and considerations for reusing the existing headstay.
Procedure for cutting the headstay wire or rod to the correct length.
Instructions and checks for using swage studs.
Instructions and checks for using rod fittings.
Specific assembly instructions for Norseman and Sta-Lok® fittings.
Specific assembly instructions for rod fittings.
Chart to determine the correct number of 6" (152 mm) connectors for the headstay.
Chart to determine the correct number of 7' (2.13 m) foils for the headstay.
Process of correctly placing connectors onto the headstay.
Specific assembly notes for Norseman/Sta-Lok® units.
Specific assembly notes for rod installations.
Matching the furling system length to the headstay by adjusting foil count and length.
Important notes and considerations before cutting foil sections.
Caution regarding cleaning foil shavings to prevent connector seizing.
General preparation steps for all foil installations.
Preparing the top foil surface for attaching the trim cap.
Instructions for deburring and cleaning foil after cutting.
General instructions for deburring foil sections.
Specific instructions for deburring foil sections.
Steps for cutting and drilling the special bottom foil.
Table providing specific lengths for cutting the top foil.
Caution regarding cleaning foil shavings to prevent connector seizing.
Detailed steps for attaching the rod terminal.
Helpful tip for aligning parts during terminal assembly.
Specific assembly notes for Norseman/Sta-Lok® installations.
Specific assembly notes for rod installations.
Common problems and solutions related to spinnaker halyards.
Instructions for adjusting headstay tension for optimal performance.
Pre-adjustment tip to slacken other lines for easier headstay tensioning.
Function and benefits of backstay adjusters for sail trim.
Specific considerations for racing boats when sailing downwind.
Step-by-step guide for raising sails with the furling system.
Advice for raising stiff new sails and preventing hang-ups.
Guidelines for using heavy air working jibs and storm sails.
Instructions on how to furl and reef sails using the system.
Tip on proper halyard tension for shaping sails.
Instructions for storing the unit with the mast down, especially in freezing conditions.
Guidelines for safe storage or transport of the furling system.
Procedures for cleaning and maintaining the unit after storage or transport.
Detailed steps for cleaning and lubricating the furling system components.
Checking the unit for signs of wear, damage, and loosening.
Procedure for replacing the furling line, including necessary tools and parts.
Problem: A connector is missing from the assembly.
Problem: An excessive number of connectors are present.
Problem: The foil extrusion does not slide over the threaded stud.
Problem: The connector cannot be inserted into the foil extrusions.
Problem: Warning color on threads indicates improper adjustment.
Problem: Difficulty or inability to furl the sail.
Problem: Difficulty or inability to unfurl the sail.
Problem: The sail cannot be fully furled.
Problem: Headstay rotation is jerky or elliptical.
Problem: The sail does not remain furled.
Problem: The sail cannot be raised.
Problem: Sail does not raise fully or luff tension is incorrect.
Problem: The sail cannot be lowered.
Problem: UV cover rolls up within the sail.
Details on what the Harken limited warranty covers.
Specifies the duration of the limited warranty.
Clarifies which parts are covered for the full seven years.
Lists conditions or situations not covered by the warranty.
Defines what constitutes improper operation of the system.
Defines what constitutes improper installation of the system.
Defines what constitutes improper maintenance of the system.
Explains Harken's process for addressing warranty issues.
Clarifies whether labor costs are covered under the warranty.
States Harken's liability regarding special, incidental, or consequential damages.
Provides contact information for obtaining service and support.
Procedure for obtaining replacement parts under warranty.
Explains how state laws may affect warranty rights.
| Model | MKIII |
|---|---|
| Manufacturer | Harken |
| Max Headstay Length | Up to 22.5 m (74 feet) |
| Material | Stainless steel and anodized aluminum |
| Line Capacity | Varies depending on model |