Do you have a question about the Harman Kardon T20 and is the answer not in the manual?
Highly sensitive tonearm ensures perfect tracking, even with high compliance cartridges.
Reduces tracking error by using a uniquely designed offset angle headshell.
Selector adjusts load impedance for optimum cartridge performance.
Miniature DC servomotor with frequency generator ensures stable speed control.
Cabinet uses high density chipboard for acoustic properties and vibration absorption.
Thick mat absorbs vibrations to prevent them reaching the disc.
Turntable designed for 120V AC; use only domestic outlets or amplifier outlets.
Disconnect by pulling the plug, not the cord, to prevent damage.
Place on a firm, level surface, avoiding moisture, direct sunlight, and vibrations.
Wipe with a soft, dry cloth; use mild soap for stubborn dirt.
Install platter on spindle and thread drive belt onto pulley and platter.
Secure counterweight to tonearm and attach dust cover hinges.
Secure cartridge to headshell using screws and connect lead wires.
Insert headshell into tonearm and tighten clamp, keeping stylus guard on.
Align stylus tip with gauge marking by moving cartridge in headshell.
Adjust cartridge angle for parallelism with tracking gauge lines.
Balance tonearm, set tracking force using scale ring, and adjust anti-skating.
Plug output leads into amplifier's phono terminals (white for left, red for right).
Attach turntable's ground wire to amplifier's ground terminal.
Connect the power line cord to an AC outlet.
Turn amplifier volume down, then turn on and select phono input.
Select disc speed and adjust pitch control for correct platter speed.
Place disc on platter, use adaptor if needed, and start playback.
Flip cue lever forward to gently lower tonearm onto disc surface.
Slowly raise amplifier volume to hear music from speakers.
Press cut button to automatically lift tonearm and stop platter.
Tonearm automatically lifts, returns, and platter stops at end of disc.
| Drive method | Belt drive |
|---|---|
| Motor | DC motor |
| Output | RCA |
| USB Output | No |
| Weight | 5.5 kg |
| Speeds | 33 1/3 RPM, 45 RPM |
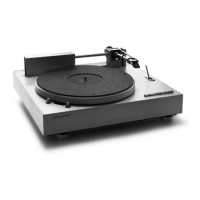
| Type | Manual Belt-Drive Turntable |