0 Preamp outputs
The
Kappa four amplifier allows
you
to send a second
amplifier line-level
signal.
Connect a set of
RCA
patch cables
to the line-level inputs
on
the Kappa amplifier at one
end
,
and to the second amplifier's line-lev
el
inputs at the other.
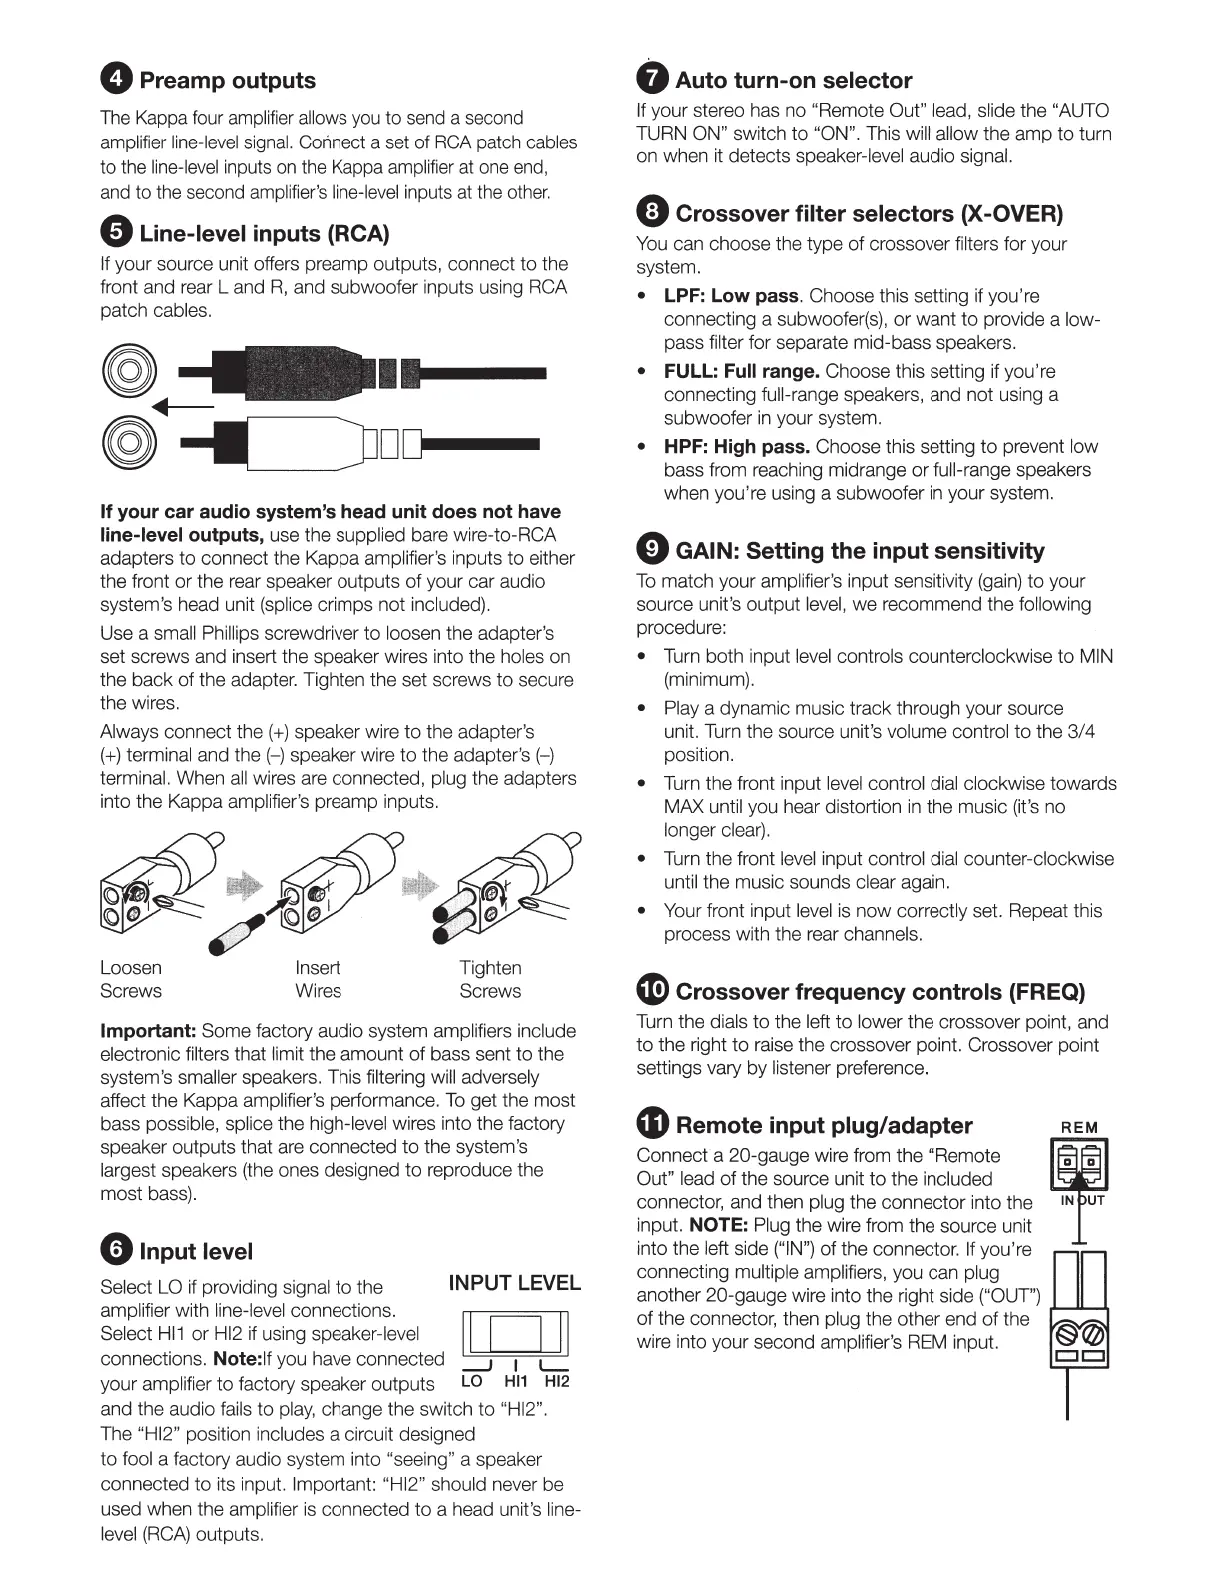
0 Line-level inputs (RCA)
If
your source unit offers preamp outputs, connect
to
the
front and rear
Land
R,
and subwoofer inputs using RCA
patch cables.
@
··
----
.....
1---
~oo--
If your car audio system's head unit does not have
line-level outputs,
use the supplied bare wire-to-RCA
adapters
to
connect the Kappa amplifier's inputs
to
either
the front or the rear speaker outputs
of
your car audio
system's head unit (splice crimps not included}.
Use a small Phillips screwdriver
to
loosen the adapter's
set screws and insert the speaker wires into the holes on
the back of the adapter. Tighten the set screws
to
secure
the wires.
Always connect the(+) speaker wire
to
the adapter's
(+)terminal and
the(-)
speaker wire
to
the adapter's (-)
terminal. When
all
wires are connected, plug the adapters
into the Kappa amplifier's preamp inputs.
~
.
#
.
~~~~
'
Loosen Insert
Screws Wires
Tighten
Screws
Important: Some factory audio system amplifiers include
electronic filters that limit the amount
of
bass sent
to
the
system's smaller speakers. This filtering will adversely
affect the Kappa amplifier's performance.
To
get the most
bass possible, splice the high-level wires into the factory
speaker outputs that are connected
to
the system's
largest speakers (the ones designed
to
reproduce the
most bass).
e Input level
Select LO if providing signal to the INPUT
LEVEL
amplifier with line-level connections.
II
n
II
Select
Hl1
or
Hl2 if using speaker-level .. _ ..
connections. Note:
If
you have connected
__J
1
L--
your amplifier
to
factory speaker outputs
LO
Hl1
Hl2
and the audio fails to
play,
change the switch
to
"HI2".
The "HI2" position includes a circuit designed
to
fool a factory audio system into "seeing" a speaker
connected
to
its input. Important: "HI2" should never be
used when the amplifier
is
connected
to
a head unit's line-
level
(RCA)
outputs.
t)
Auto turn-on selector
If
your stereo has no "Remote Out" lead, slide the "AUTO
TURN ON" switch to "ON". This will allow the amp
to
turn
on when it detects speaker-level audio signal.
C)
Crossover filter selectors (X-OVER)
You
can choose the type of crossover filters for your
system.
• LPF: Low pass. Choose this setting if you're
connecting a subwoofer(s), or want
to
provide a low-
pass filter for separate mid-bass speakers.
• FULL: Full range. Choose this setting if you'
re
connecting full-range speakers, and not using a
subwoofer
in
your system.
• HPF: High pass. Choose this setting
to
prevent low
bass from reaching midrange
or
full-range speakers
when you'
re
using a subwoofer
in
your system.
E) GAIN: Setting the input sensitivity
To
match your amplifier's input sensitivity (gain)
to
your
source unit's output level,
we
recommend the following
procedure:
• Turn both input level controls counterclockwise to MIN
(minimum).
• Play a dynamic music track through your source
unit. Turn the source unit's volume control
to
the 3/4
position.
• Turn the front input level control dial clockwise towards
MAX until you hear distortion
in
the music (it's no
longer clear).
• Turn the front
level
input control dial counter-clockwise
until the music sounds clear again.
• Your front input level
is
now correctly set. Repeat this
process with the rear channels.
G)
Crossover frequency controls (FREQ)
Turn the dials
to
the left
to
lower the crossover point, and
to
the right
to
raise the crossover point. Crossover point
settings vary by listener preference.
4D
Remote input plug/adapter
Connect a 20-gauge wire from the "Remote
Out" lead
of
the source unit
to
the included
connector, and then plug the connector into the
input.
NOTE: Plug the wire from the source unit
into the left side ("
IN")
of the connector.
If
you'
re
connecting multiple amplifiers, you can plug
another 20-gauge wire into the right side ("OUT")
of
the connector, then plug the other end
of
the
wire into your second amplifier's
REM
input.
REM
g)
IN1UT
 Loading...