Do you have a question about the Harman Kardon SoundSticks II and is the answer not in the manual?
| Woofer diameter | 150 mm |
|---|---|
| Audio output channels | 2.1 channels |
| Frequency range | 44 - 20000 Hz |
| RMS rated power | 20 W |
| Connector(s) | 3.5mm |
Statement of compliance with FCC rules, subject to two conditions regarding interference.
Equipment tested for Class B limits, potential for interference, and suggested corrective measures.
Details frequency range and power consumption for the SoundSticks II system.
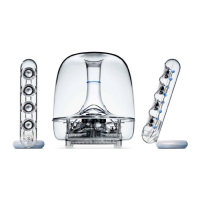
Technical specifications for the subwoofer, including transducer size, power, and dimensions.
Technical specifications for the satellites, including transducer size, power, and dimensions.
Instructions for placing the satellite speakers beside the monitor or computer.
Guidance on optimal placement of the subwoofer for best sound performance.
Instructions on how to connect the satellite speakers to the subwoofer unit.
Guide for connecting the main input cable to the audio source.
Instructions for connecting the power cord to the power adapter.
Guidance on connecting the power adapter to the subwoofer.
Instructions for plugging the power cord into a wall outlet.
Steps to power on the unit and indicator for activation.
How to control the volume using touch controls and mute function.
Addresses issues related to no sound output from the speaker system.
Troubleshooting steps for when only the satellites produce sound, not the subwoofer.
Troubleshooting steps for when only the subwoofer produces sound, not the satellites.
Guidance on addressing issues with dull high-frequency sound output.