Do you have a question about the Harmony 900 and is the answer not in the manual?
Discharge static electricity before working on the Harmony 900 to protect sensitive components.
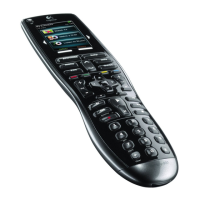
Familiarize yourself with the main parts of the Harmony 900 before starting disassembly.
Locate and remove four screws from the battery compartment cover to begin disassembly.
Carefully pry off the rubberized back plate, noting potential adhesive at the bottom.
Expose and remove three screws located after the back plate is detached.
Use a pry tool to carefully separate the front and back halves of the remote casing.
Remove three shorter screws that hold the logic board to the front cover.
Gently unclip and slide out the ribbon cable connecting the touch screen.
Lift the logic board assembly free from the front cover, minding any soft connections.
Place button pads and plastic guide correctly onto the front cover, ensuring proper orientation.
Align and place the logic board assembly onto the front cover's mounting posts.
Carefully re-insert and close the clamp for the touch screen ribbon cable.
Replace logic board screws and test key alignment and tactile response.
Align and press the main silver/black back cover onto the front assembly.
Ensure all locking tabs engage correctly by pressing along the remote's edges.
Snap the rubberized back piece into place, ensuring all tabs are engaged.
Install the final four screws into the battery compartment and reapply the sticker.
| Brand | Logitech |
|---|---|
| Model | Harmony 900 |
| Type | Universal Remote |
| Display | Yes |
| Rechargeable Battery | Yes |
| RF Wireless Capability | Yes |
| Activities | Yes |
| Connectivity | USB |
| Display Type | Color touch screen |
| Battery Type | Rechargeable Lithium-ion |
| Number of Devices Controlled | Up to 15 |
| PC Software | Yes |
| Mac Software | Yes |
| Control | Infrared (IR) and RF |
| Range | Up to 100 feet with RF |
| Warranty | 1 year limited |
| Device Compatibility | TV, DVD, DVR, Blu-ray |