Page 7
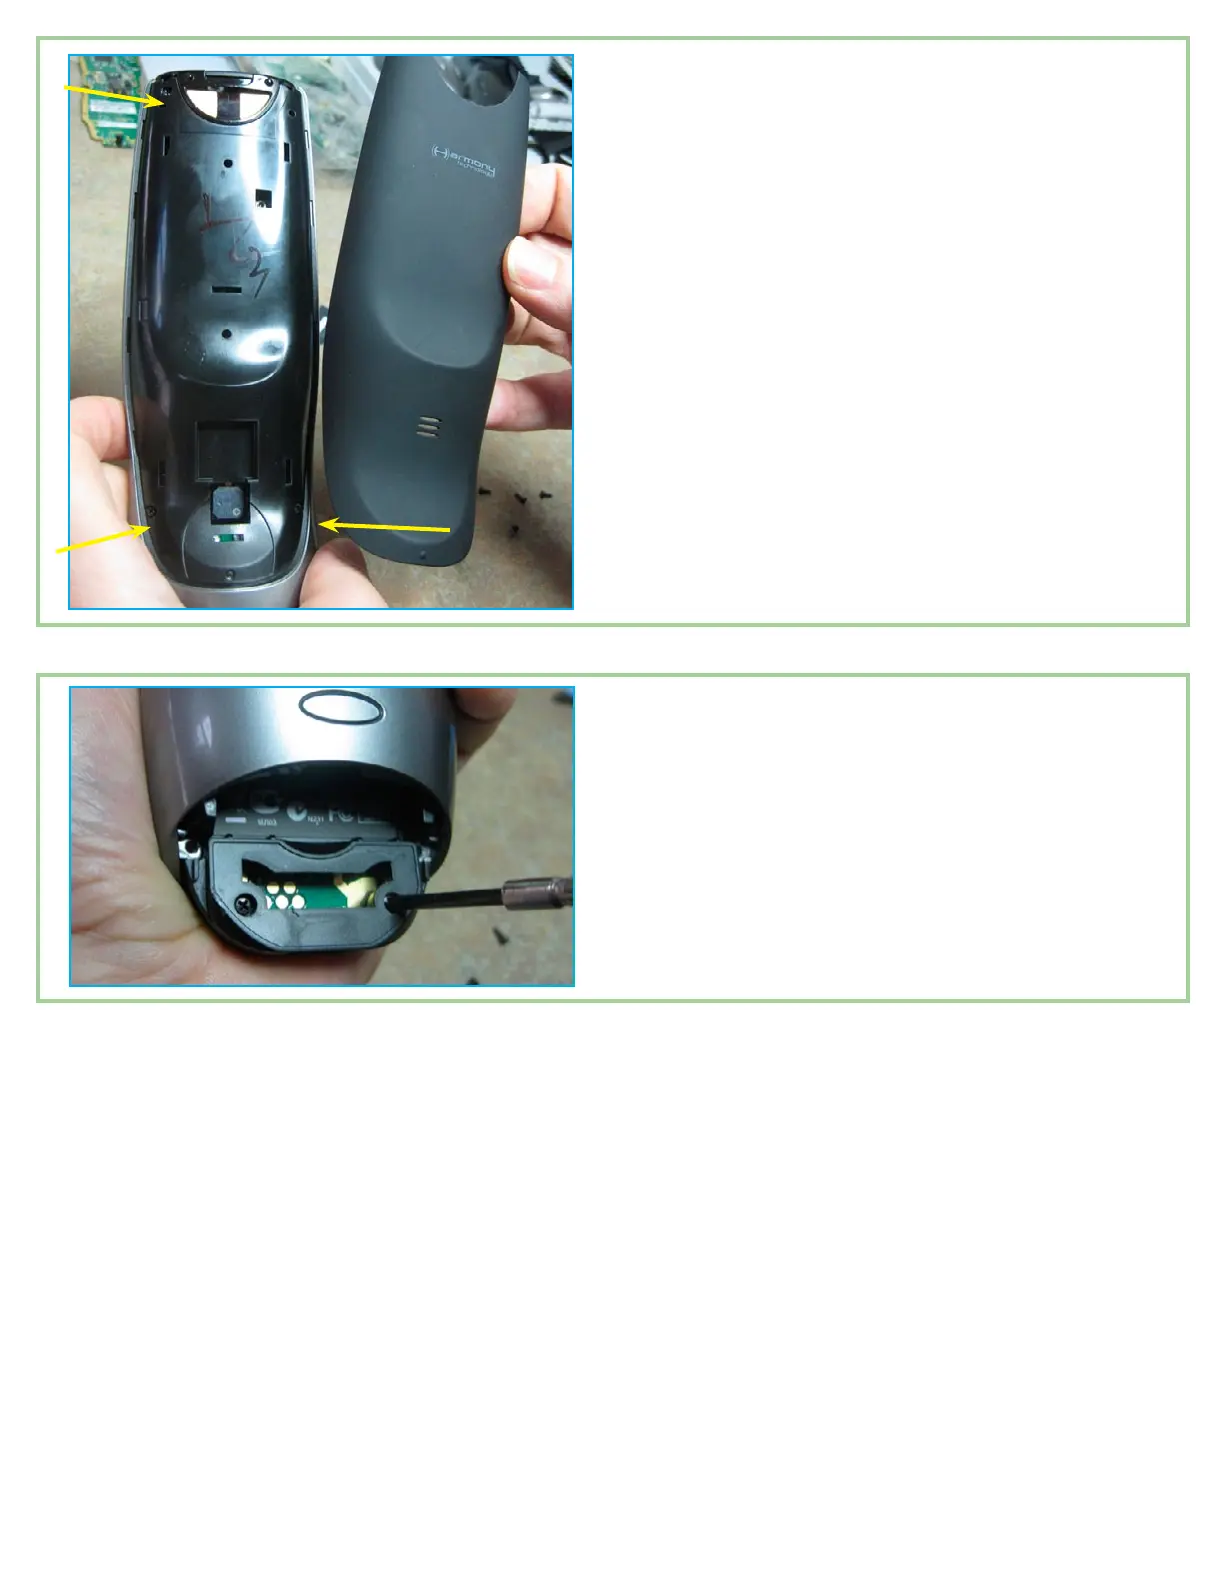
7. Replace the three screws that rmly attach the
back cover to the logic board. Then, you are ready
to reinstall the ‘rubberized’ back piece. This piece
just snaps back in. Align the piece with the back of
the remote and press rmly at the top. Move to the
middle and press again. You should feel and hear
very denite engagement. Press rmly along the
sides and length of the piece to ensure that all tabs
have been engaged. Then, inspect the edges. If it
appears that a side tab did not fully engage, simply
press the spot sideways and it should click right in.
There should not be any spaces between this piece
and the body of the remote.
8. Install the remaining four screws back in the bat-
tery compartment and, if desired, re-apply the
serial number sticker. If it came off cleanly there is
generally enough glue to stick it back on.
Do a nal test to make sure everything works as expected. Feel free to contact me if you have any questions. I’m
always happy to help.
Questions? Need additional help?
Contact us at info@harmonyremoterepair.com
www.harmonyremoterepair.com