EasyManua.ls Logo

HARTMANN TRESORE HS 460 Series - User Manual

HARTMANN TRESORE HS 460 Series
17 pages
Print Icon
To Next Page IconTo Next Page
Loading...
8
1 2 3
4 5 6
7 8 9
*
0 #
OPERATING INSTRUCTIONS
for HS 460 series hotel safes
GB
Question and Answer IconNeed help?

Do you have a question about the HARTMANN TRESORE HS 460 Series and is the answer not in the manual?

Summary

1 INSTRUCTIONS

General Operating Instructions

Provides essential instructions for safe placement, environment, and usage.

Safety Instructions

Highlights critical safety precautions regarding weight and moving parts.

2 TECHNICAL SPECIFICATIONS

Control Panel Components

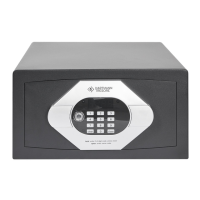
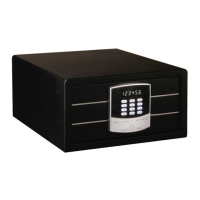
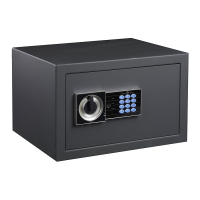
Details the parts of the safe's control panel, including display and keypad.

3 PUTTING INTO OPERATION

Initial Setup Procedures

Guides through the initial checks, securing, and battery installation for operation.

I-button and Smart Safe System Notes

Provides information on optional I-buttons and the Smart Safe System features.

Safe Operation and Troubleshooting

Opening and Closing the Safe

Procedures for locking and opening the safe using a code.

Emergency Opening Methods

Details using the master I-button and the mechanical emergency key.

Error Message Handling

Explains common error messages and their resolution.

7 USING THE I-BUTTONS

I-button Types and Functions

Outlines the four types of I-buttons: owner, master, time, and data keys.

Owners Key (Red I-button)

Details the owner's key function, its importance, and initialization process.

Master Key (Blue I-button)

Explains the master key's role in emergency opening and assignment.

Deleting Master Keys

Provides instructions for deleting individual or all assigned master keys.

Time and Data Keys

Describes the functionality of the time (yellow) and data (black) I-buttons.

8 FUNCTION OF THE SMART SAFE SYSTEM

System Overview and Requirements

Introduces the Smart Safe System and its minimum software requirements.

Software Installation

Guides through the process of installing the Smart Safe System software.

Encoder Installation and User Interface

Details encoder connection, driver installation, and the software's user interface.

Initial Settings Configuration

Explains how to configure initial settings using Holders, Audit Trail, and Clock Adjustment.

Registering a Button Holder

Step-by-step instructions for registering an I-button holder in the system.

Setting Date and Time on the Safe

Guides on setting the safe's date and time using the time card and encoder.

Data Storage and Transfer

Explains how to transfer opening operation data from the safe to a PC.

Confirming Data Transfer and Notes

Covers data transfer confirmation, viewing data, and important scanning notes.

9 TIPS AND HELP

Troubleshooting Common Problems

Lists common issues with safes, their causes, and suggested solutions.

10 CLEANING AND CARE

Cleaning and Maintenance

Provides instructions for cleaning the safe and lubricating its hinges.

11 DISPOSAL

Appliance Disposal Guidelines

Offers guidance on the proper and eco-friendly disposal of the appliance.

12 GUARANTEE

Guarantee Terms and Conditions

Details the guarantee period and conditions that may invalidate it.

Overview

This document provides operating instructions for the HARTMANN TRESORE HS 460 series hotel safes. It covers everything from initial setup and daily operation to emergency procedures, maintenance, and disposal. The safe is designed to be secure and user-friendly, with options for both code-based and I-button access, as well as a comprehensive Smart Safe System for logging operations.

Function Description

The HARTMANN TRESORE HS 460 series hotel safe is a security device designed for storing valuables. Its primary function is to provide secure storage, accessible via a user-defined 3-6 digit code or an I-button. The safe also features an emergency opening system for situations like forgotten codes or technical malfunctions, which can be activated using a master I-button, a mechanical emergency key, or the Smart Safe System.

A key feature of the HS 460 series is its integration with the optional Smart Safe System. This system logs all opening operations in a database, archiving them according to the customer code used and the type of key (I-button or mechanical key). It also records the date and time of each opening operation, providing a comprehensive audit trail. This functionality is particularly useful for hotels or businesses requiring detailed access logs.

The safe's control panel includes a display, a keypad, an I-button contact, an emergency power supply connection, and a mechanical emergency lock. The positions of the emergency power supply and emergency lock are swapped if the door is hinged on the left.

Important Technical Specifications

The HS 460 series supports a 3-6 digit user code for locking and unlocking. It operates on battery power, with the battery compartment located on the rear of the door. The system provides error messages on the display, such as "Err" for incorrect code entries. After four consecutive incorrect entries, the safe enters a one-minute hold time, during which it cannot be opened.

The Smart Safe System requires a PC with Windows 7 or Windows 8 as the operating system. It utilizes an encoder with both USB (DS9490R) and serial (DS9097U) ports for connecting to a PC. The system includes an installation CD, USB and serial interfaces, an encoder, a black data card, and a yellow time card. The software drivers for the encoder come in 32-bit (WinUSB_32) and 64-bit (WinUSB_64) versions, depending on the Windows operating system.

The data card (black) can store up to 300 opening operations, which can then be transferred to a computer for viewing and analysis. The time card (yellow) is used to program the safe with the correct date and time.

The HS 460 series uses four different types of I-buttons, each with specific functions:

  • Owner's key (red I-button): The most important I-button, required for authorizing all programming and emergency opening. Each safe can only be assigned to one owner's I-button.
  • Master key (blue I-button): Used by authorized employees for emergency opening without needing the owner's I-button. Can be programmed by the owner's I-button.
  • Time key (yellow I-button): Used to program the safe with the date and time, especially in conjunction with the Smart Safe System.
  • Data key (black I-button): Required to read out the last 300 operations and transfer them to a computer for viewing.

Usage Features

Putting into Operation:

Before use, the safe must be securely fixed to a flat, solid surface using the supplied fixing material. Batteries must be inserted correctly into the battery compartment. The display will show "Good" upon startup, then "Okay" when ready for use. Incorrect inputs can be corrected using the "clear" key. The owner's I-button (red) must be initialized by holding it against the receiver while the safe is open, confirmed by an audible beep.

Locking and Opening:

To lock the safe, close the door, enter a 3-6 digit code, and press "close." The safe will close automatically, and "CLSD" will appear on the display. The code can be reassigned each time the safe is locked. To open, enter the code used to lock the safe. The safe will open automatically, and "OPEN" will appear.

Emergency Opening:

  • Master I-button (blue): Hold the master I-button against the contact. The safe will open automatically, displaying "OPEN." Note that a master I-button must first be assigned by the owner's I-button.
  • Emergency-opening key (mechanical): Insert the key into the lock on the control panel and turn it anti-clockwise. The safe will open automatically, displaying "OPEN."

Smart Safe System Usage:

  • I-button holder registration: Connect the encoder to a PC. In the software interface, click "Holders," insert the I-button into the encoder, and click "Read Key ID." Enter the holder's name and click "Register Key Holder." Ensure the correct interface (DS9097U for serial, DS9490 for USB) is selected.
  • Setting date and time: Hold the time card (yellow) against the encoder. In the software, press "Clock Adjustment," confirm with "Yes" and "OK." The date and time are saved on the time card. Then, press "clear" on the safe's keypad, hold the owner's key (red) against the receiver, and finally hold the time key (yellow) against the receiver until "P_ED" appears and an audible signal sounds.
  • Data storage and retrieval: Press "clear" on the safe's keypad, hold the owner's key (red) against the receiver. "P" will appear. Then, hold the data key (black) against the receiver. Audible signals will confirm data transmission. Once complete, place the data key on the encoder connected to the PC. In the software, press "Audit Trail" and confirm with "Yes." The data (up to 300 operations) will be transferred and displayed, showing sequential number, code/key ID, date/time, opener, and holder name.

I-Button Management:

  • Assigning master keys (blue): Press "clear," hold the owner's I-button (red) against the receiver (display shows "P"), then hold it again. Finally, hold a master I-button (blue) against the receiver. "P_S1" confirms assignment. Multiple master keys can be assigned.
  • Deleting a master key: Press "clear" ("LIGHT_ON"), hold the owner's I-button (red) against the receiver (display shows "P"), then hold it again. Hold the master I-button (blue) to be deleted against the receiver. Two beeps and "P_S1" confirm deletion.
  • Deleting all master keys: Press "clear" ("LIGHT_ON"), hold the owner's key against the receiver (display shows "P"), then hold it twice more. "P_ED" confirms all master keys are deleted.
  • Loss of owner's I-button: If the owner's I-button is lost, a new one must be requested. The old I-button's assignment must be deleted from the circuit board by removing the door's rear cover, pressing the reset button, and then initializing the new I-button.

Maintenance Features

Cleaning and Care:

  • Use a soft cloth and a mild, commercially available cleaning agent for the safe. Avoid strong detergents or hard objects.
  • Regularly lubricate the door hinge with a little commercial machine oil to maintain mobility.
  • Clean the contacts on the I-button and/or I-button contact if they are soiled, as this can prevent the I-button from working.

Battery Management:

  • Ensure batteries are inserted correctly.
  • Do not mix battery types or old and new batteries.
  • If batteries are fully discharged before replacement, an emergency power adapter can be used temporarily. The connection for this is under the left or right trim next to the keypad, depending on the door hinge side.
  • Low battery power can cause the keyboard and/or display to not respond, or the I-button contact to malfunction. In such cases, change the batteries.

Troubleshooting (Error Messages):

  • "Err": Indicates an incorrect code entry. Re-enter the correct code. After 4 consecutive incorrect entries, the safe will enter a 1-minute hold time, indicated by a continuous "Err" display and audible signals.
  • Safe does not open despite correct code: Closing pins may be jammed (try shaking gently, if not, contact service) or there may be a malfunction in the drive for the locking pins (contact service).
  • Door does not close properly: Ensure the door is fully engaged in the door frame. If locking pins cannot be extended or are only partially extended, or if there's a malfunction in the drive, contact service.
  • Fault in electronics: Contact a service employee at Hartmann Tresore AG.

Disposal:

The appliance is marked according to European Directive 2002/96/EC for waste electrical and electronic equipment. It must not be disposed of with normal household waste. It should be taken to a special waste collection center for electronic appliances. Packaging materials are reusable and should be disposed of according to waste instructions, kept out of reach of children. Remove the mains plug and any locks before disposal to prevent hazards to children.

Guarantee:

The guarantee period is 12 months from the date of purchase. It is rendered invalid if installation and operating instructions are not followed, if the appliance is modified, or if non-original spare parts are used. The guarantee does not cover personal injury or property damage due to non-observance of the operating manual or incorrect use. Product characteristics may change without advance notice.

HARTMANN TRESORE HS 460 Series Specifications

General IconGeneral
BrandHARTMANN TRESORE
ModelHS 460 Series
CategorySafes
LanguageEnglish

Related product manuals