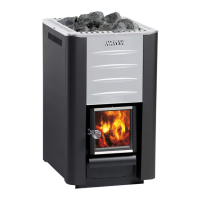
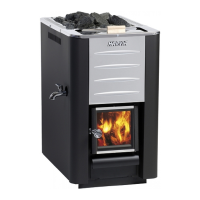
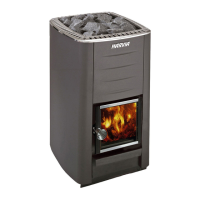
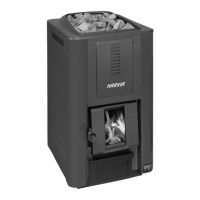
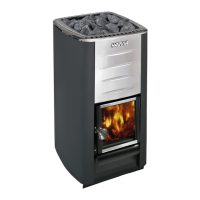
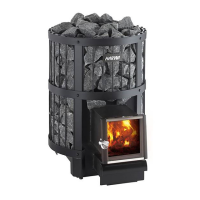
Harvia has manufactured quality stoves, cauldrons
and chimneys for decades using all the experience
accumulated along the way. Our product range
provides you with a wealth of options whether
you need a stove for a small family sauna or a
larger public sauna. Congratulations on making an
excellent choice!
Depuis des décennies, grâce à l’immense expérience
accumulée au fil des ans, Harvia fabrique des poê-
les, des chaudières et des cheminées de qualité.
Que vous recherchiez un poêle pour un petit sauna
familial ou un sauna public plus grand, notre gamme
de produits vous permet de choisir parmi une multi-
tude de possibilités. Félicitations pour cet excellent
choix !
TABLE DES MATIÉRS
1. INSTRUCTIONS D’UTILISATION ...........................
3
1.1. Préparation du poêle à l’utilisation ................. 3
1.2. Sélection du poêle ...................................... 3
1.3. Utilisation du poêle ..................................... 3
1.3.1. Première mise en service ...................... 3
1.3.2. Pierres de sauna ................................. 4
1.3.3. Matériau combustible........................... 4
1.3.4. Chauffage du poêle ............................. 4
2.6. Eau du sauna ............................................. 5
2.7. Entretien du poêle ....................................... 5
2. CABINE DU SAUNA ............................................
6
2.1. Effets du poêle chaud sur la cabine de sauna .. 6
2.2. Ventilation de la cabine de sauna .................. 6
2.3. Hygiène de la cabine de sauna ...................... 6
3. INSTRUCTIONS D’INSTALLATION ........................
7
3.1. Avant l'installation ...................................... 7
3.1.1. Protection du sol (figure 6) ...................
7
3.1.2. Distance de sécurité par rapport au
plafond ........................................................ 8
3.1.3. Murs maçonnés .................................. 8
3.1.4. Murs en bois ...................................... 8
3.2. Protection supplémentaire ............................ 8
3.2.1. Plaque de protection légère simple pour
les murs ...................................................... 8
3.2.2. Plaque de protection légère double pour
les murs ...................................................... 9
3.2.3. Gaine et couche de protection Harvia ..... 9
3.3. Installation du poêle .................................. 10
3.3.1. Pieds réglables du poêle ..................... 10
3.3.2. Raccordement du poêle à une cheminée 11
3.3.3. Raccordement du poêle à un conduit
maçonné via l’ouverture de raccordement
arrière ....................................................... 11
3.3.4. Raccordement du poêle à un conduit
maçonné via l’ouverture de raccordement
supérieure .................................................. 12
3.3.5. Raccordement du poêle à une cheminée
en acier Harvia ........................................... 13
3.3.6. Installation d’un poêle avec bac à eau
avant (Harvia 20 ES Pro / ES Pro S) .............. 14
3.4. Installation du chauffe-eau ......................... 14
3.5. Modification du sens d’ouverture de la
porte du poêle ................................................. 15
CONTENTS
1. INSTRUCTIONS FOR USE .................................... 3
1.1. Preparing the Stove for Use ......................... 3
1.2. Selecting the Stove ..................................... 3
1.3. Using the stove .......................................... 3
1.3.1. First Heating ....................................... 3
1.3.2. Sauna Stones .................................... 4
1.3.3. Burning Material .................................. 4
1.3.4. Heating the Stove ............................... 4
1.3.5. Sauna Water ...................................... 5
1.4. Stove Maintenance ..................................... 5
2. SAUNA ROOM ...................................................
6
2.1. Effects that Heating the Stove has on the
Sauna Room ..................................................... 6
2.2. Ventilation of the Sauna Room ..................... 6
2.3. Sauna Room Hygiene .................................. 6
3. INSTRUCTIONS FOR INSTALLATION ..................... 7
3.1. Before Installation ....................................... 7
3.1.1. Protecting the Floor (figure 3) ............... 7
3.1.2. Safety Distance to the Ceiling ............... 8
3.1.3. Masonry Walls .................................... 8
3.1.4. Wooden Walls .................................... 8
3.2. Additional Protection ................................... 8
3.2.1. Single Light Protective Cover for
the Walls ..................................................... 8
3.2.2. Double Light Protective Cover for
the Walls ..................................................... 9
3.2.3. Harvia Protective Sheath and Bedding .... 9
3.3. Installation of the Stove ............................. 10
3.3.1. Adjustable Legs ................................ 10
3.3.2. Connecting the Stove to a Chimney ..... 11
3.3.3. Connecting the Stove to a Masonry
Flue Via the Connection Opening in the Back .. 11
3.3.4. Connecting the Stove to a Masonry
Flue Via the Upper Connection Opening ......... 12
3.3.5. Connecting the Stove to a Harvia Steel
Chimney .................................................... 13
3.3.6. Installing a Stove with a Front Water
Container (Harvia 20 ES Pro / ES Pro S) ......... 14
3.4. Installation of the Water Heater .................. 14
3.5. Changing the Opening Direction of the Stove
Door .............................................................. 15