EN DE
19
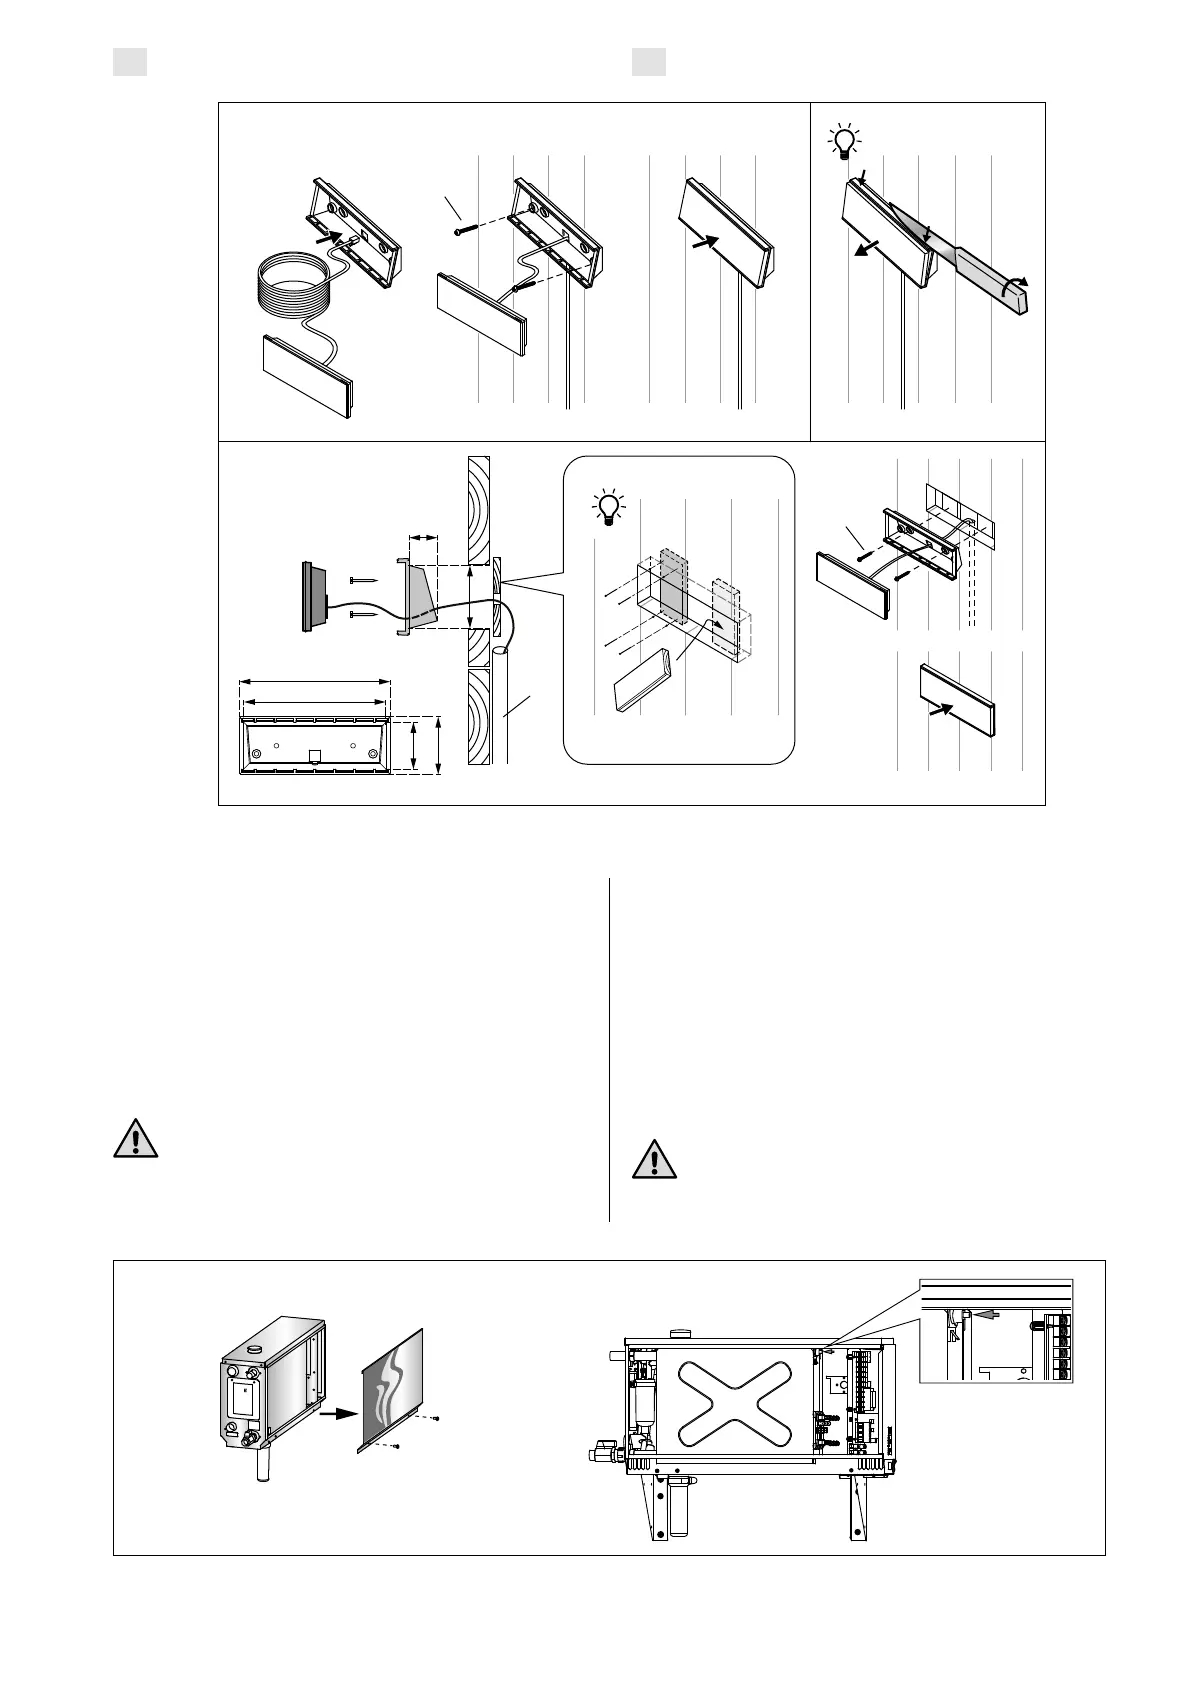
within the wall – otherwise the installation will have
to be on the wall surface.
2.10. Resetting the Overheat Protector
Open the cover. If needed move the circuit board
housing by opening screws. A blown overheat pro-
tector can be reset by pressing the button on the
end of the device. Figure 14.
The reason for the going off must be deter-
mined before the button is pressed. The over-
heat protector may be reset only by a professional
maintenance person.
min.
ø 30
46
46
56
20
140
147
A
B
1. 2. 3.
1. 2.
3.
ø4 x 30
ø4 x 30
Figure 14. Resetting the Overheat Protector
Abbildung 14. Zurücksetzen des Überhitzungsschutzes
Figure 13. Fastening the control panel
Abbildung 13. Befestigung des Bedienfelds
In wärmeisolierenden Röhren (ø 30 mm), die in
die Wandstruktur eingearbeitet sind, können Sie
das Datenkabel versteckt in der Wand verlegen.
Anderenfalls muss das Datenkabel auf der Wand-
oberfläche verlegt werden.
2.10. Zurücksetzen des Überhitzungsschutzes
Entfernen Sie die Abdeckung. Gegebenenfalls müs-
sen Sie das Leiterplattengehäuse nach dem Lösen
der Schrauben entfernen. Um den Überhitzungs-
schutz nach dem Auslösen zurückzusetzen, drücken
Sie den Knopf am Ende des Geräts. Abbildung 14.
Bevor Sie den Knopf drücken, müssen Sie
die Ursache für die Auslösung ermitteln. Der
Überhitzungsschutz darf nur von qualifiziertem
technischen Personal zurückgesetzt werden.
 Loading...