7
EN
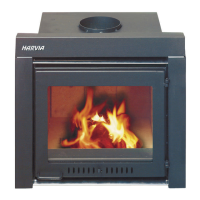
Harvia’s fireplace inserts are designed to improve the
heating characteristics of an old open fireplace or
stove. The improvement is based on the fact that the
air needed for combustion flows in a controlled manner
in the insert. Compared to an open fireplace, less
ventilation takes place through the heating chamber.
Harvia fireplace inserts are also suitable for first-
time installations, in which case a brick casing is built
around the fireplace insert.
If the insert is installed in an existing open fireplace,
the mouth of the fireplace and the depth of its heating
chamber must be designed so that both its size and
form fit the fireplace insert.
If the mouth is too big, use bricks to make it smaller.
If the mouth is too small, remove the necessary number
of bricks and shape the mouth as required.
Use bricks to flatten the bottom of the heating
chamber. The recommended installation hole
dimensions for each model are listed under “Technical
data”. Make sure that there are no bricks or other
obstacles directly above the combustion gas outlet
that might prevent the gases from reaching the smoke
duct.
Install the fireplace insert in the designated place and
check that it is possible to add mineral wool on the sides
and top of the insert.
Put the cover collar or strip in place before you push
the fireplace insert against the fireplace’s brickwork.
Check the fireplace insert’s sealing at the bottom edge.
Add more mineral wool under the bottom if required.
The surroundings of the fireplace insert must be
carefully sealed to enable the draught to be guided in a
controlled manner through the heating chamber. See
the figure.
Installation of Harvia fireplace inserts
Publication 22/701/86 printed by the Ministry of
Interior’s Rescue Services includes instructions on
prefabricated fireplaces burning solid fuel and their
safety distances from inflammable structures.
Lightweight shields and safety distances
The specified safety distances from inflammable
materials can be cut down to half with a single-layer
lightweight shield and to one-fourth with a double
lightweight shield.
Harvia’s protective sheath for fireplaces is also a good
option. Brochures can be obtained from your retailer.
Single lightweight shields are made of non-
inflammable fibre-reinforced cement plate with a
minimum thickness of 7 mm or of metal sheet with a
minimum thickness of 1 mm. Fixing points must be
placed close enough to one another to ensure a sturdy
structure.
Double lightweight shields are made of two of the
plates mentioned above. The plates are connected to
the back of the furnace. If required, they can also be
screwed together. An air slot of at least 30 mm should
be left between the plate and the protected surface, as
well as between the plates. Air slots can be
constructed using pipe sleeves as intermediate
support. The shield should not touch the floor or ceiling.
The single shield corresponds to a masonry wall of 55
mm, open on the sides and with a minimum distance of
30 mm from the surface to be protected.
Correspondingly, a 110-mm-thick masonry wall
located at least 30 mm from the surface offers the
same protection as a double lightweight shield.
 Loading...