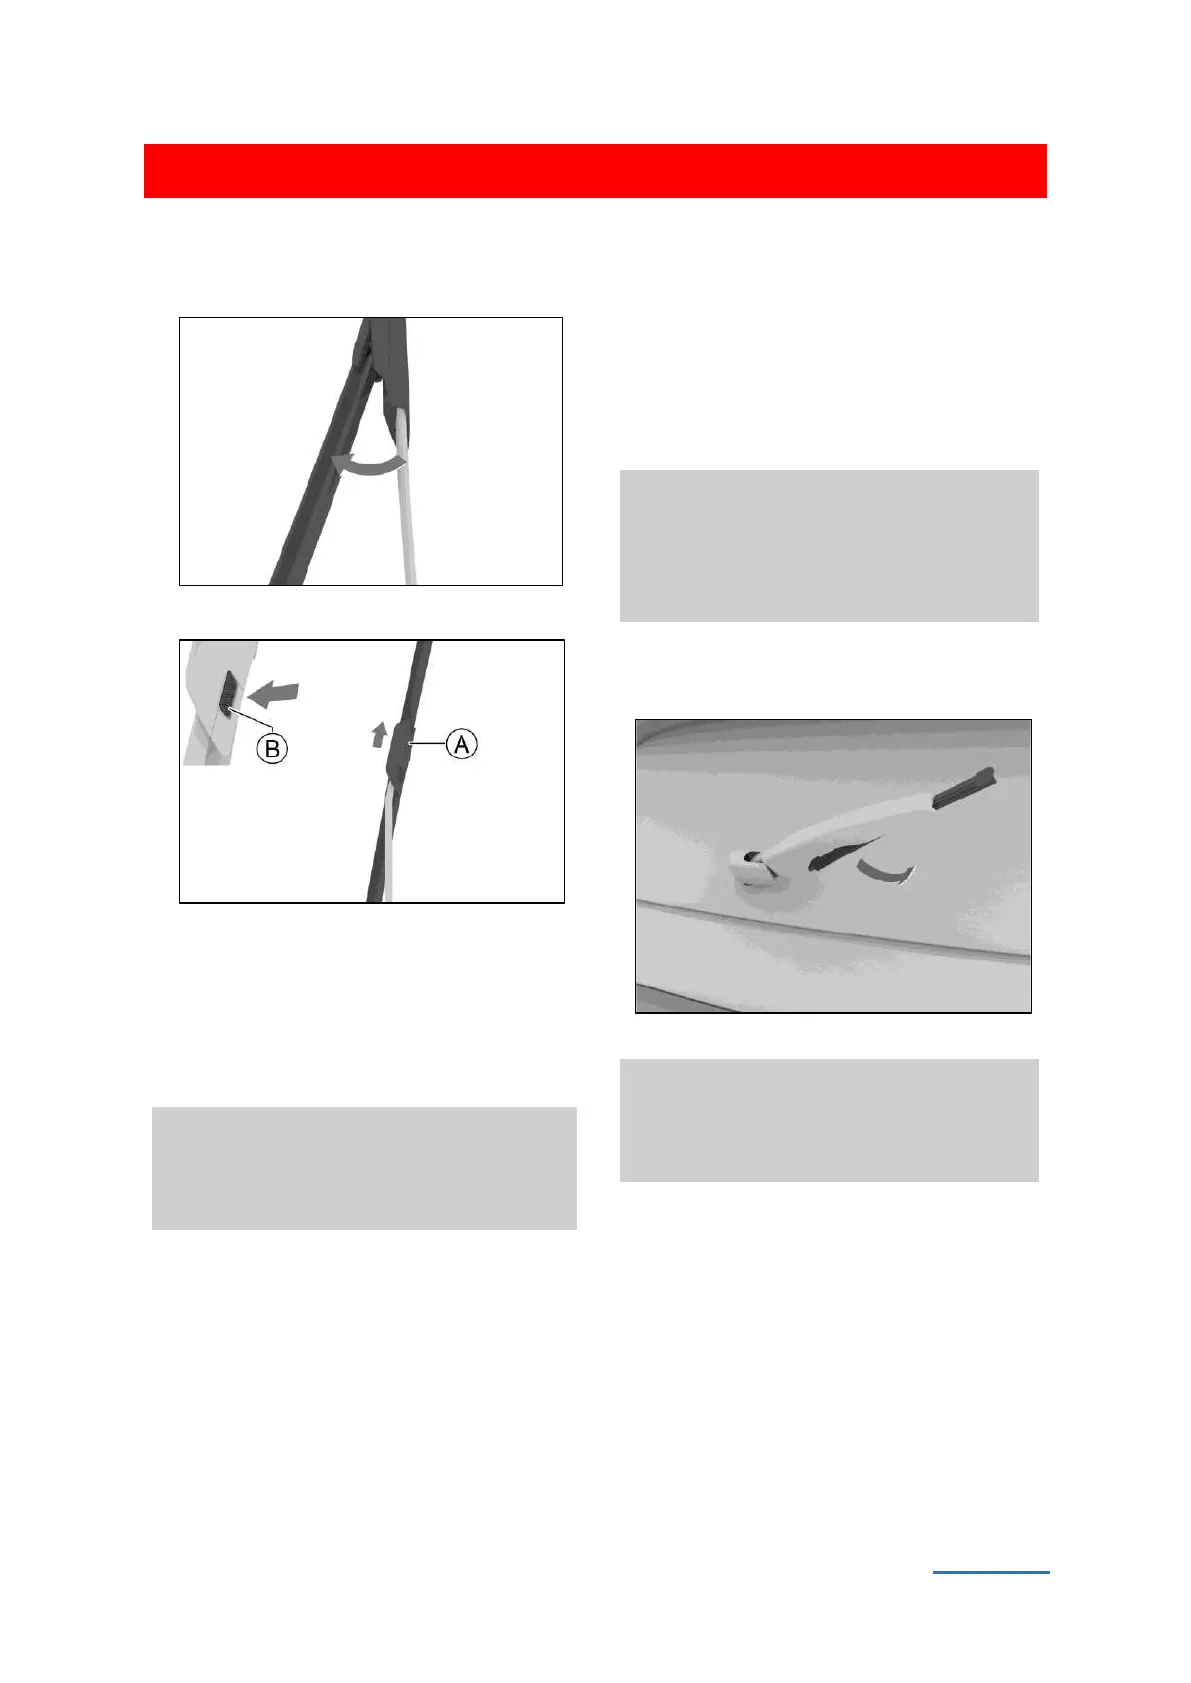
3. Rotate the wiper blades as indicated by the
arrow in the figure to maximize the angle
between it and the plastic connector.
15E146B9A476
4. Remove the wiper blades from the wiper arm.
3870D48F103F
Ⓐ Wiper blade
Ⓑ Flexible cleat
While pressing the flexible fastener, pull the
wiper blade in the direction of the arrow in the
diagram until it disengages from the wiper arm.
⚠ Caution
If a wiper blade is not fitted, do not place the
wiper arm directly on the windscreen, this will
damage the glass.
5. Fit a new wiper blade and place the wiper
back on the windscreen.
To facilitate installation, please refer to step
3 to maximize the included angle between
the wiper blades and the plastic connector.
After installation, please move the wiper up
and down to ensure that it is installed in
place.
6. Reset the wiper to its original state.
Change the power switch to ON, or start the
vehicle. The wiper will automatically reset
to its original state.
Rear wiper blades replacement
1. Raise the wiper arm up off the windscreen.
⚠ Caution
The rear wiper arm has a limited lift angle of
about 45 °. Do not over lift or use excessive
force when lifting up, otherwise there is a risk
of damage.
2. Pull the wiper blades in the direction shown
until the blade is free of the wiper arm.
67255DED83DC
⚠ Caution
If a wiper blade is not fitted, do not place the
wiper arm directly on the windscreen, this will
damage the glass.
3. Fit a new wiper blade and place the wiper
back on the windscreen.
Bulbs
When the new vehicle leaves the factory,
the front light assembly has already been
calibrated. If you often carry heavy loads in your
vehicle, the front light assembly may need to be
realigned. Please go to an authorized service
center to calibrate the front light assembly.
 Loading...