www.hawkeyeelectronics.com
2. After finding the right location, mark a 2-inch hole. (If your boat has a pre-cut
hole in the dash panel, simply remove the hole plug and proceed to Step 5.)
Check behind the desired cutting area for wires, switches, etc. that
may be damaged during cutting. If these obstructions are present,
use masking tape to hold them out of the way during cutting.
3. Cut out the 2-inch hole using the 2” hole saw.
4. Seal any exposed wood with a marine
sealant.
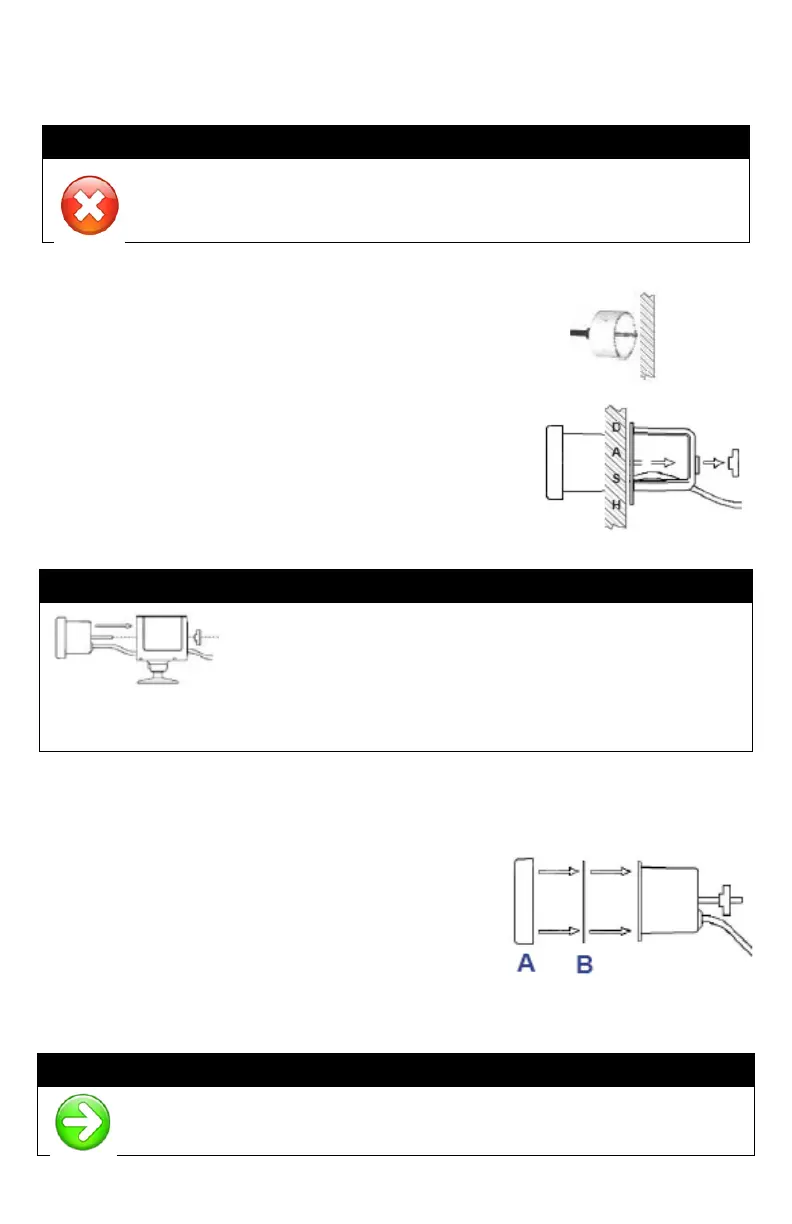
5. Insert the display from the front of the panel,
feed the wires through the bracket and install
the bracket and locking nut from the rear of
the panel. Make sure that the face of the
display is rotated upright and aligned to your
satisfaction for easy viewing from the
vessel’s helm.
The display can also be surface mounted using the
Adjustable Surface Mount Bracket (P/N: ACC-DF-1000).
Please visit our website or contact us by phone for
purchase information. You must attach the extension
rod to the mounting stud on the back of the display housing before inserting
the display into the Surface Mount Bracket.
STEP 2
Installing the Face and Bezel
1. Place the face (B) over the display making
sure to line up the cut outs on the face with
the notches on the display.
2. While holding the bezel (A), place it over
the display and turn clockwise until the
bezel locks into place.
OTICE
Gold and Chrome Bezels can be purchased on our website to match
your factory dash or give your depth finder a custom look.