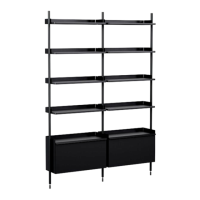
12
13
14
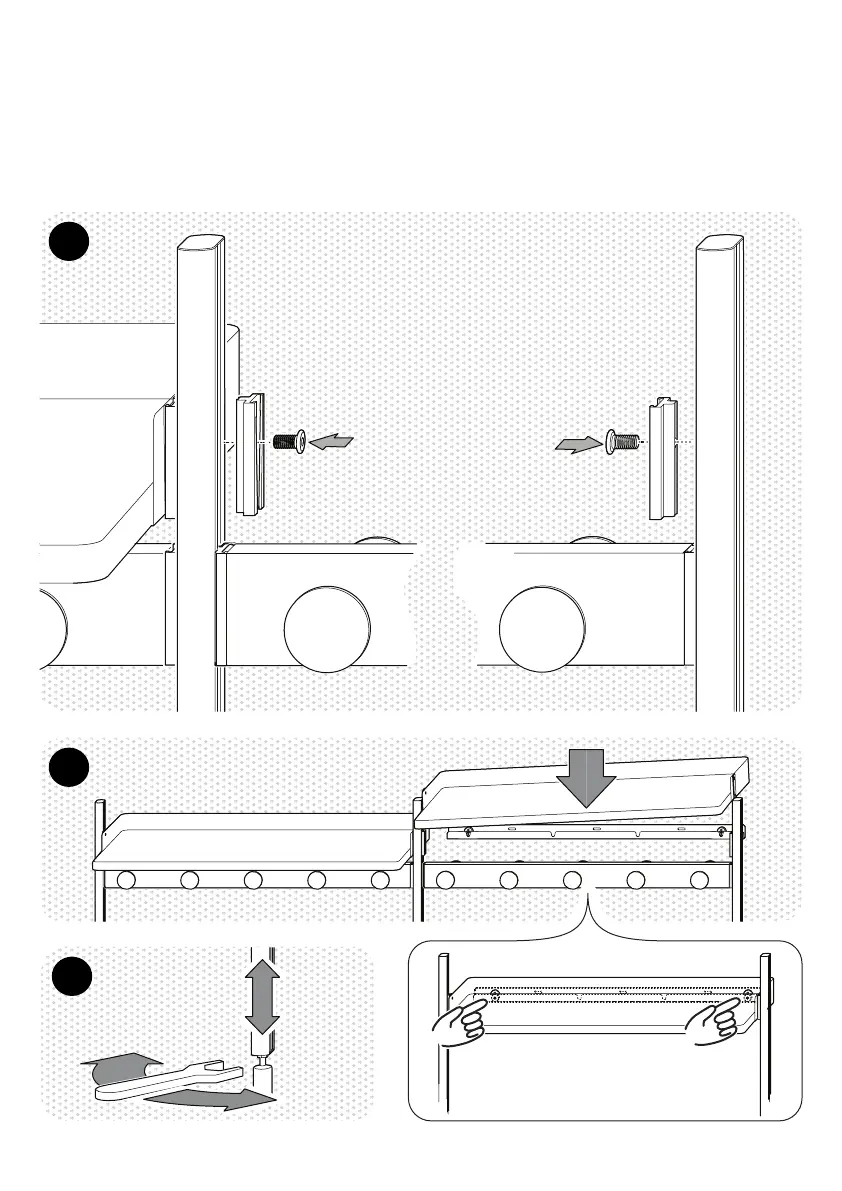
12. Rescrew the connectors that were
removed in STEP 9.
13. Slide the top shelf into the connectors
on the profiles. Make sure the connectors on
the back of the shelf go into the designated
cut-outs on the wall bracket.
Finally, you can adjust the height of the feet
of your shelving by first loosening the nut
right under the profile. Use the provided
Wrench
Q . Then turn the glider to bring it
up or down. Tigthen the nut when you have
reached the desired hight.
25
 Loading...