the exposed portion of the adjuster at the
rear of the backplate and then turn it
through its entire travel. Preferably do this
with the brake drum removed.
6 Turn the second adjuster also in the
direction of forward wheel rotation until the
drum locks again. Now back the adjuster off
until the wheel turns freely once more.
7 Repeat this procedure for the other front
wheel and then lower the car to the ground.
Rear brakes
8 Chock the front wheels then jack up the
rear of the car and support it on axle stands
(see “Jacking and vehicle support”). Ensure
that the handbrake is off.
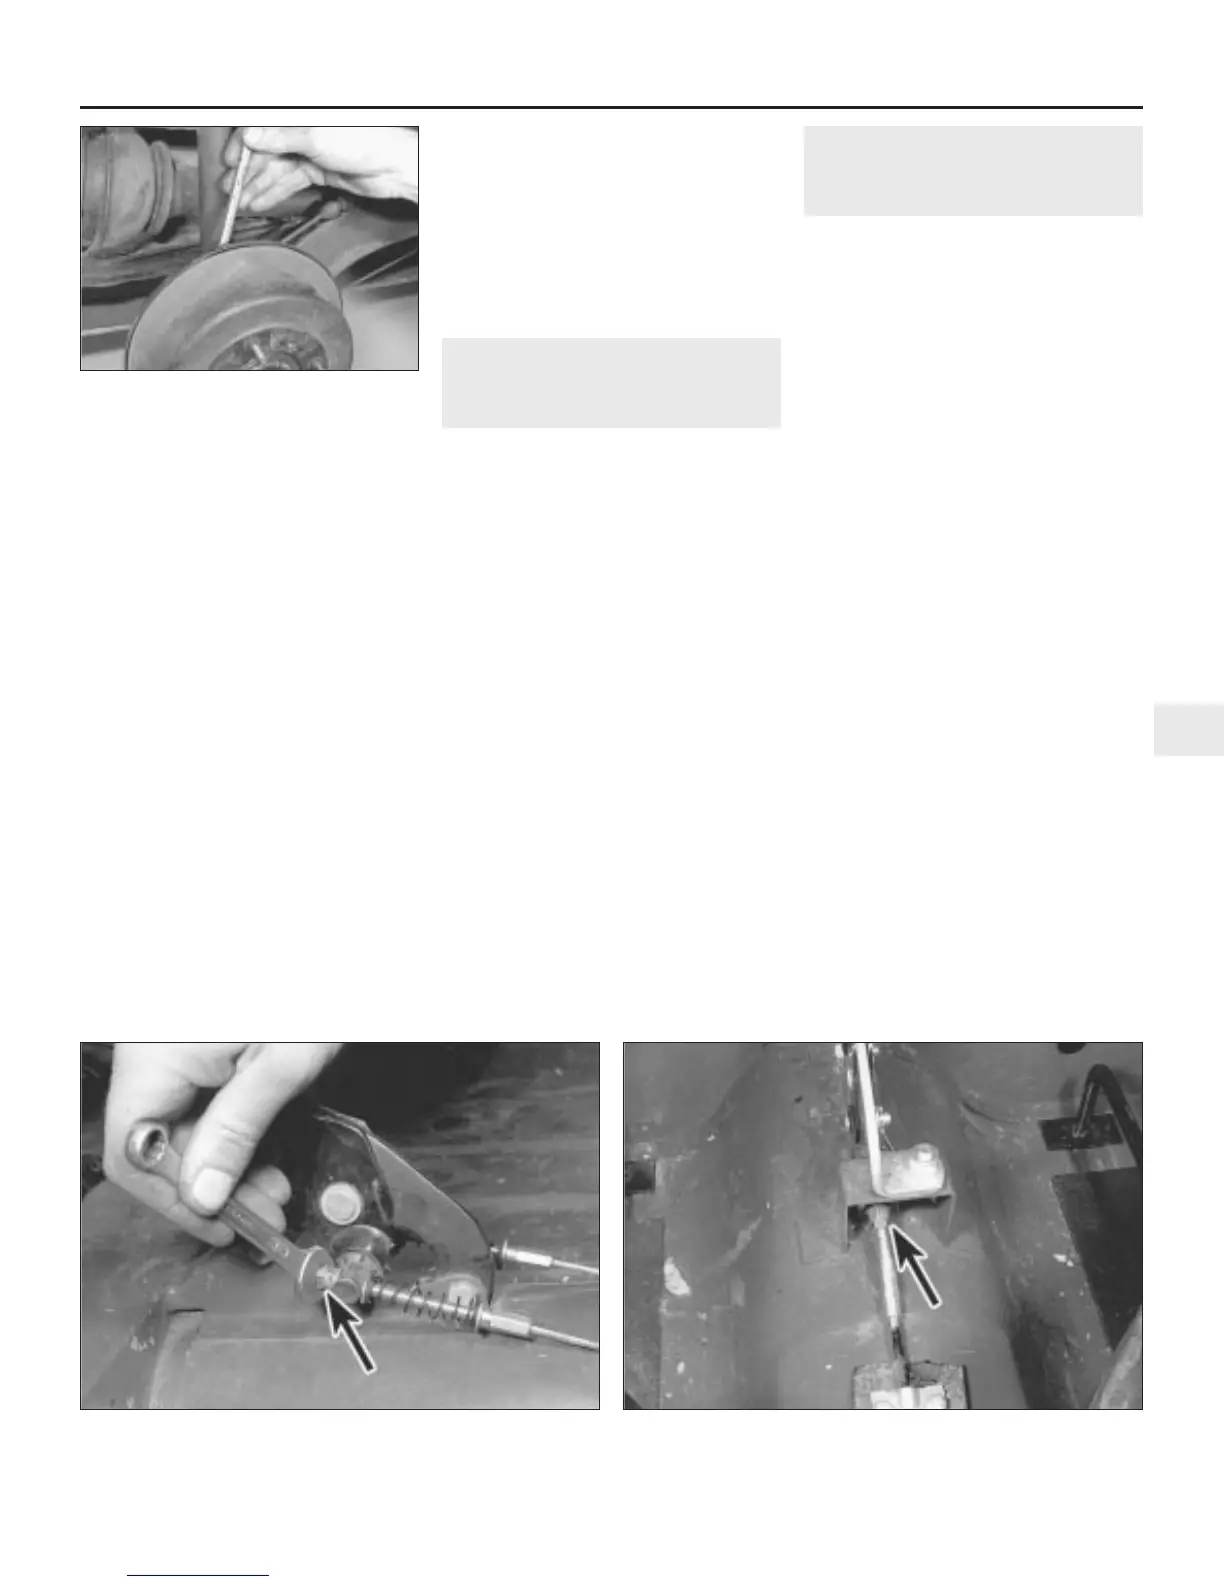
9 Using a brake adjusting spanner, turn the
square-headed adjuster in a clockwise
direction (viewed from the rear of the
backplate) until the wheel is locked (see
illustration). The adjusters on the rear brakes
are even more prone to seizure than those at
the front. If the adjuster is reluctant to turn
attempt to free it off as described above. If
this fails, remove the rear brake drums and
brake shoes as described in Chapter 9, and
clean and lubricate the adjuster thoroughly.
When all is well, refit the brake assemblies
and start the adjustment procedure again.
10 Now turn the adjuster back a quarter of a
turn at a time until the wheel turns freely
without binding. A slight rubbing may be felt
when the wheel is turned slowly, indicating a
high spot on the drum or dust on the linings.
This is acceptable providing the drum does
not bind.
11 Repeat this procedure for the other rear
brake then, before lowering the car to the
ground, check the handbrake adjustment as
described in the following Section.
4 Handbrake check and
adjustment
2
1 Adjustment of the handbrake cables is
usually only necessary after high mileage
when a slight stretching of the cables will have
taken place, or if the cables have been
removed.
2 Before adjusting the handbrake check that
the footbrake is correctly adjusted as
described in Section 3.
3 Chock the front wheels then jack up the
rear of the car and support it on axle stands
(see “Jacking and vehicle support”).
4 Apply the handbrake lever to the third notch
of the ratchet and check that the rear wheels
are locked. If not, adjust the handbrake as
follows.
5 With the handbrake still applied to the third
click of the ratchet, tilt the front seats forward,
and on models having twin cables, tighten the
cable adjusting nuts at the base of the lever
until the rear wheels can only just be turned
by heavy hand pressure. On models having a
single front cable, slacken the locknut and
rotate the cable adjusting nut. When the
wheels can only just be turned by heavy hand
pressure, tighten the locknut (see
illustrations).
6 Release the handbrake lever and ensure
that the wheels rotate freely. If satisfactory
lower the car to the ground.
5 Steering and suspension
check
2
Steering
1 First check for wear in the steering tie-rod
outer balljoints. Turn the steering to left or
right lock sufficiently to allow the joints to be
observed. Now have an assistant turn the
steering wheel back and forth slightly. If there
is any side movement in the balljoint it must
be renewed. Similarly place your hand over
the rubber gaiter at the end of the rack
housing and feel for any excess free play of
the inner balljoint. If the condition of this joint
is suspect, a further investigation should be
carried out with the gaiter removed as
described in Chapter 10.
2 Check the tightness of the steering column
clamp bolt at the base of the column. Any
slackness at this joint can also show up as
free play at the steering wheel.
Front suspension
3 To inspect the front suspension, chock the
rear wheels then jack up the front of the car
and support it on axle stands (see “Jacking
and vehicle support”).
4 Visually inspect the balljoint dust covers
and the steering gear gaiters for splits, chafing
or deterioration. Any wear of these
components will cause loss of lubricant,
together with dirt and water entry, resulting in
rapid deterioration of the balljoints or steering
gear.
5 Grasp the roadwheel at the 12 o’clock and
6 o’clock positions and try to rock it. If any
movement is felt it is likely to be in one or
more of the following areas:
Hub bearings
6 Continue rocking the wheel while your
assistant depresses the footbrake. If the
Every 3000 miles or 3 months 1•9
1
3.9 Adjusting the rear brakes
4.5a Handbrake adjustment on models with twin cables 4.5b Handbrake cable adjusting nut on models with a
single front cable
 Loading...