14 Starter motor - testing and
overhaul
5
If the starter motor is thought to be suspect,
it should be removed from the vehicle and
taken to an auto-electrician for testing. Most
auto-electricians will be able to supply and fit
brushes at a reasonable cost. However, check
on the cost of repairs before proceeding as it
may prove more economical to obtain a new
or exchange motor.
Renewal of the solenoid and, on the inertia
type starter motor the drive pinion assembly,
is described in the following Sections.
15 Drive pinion assembly
(inertia type starter) -
removal and refitting
3
Removal
1 With the starter motor removed from the
car (Section 13) use a starter motor pinion
compressor tool (available from automobile
accessory stores), to compress the
mainspring until sufficient clearance exists to
enable the circlip on the end of the shaft to be
removed. Remove the pinion compressor and
then slide off the locating washer and
mainspring.
2 Slide the remaining parts off the armature
shaft with a rotary action.
3 Examine the teeth of the drive pinion that
engage with the flywheel ring gear. If they are
badly worn on their leading edge, renew the
pinion assembly. Bear in mind that if the drive
pinion teeth are worn, the teeth on the
flywheel ring gear are likely to be in a similar
condition.
4 Inspect the remainder of the drive pinion
components and renew the assembly if any
are worn.
Refitting
5 Refitting the drive pinion is the reverse
sequence to removal. Note: It is most
important that the drive pinion components
are completely free from oil, grease and dirt
before reassembly. Under no circumstances
should any of the parts be lubricated, as this
will attract dust from the clutch which could
cause the drive pinion to stick.
16 Starter solenoid - removal
and refitting
1
Removal
Remotely mounted solenoid (inertia
type starter)
1 Disconnect the battery negative lead.
2 Carefully ease back the rubber covers to
gain access to the terminals (see illustration).
3 Make a note of the Lucar terminal
connectors and detach these terminals.
4 Undo and remove the heavy duty cable
terminal connection nuts and spring washers.
Detach the two terminal connectors.
5 Undo and remove the two securing screws
and lift away the solenoid.
Integral solenoid (pre-engaged type
starter)
6 Remove the starter motor as described in
Section 13.
7 Undo the nut and disconnect the lead at the
lower terminal on the solenoid.
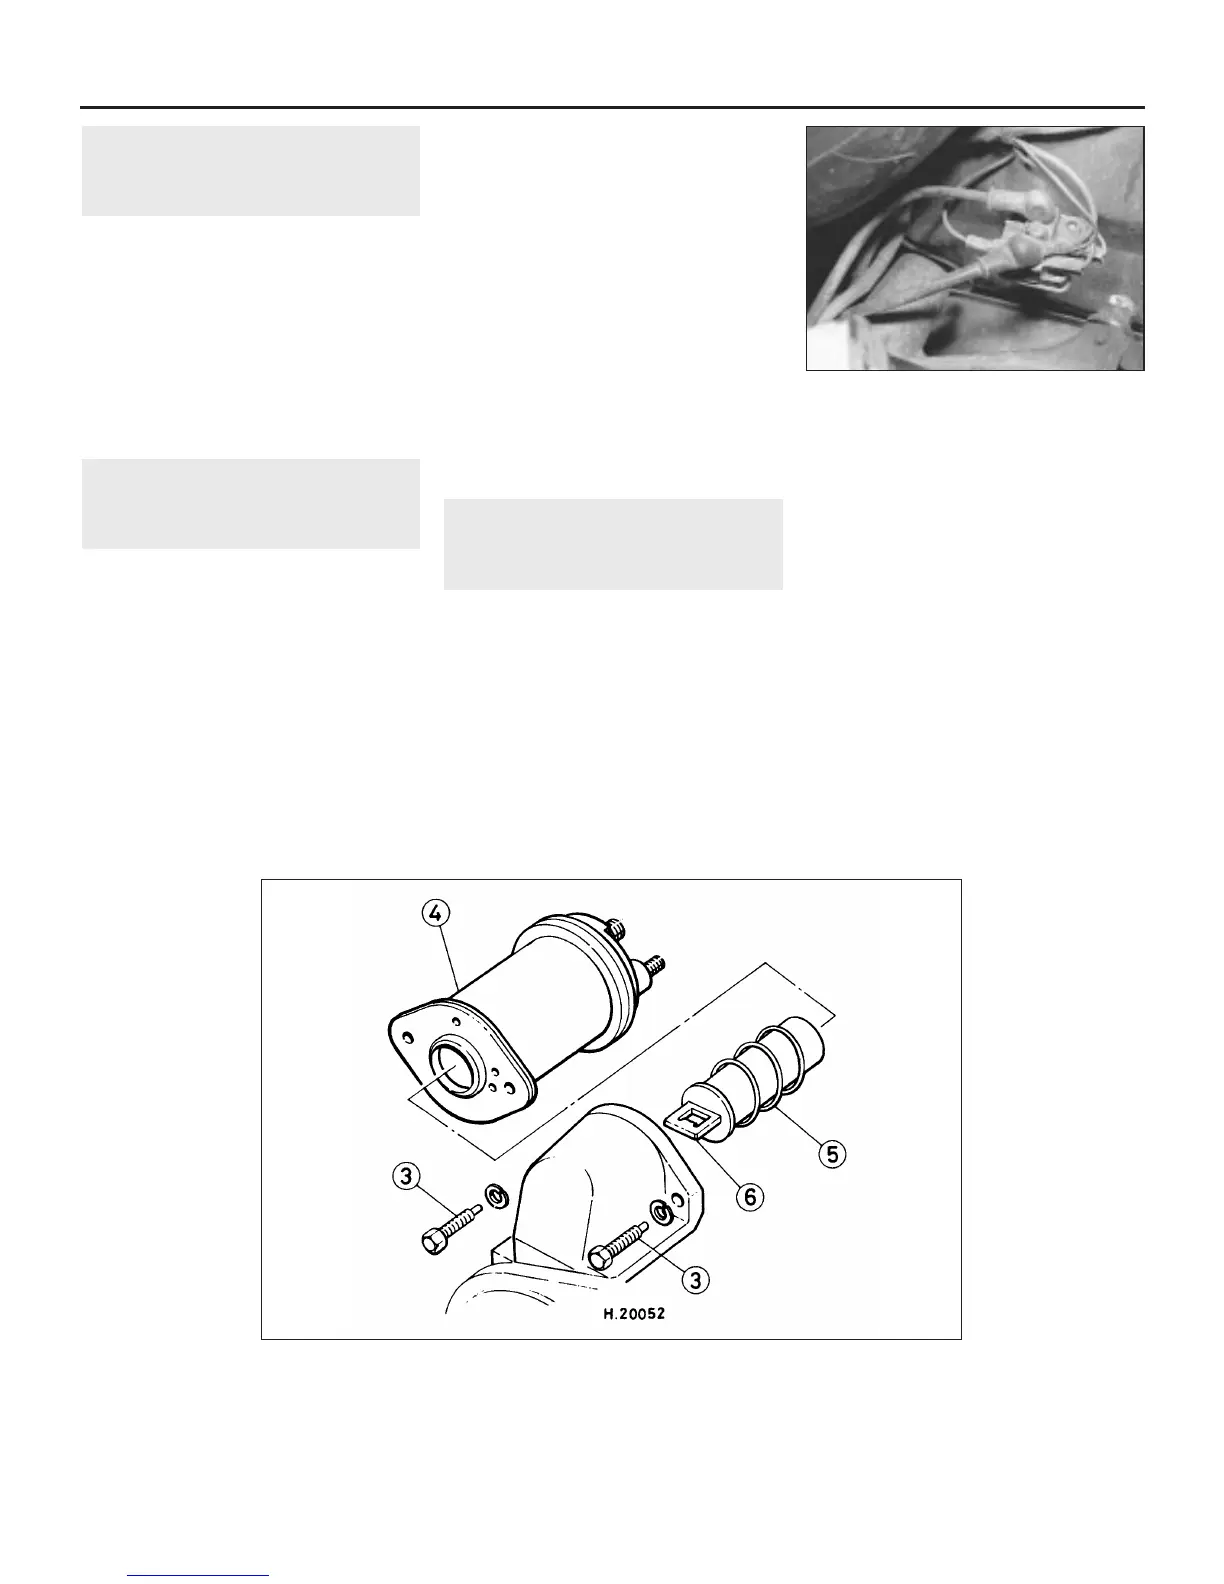
8 Undo the two bolts and remove the
solenoid yoke (see illustration).
9 Withdraw the plunger spring, unhook the
plunger from the starter operating lever and
remove the plunger.
Refitting
10 In all cases, refitting is the reverse
sequence to removal.
5A•8 Starting and charging systems
16.2 Electrical connections at the starter
solenoid
16.8 Pre-engaged starter solenoid removal
3 Retaining bolts 4 Solenoid yoke 5 Plunger spring 6 Plunger
 Loading...