b) Do not allow any grease or hydraulic fluid
to come into contact with the brake shoe
linings.
c) Ensure that the shoes are refitted
correctly and the return springs are in
their correct holes. Ensure that the lower
rear return spring does not rub on the
wheel hub when refitted.
d) Repeat all the above operations on the
opposite rear brake.
e) With the brake shoes assembled and
drums refitted, adjust the brakes as
described in Chapter 1.
6 Drum brake wheel cylinder -
removal, overhaul and refitting
3
Note: Before starting work, refer to the
warning at the beginning of Section 2
concerning the dangers of hydraulic fluid, and
to the warning at the beginning of Section 5
concerning the dangers of asbestos dust.
Removal
Front wheel cylinder
1 Remove the brake shoes from the relevant
wheel as described in Section 5.
2 Thoroughly clean the rear of the backplate
in the area around the wheel cylinder.
3 Clamp the flexible brake hose leading to the
wheel cylinder with a proprietary brake hose
clamp, or a self-gripping wrench with their
jaws suitably protected. This will minimise
hydraulic fluid loss when the hose or pipe is
disconnected.
4 Disconnect the interconnecting brake pipe
from the rear of the two wheel cylinders.
5 Undo and remove the two bolts securing
each cylinder to the backplate.
6 If removing the cylinder containing the
bleed screw, undo and remove the screw and
lift off the cylinder.
7 If removing the cylinder containing the
flexible brake hose, slacken the hose union at
the wheel cylinder half a turn. Withdraw the
wheel cylinder from the backplate and when it
is clear, turn the cylinder anti-clockwise to
unscrew it from the hose, taking care not to
lose the copper sealing washer.
8 If the hose has not been clamped, suitably
plug its end to prevent fluid loss and dirt
ingress.
Rear wheel cylinder
9 Remove the brake shoes from the relevant
wheel as described in Section 5.
10 Thoroughly clean the rear of the backplate
in the area around the wheel cylinder.
11 Clamp the flexible hose located at the
front of the rear suspension arm with a
proprietary brake hose clamp, or a self-
gripping wrench with its jaws suitably
protected. This will minimise hydraulic fluid
loss when the hydraulic pipe is disconnected.
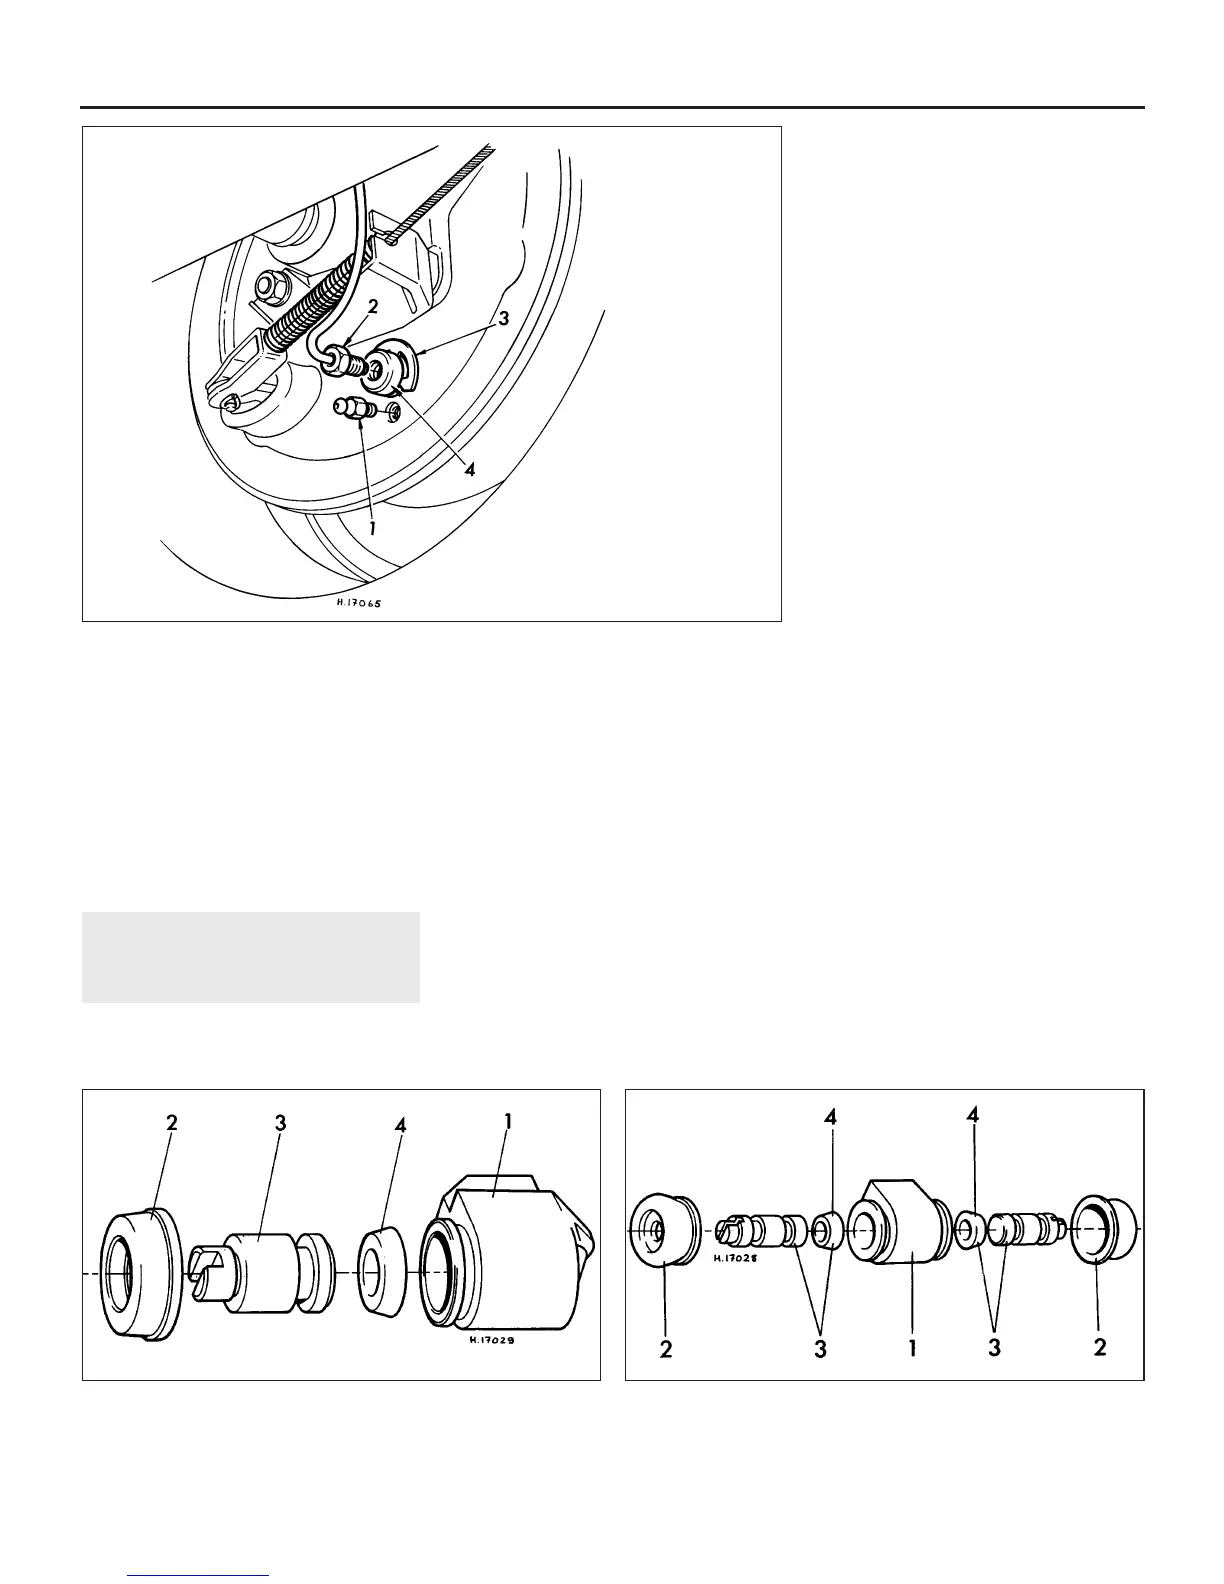
12 Undo and remove the brake bleed screw
and the hydraulic pipe union from the rear of
the wheel cylinder (see illustration). Suitably
protect the end of the brake pipe against dirt
ingress.
13 Using a screwdriver, prise off the retaining
circlip from the rear of the cylinder and then
withdraw the wheel cylinder from the
backplate.
Overhaul
14 Thoroughly clean off the exterior of the
cylinder, then prepare a clean working area on
the bench.
15 Lift off the rubber dust cover(s) from the
end of the wheel cylinder and withdraw the
piston(s) and rubber seal(s), noting their
precise location in relation to each other (see
illustrations).
16 Thoroughly wash the components in
clean hydraulic fluid or methylated spirit and
dry with a lint-free cloth.
17 Carefully inspect the surface of the
piston(s) and the internal bore of the cylinder
body for scoring, pitting or other signs of
wear. If any of these conditions are apparent
the cylinder must be renewed.
9•6 Braking system
6.15a Exploded view of a front wheel cylinder
1 Cylinder body
2 Dust cover
3 Piston
4 Rubber seal
6.15b Exploded view of a rear wheel cylinder
1 Cylinder body
2 Dust covers
3 Piston assemblies
4 Rubber seals
6.12 Rear wheel cylinder
removal
1 Bleed screw
2 Hydraulic pipe union
3 Retaining circlip
4 Wheel cylinder
 Loading...