18 If the wheel cylinder is in a satisfactory
condition, a new set of rubber seals should be
obtained. Never re-use old seals as their
condition is bound to be suspect.
19 To reassemble the wheel cylinder,
immerse the piston and the new internal
rubber seals in clean hydraulic fluid.
20 Carefully fit the seal(s) to the piston(s) with
their lip or larger diameter facing away from
the main part of the piston(s).
21 Slide the piston into the cylinder bore and
then refit the dust cover(s) after first
lubricating with the rubber grease supplied in
the kit.
Refitting
22 Refitting the front and rear wheel cylinders
is the reverse sequence to removal, bearing in
mind the following points:
a) Where a wheel cylinder has been
unscrewed from a flexible hose, use a
new copper washer and ensure that the
hose is not kinked when the cylinder is
refitted.
b) Ensure that the retaining spring circlip is
correctly located in the groove in the rear
wheel cylinder body.
c) After fitting the wheel cylinder and
refitting the brake shoes and drum, bleed
the hydraulic system as described in
Section 2. Providing the hoses were
clamped as instructed, it should only be
necessary to bleed the relevant wheel and
not the entire system.
7 Disc brake pads - renewal
2
Warning: Disc brake pads must
be renewed on both front
wheels at the same time - never
renew the pads on only one
wheel as uneven braking may result. Dust
created by wear of the pads may contain
asbestos, which is a health hazard. Never
blow it out with compressed air and do not
inhale any of it. DO NOT use petroleum-
based solvents to clean brake parts. Use
brake cleaner or methylated spirit only. DO
NOT allow any brake fluid, oil or grease to
contact the brake pads or disc. Also refer
to the warning at the start of Section 2
concerning the dangers of hydraulic fluid.
1 Chock the rear wheels then jack up the
front of the car and support it on axle stands
(see “Jacking and vehicle support”). Remove
the front roadwheels.
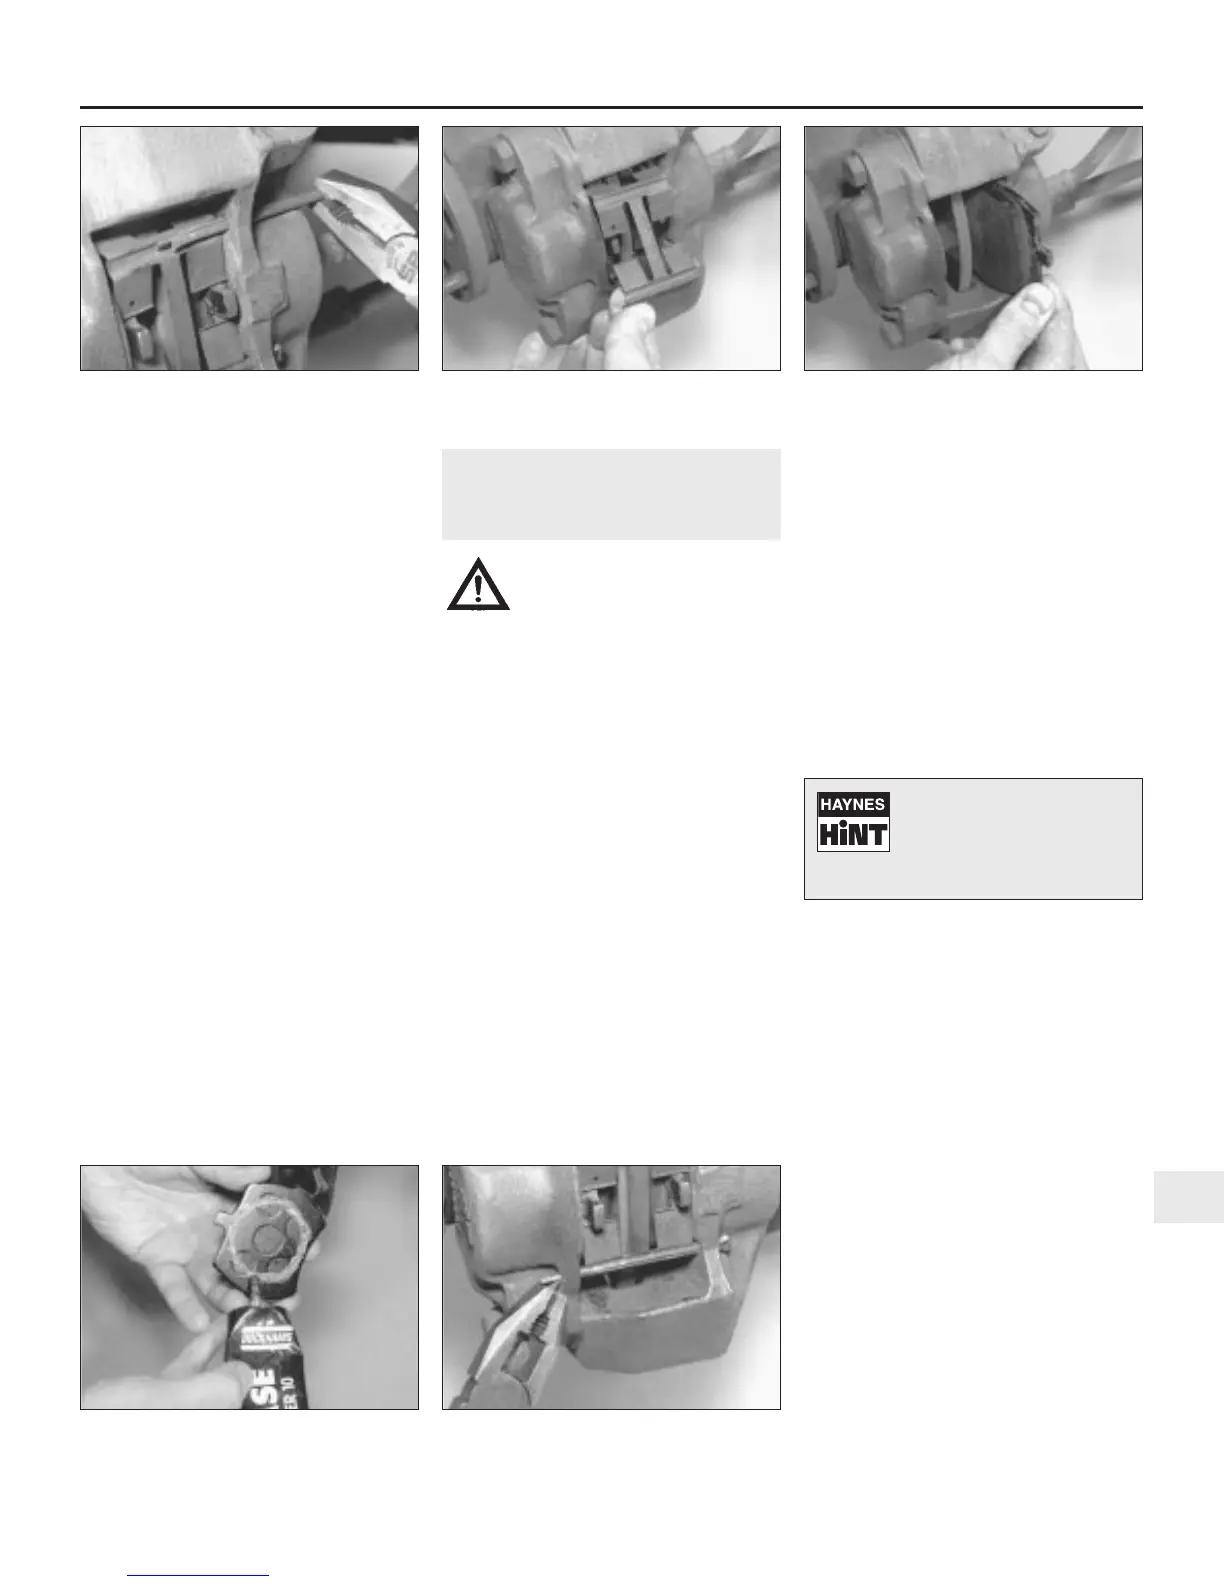
2 Straighten the ends of the two brake pad
retaining split pins then extract the split pins
from the brake caliper (see illustration).
3 Lift away the pad retaining spring plate
then, using a pair of pliers, carefully withdraw
the two brake pads and (where fitted) their
anti-rattle shims from the front of the caliper
(see illustrations).
4 Carefully inspect the pads and renew them
if the friction material has worn down to less
than the minimum specified thickness.
5 Thoroughly clean all traces of dirt and dust
from the recesses in the caliper, in which the
brake pads lie, and the exposed face of each
piston.
6 If new brake pads are being fitted it will be
necessary to move the pistons back into the
caliper to accommodate the new, thicker
pads. This will cause a quantity of hydraulic
fluid to be returned to the master cylinder
reservoir, causing the fluid level to rise and
possibly overflow. To protect the surrounding
paintwork, remove the reservoir filler cap and
place a large rag beneath the reservoir to
absorb any fluid that may overflow.
Alternatively, siphon off a quantity of fluid
from the reservoir first.
7 Using a flat bar or large screwdriver, lever
the piston in each half of the caliper, back into
its cylinder as far as it will go.
8 Smear a small amount of high-temperature
anti-seize grease onto the edges and rear of
the pad backing plates which contact the
calipers and pistons (see illustration). Do not
allow any grease onto the friction material of
the brake pads.
9 Check that the cutaway face of each piston
is facing upwards and then place the anti-
rattle shims in position.
10 Slide in the brake pads, refit the pad
retaining spring plate, then secure the
assembly using new split pins. Spread the
ends of the split pins to retain them in position
(see illustration).
11 Depress the brake pedal several times (it
will probably go right to the floor on the first
stroke), to centralise the pads, and then check
that the disc turns reasonably freely with the
pedal released.
12 Repeat the above operations on the other
front brake.
13 Refit the roadwheels and lower the car to
the ground.
Braking system 9•7
9
7.2 Extract the brake pad split pins from
the caliper
7.3a Lift away the pad retaining spring
plate . . .
7.3b . . . then withdraw the two brake pads
7.8 Smear high-temperature anti-seize
grease to the pad backing plates
7.10 Spread the ends of the split pins to
retain them in position
An ideal way to remove fluid
from the master cylinder
reservoir is to use a clean
syringe or an old poultry
baster.
 Loading...