10 Handbrake cable - removal
and refitting
3
Early models
Removal
1 Chock the front wheels then jack up the
rear of the car and support it on axle stands
(see “Jacking and vehicle support”). Remove
the rear roadwheel and ensure that the
handbrake is off.
2 From inside the car, undo and remove the
cable adjusting nut at the handbrake lever,
then pull the cable out of the lever trunnion.
Slide the two washers and tension spring off
the threaded end of the cable.
3 Lift up the carpets to expose the cable
guide plates located at the point where the
cable passes through the floor.
4 Engage the help of an assistant to hold the
two nuts from underneath the car while the
two cable guide retaining screws are removed
from above. Lift off the guide and sealing pad.
5 From beneath the car, pull the end of the
cable through the opening in the floor and out
of the passenger compartment.
6 Bend back the tags slightly on the guide
channel located on the forward crossmember
of the rear subframe. Lift the cable out of the
guide channel.
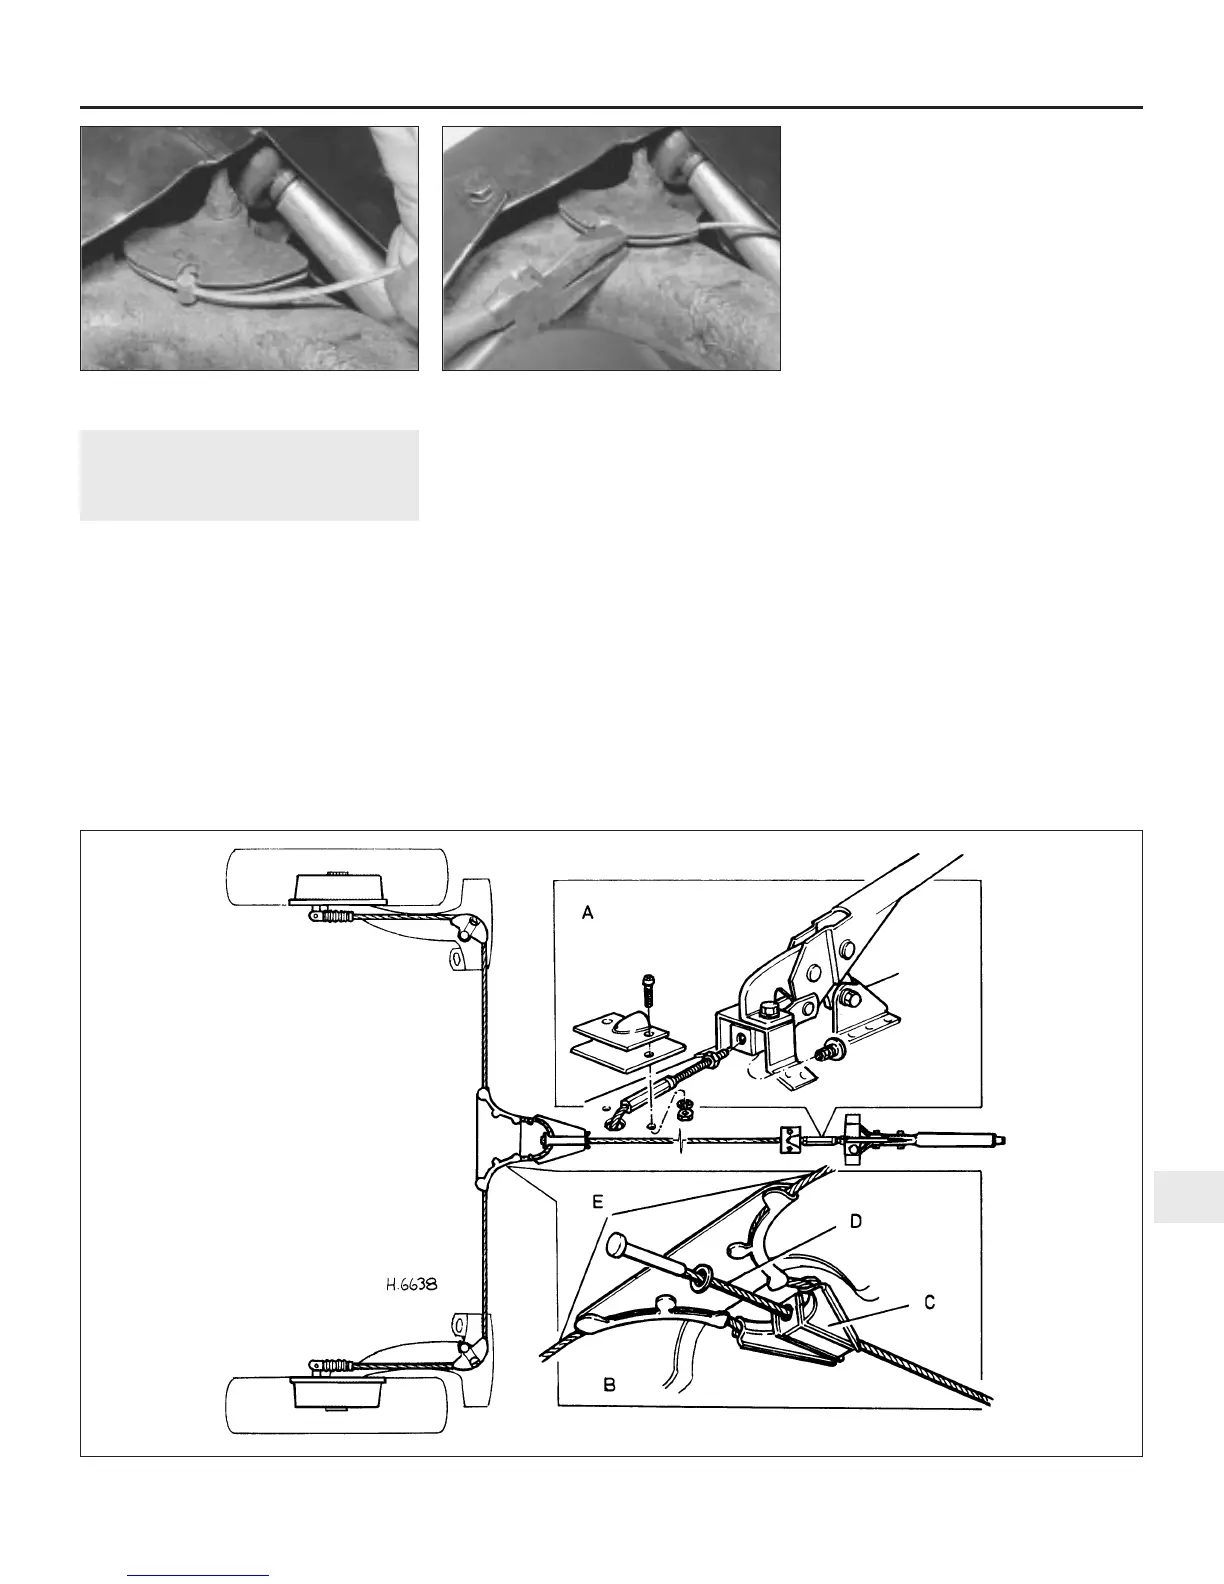
7 Similarly bend up the pinched ends of the
moving sector located at the front of the rear
suspension arm. Lift the cable and the
locating peg out of the sector (see
illustration), and then pull the disconnected
end of the cable through the opening in the
side of the subframe.
8 At the other end of the cable, extract the
split pin and withdraw the clevis pin securing
the cable end to the handbrake operating
arm.
9 Release the cable from the abutment
bracket at the rear of the brake backplate and
lift the cable off the car.
Refitting
10 Refitting the cable is the reverse
sequence to removal, bearing in mind the
following points:
a) With the cable in position, pinch the ends
of the moving sector and subframe guide
channel slightly to retain the cable (see
illustration).
b) Ensure that the guide channel in the
subframe is well lubricated.
c) Adjust the handbrake as described in
Chapter 1 on completion.
Later models - front cable
Removal
11 Chock the front wheels then jack up the
rear of the car and support it on axle stands
(see “Jacking and vehicle support”). Remove
the rear roadwheel and ensure that the
handbrake is off.
12 Tilt the front seats forward and lift up the
carpet around the handbrake lever.
13 Slacken the locknut, and then unscrew
the cable adjusting nut until the cable can be
withdrawn from the lever assembly (see
illustration).
Braking system 9•9
9
10.7 Removing the handbrake cable from
the moving sector
10.10 Pinching the ends of the moving
sector to retain the handbrake cable
10.13 Handbrake cables and lever
assembly fitted to later models
A Front cable adjustment detail
B Rear cable and compensator detail
C Compensator
D Front cable
E Rear cable
 Loading...