3 Using a small screwdriver, carefully ease up
one end of the finishing strip from its groove in
the windscreen sealing rubber and then pull
the entire length of the strip out of the rubber.
4 If an undamaged windscreen is being
removed, from inside the car firmly push the
screen outwards, starting at one of the top
corners. Carefully remove the complete
windscreen from the sealing rubber and lift if
off the car. Withdraw the sealing rubber from
the windscreen aperture in the body.
5 If a shattered windscreen is being removed,
lay some old blankets or sheets over the
bonnet and in the car interior, making sure
that the demister vents are well covered.
Break the remaining glass onto the blankets
or sheets, and then withdraw the sealing
rubber from the windscreen aperture. Discard
the shattered glass and clean up any
fragments using a vacuum cleaner.
Refitting
6 To fit the windscreen, first inspect the
sealing rubber for hardness or deterioration
and renew if necessary. It is advisable to
renew the sealing rubber as a matter of
course when fitting a new windscreen.
7 Position the sealing rubber over the
windscreen, and then insert a length of string,
around the circumference of the rubber,
ensuring that it seats into the body flange
groove of the rubber. Position the string so
that the two ends protrude by at least 300 mm
at the bottom centre of the screen.
8 Mix a concentrated soap and water solution
and apply it liberally to the flange of the
windscreen aperture.
9 Place the windscreen and rubber seal in
position on the car, and engage the help of an
assistant to apply firm pressure to the outside
of the screen. From inside the car use the
string to pull the rubber lip over the body
flange, working slowly around the screen until
the string has been fully withdrawn.
10 Starting at the top centre of the rubber
seal, use a wide-bladed screwdriver to spread
the lips of the seal, while at the same time
pressing the finishing strip into place. Work
around the entire circumference of the
windscreen in this way.
11 With the screen in position and the
finishing strip fitted, the wiper arms can now
be refitted to their spindles, and the mirror
(where fitted) re-secured using a suitable
adhesive.
22 Rear window (Saloon and
Pick-up models) - removal
and refitting
3
The removal and refitting procedure for the
rear window or its sealing rubber is the same
as described in Section 21 for the windscreen.
On later models, it will also be necessary to
disconnect the electrical supply and earth
leads to the heated rear window element
before removal.
23 Rear door window (Estate
and Van models) - removal
and refitting
3
The removal and refitting procedure for the
rear door window or its sealing rubber is the
same as described in Section 21 for the
windscreen. Note, however, that the sealing
rubber does not incorporate a finishing strip.
24 Rear quarterlight glass
(Saloon models) - removal
and refitting
2
Hinged type
Removal
1 Open the window and then undo and
remove the screws securing the catch to the
body.
2 With the window supported, undo and
remove the screws securing the hinge(s) to
the body pillar.
3 Lift away the window, and if required undo
and remove the retaining screw and window
glass surround.
Refitting
4 Refitting is the reverse sequence to
removal.
Fixed type
5 Removal and refitting of the fixed type
window follows the same procedure as
described for the windscreen in Section 21.
Note, however, that the sealing rubber does
not incorporate a finishing strip.
25 Rear side screen window
(Estate models) - removal
and refitting
2
Removal
1 Carefully remove the trim panel from above
the windows.
2 Undo and remove the screw securing the
fixed window locking peg and withdraw the peg.
3 Undo and remove the screws securing the
front, upper, and rear glazing channels and lift
out the front and rear channels.
4 Slide the windows toward the front of the
car and then pull down the rear of the upper
channel to release it from the window frame.
5 Now slide the windows and upper channel
rearwards to release the front of the upper
channel, and then carefully remove the
channel and windows.
Refitting
6 Refitting is the reverse sequence to
removal.
26 Wooden facia - removal and
refitting
3
Removal
1 Disconnect the battery negative lead.
2 Open the doors, and carefully release the
door seal weatherstrip from the area near the
ends of the facia.
3 Remove the complete steering column
assembly as described in Chapter 10.
4 Remove the fresh air vent assemblies from
both sides of the facia as described in
Chapter 3.
5 Remove the radio as described in Chapter 12.
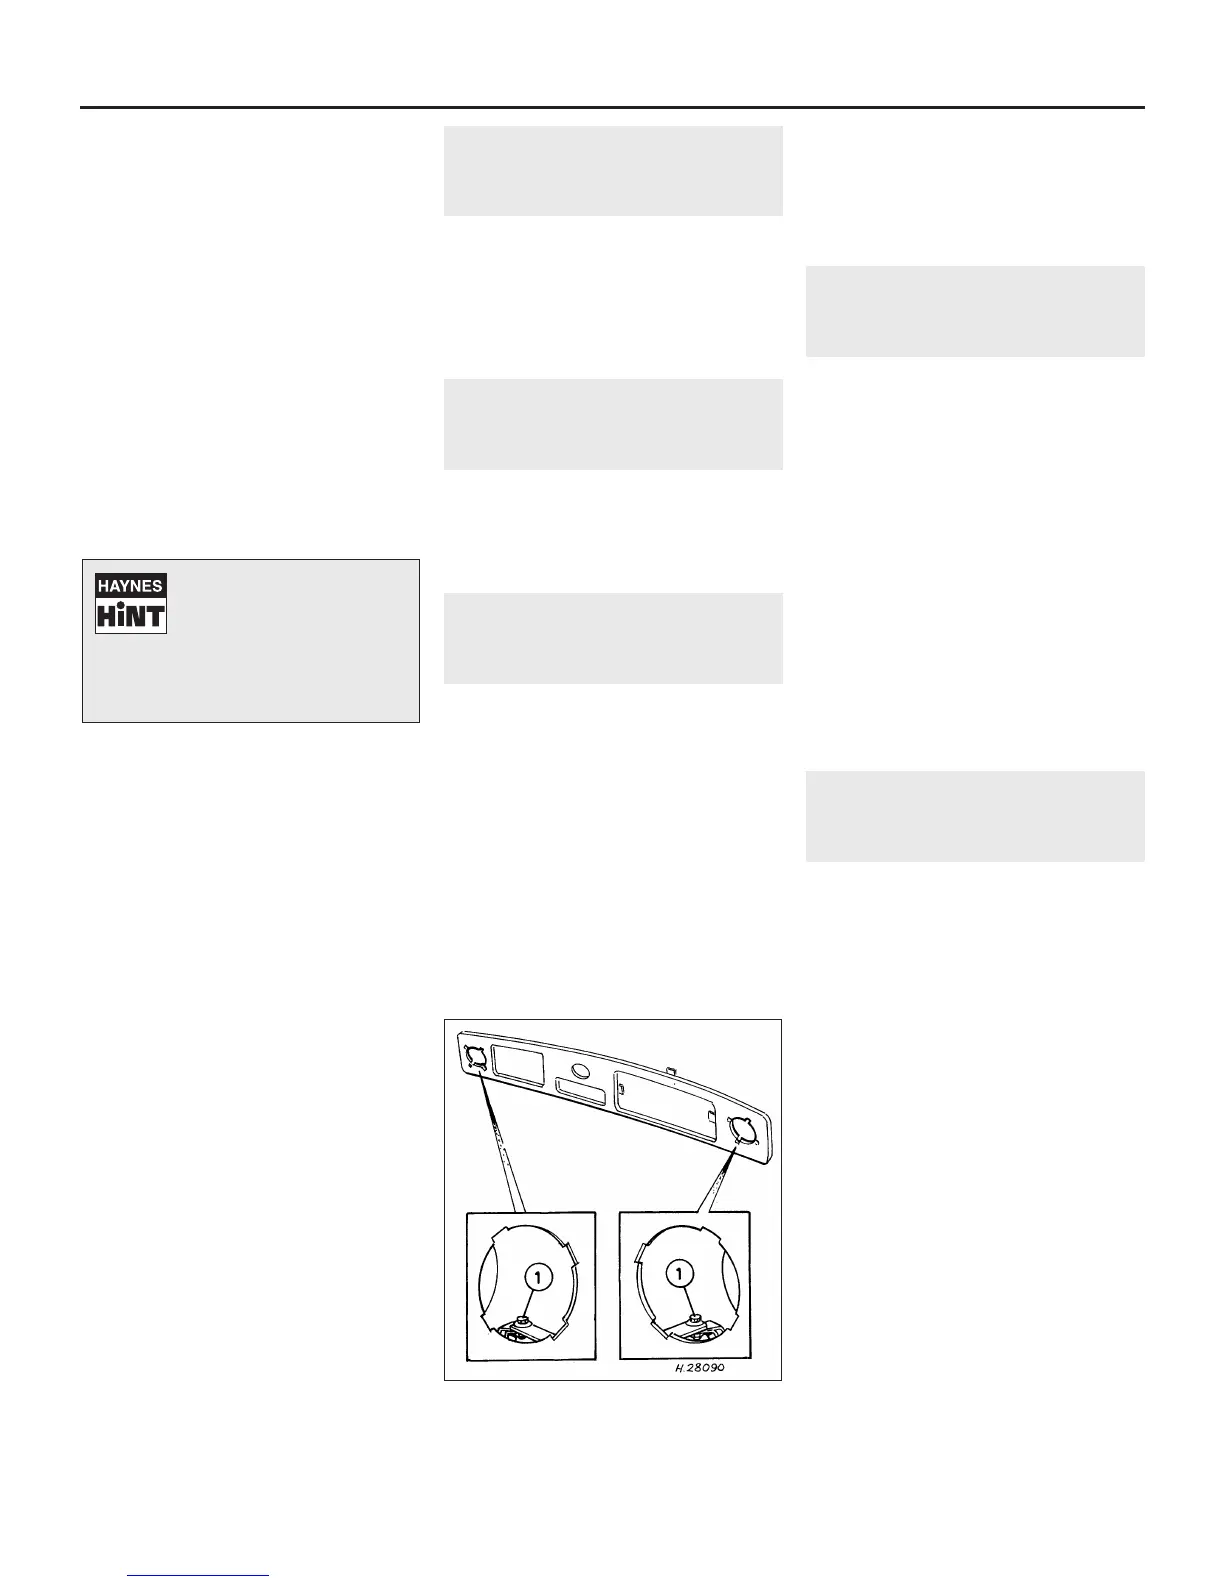
6 Working through the fresh air vent
apertures, slacken the two bolts, one each
side, securing the facia mounting brackets
(see illustration).
7 Release the facia and withdraw it forward
from its location.
8 Disconnect the wiring to the glovebox light,
clock and instruments, then remove the facia
from the car.
9 The glovebox can be removed, if desired,
by undoing the screws securing the lid hinges
and the glovebox liner, and lifting these
components away (see illustration).
10 The instrument panel can be removed by
undoing the 12 screws securing the panel to
the rear of the facia and lifting away, complete
with instruments. Removal of the instruments
from the panel is as described in Chapter 12.
11•10 Bodywork and fittings
26.6 Wooden facia attachment points
1 Inset shows mounting bracket locations
accessible through fresh air vent apertures
When cleaning up after a
shattered windscreen,
operate the heater in all
positions with the fan motor
running to dislodge any trapped glass,
but watch out for flying fragments
which may be blown out of the ducting.
 Loading...