12 To renew either item, first disconnect the
battery negative lead.
13 Carefully prise the wiring connector from
the pump.
14 Pull the reservoir upwards from its
retaining bracket. Drain the fluid into a
container.
15 Release the washer tube from the pump.
The reservoir can now be removed completely.
16 Detach the pump from the reservoir.
Refitting
17 Refitting is the reverse sequence to
removal, noting the following:
a) Use a new pump seal. Fit the seal in the
reservoir and lubricate it before refitting
the pump.
b) If the washer tube is difficult to replace
onto the pump, soften it by immersing it
in hot water for a few minutes.
c) Top-up the reservoir with reference to
“Weekly Checks” and test the operation
of the washers.
15 Instrument panel - removal
and refitting
2
Models with central instrument
panel (except Mini 850)
Removal
1 Disconnect the battery negative lead.
2 Carefully ease out the trim panels at the
rear of the facia on either side of the
instrument panel.
3 Fold back the parcel shelf cover around the
front of the instrument panel.
4 Slacken the nut securing the heater unit to
the rear mounting bracket. Undo and remove
the two screws securing the front of the
heater to the parcel shelf and lower the unit to
the floor.
5 Undo and remove the screws securing the
instrument panel to the facia.
6 Working in the engine compartment,
remove the air cleaner as described in the
relevant Part of Chapter 4.
7 Unscrew the knurled nut securing the
speedometer cable to the rear of the
speedometer and withdraw the cable.
8 Remove the clip that secures the oil
pressure gauge pipe to the engine
compartment bulkhead.
9 From inside the car draw the instrument
panel away from the facia and disconnect the
wires and bulb holders from the rear of the
instruments. Label each wire as it is removed
to prevent confusion when refitting.
10 Unscrew the union nut and release the oil
pipe from the rear of the oil pressure gauge.
11 Unscrew the knurled retaining nuts and lift
out the instruments.
12 Undo and remove the two securing
screws and lift out the speedometer and
sealing ring.
13 If required, the fuel gauge and voltage
stabiliser may be removed from the rear of the
speedometer after removing the retaining
screws and nuts.
Refitting
14 Reassembly and refitting of the
instruments and panel is the reverse
sequence to dismantling and removal.
Mini 850 models
Removal
15 Disconnect the battery negative lead.
16 Working in the engine compartment,
remove the air cleaner as described in the
relevant Part of Chapter 4.
17 Withdraw the sound insulation from
speedometer aperture.
18 Unscrew the knurled retaining nut and
detach the speedometer cable from the rear
of the speedometer (see illustration).
19 Disconnect the wires from the fuel gauge
and voltage stabiliser. Label each wire as it is
removed to prevent confusion when refitting.
20 Note the locations of the bulb holders and
remove them from the rear of the
speedometer.
21 Disconnect the earth wire.
22 From inside the car undo and remove the
two screws securing the speedometer to the
cowling and then lift out the speedometer.
Refitting
23 Refitting is the reverse sequence to
removal.
Models with offset instrument
panel
Removal
24 Disconnect the battery negative lead.
25 Hold both sides of the instrument nacelle
and carefully pull it off the instrument cluster
(see illustration). On some models the
nacelle is secured by screws.
26 Remove the upper plastic trim strip to
gain access to the panel upper retaining
screws.
27 Undo and remove the side and upper
retaining screws securing the instrument panel
to the mounting brackets (see illustrations).
12•14 Body electrical system
15.25 Remove the instrument cluster
nacelle
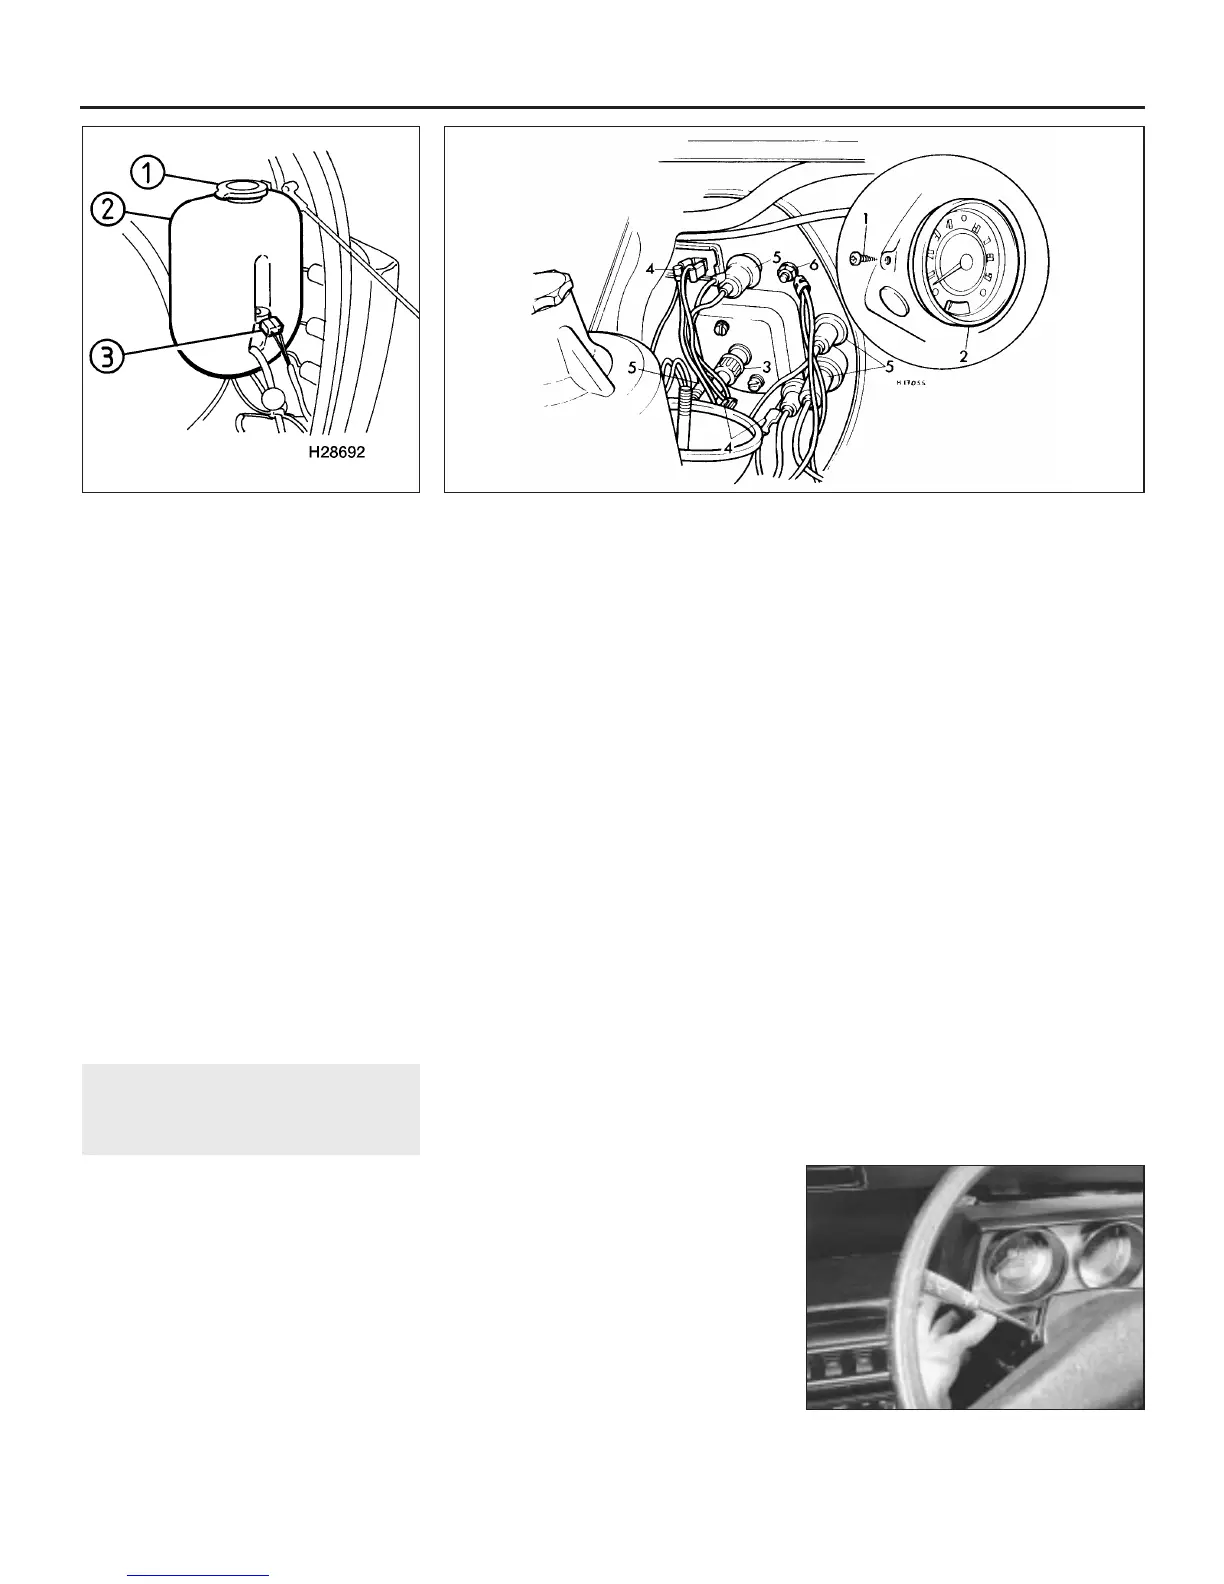
14.11 Washer pump and reservoir location
in the luggage compartment on later
models
1 Filler cap
2 Reservoir
3 Pump and wiring
multiplug
15.18 Instrument panel removal - 850 models
1 Retaining screw
2 Instrument panel
3 Speedometer cable
4 Wiring connectors
5 Bulb holders
6 Earth lead
 Loading...