14 Having released the mounting, jack up the
power unit sufficiently to enable the nine bolts
securing the converter housing cover to be
removed. Note that on early models one of
the front bolts also retains the engine earth
strap. On all models the rear bolts are quite
inaccessible, requiring a good deal of
patience and a short spanner.
15 When all the bolts are undone, lift off the
converter housing cover.
16 Knock back the locktabs, and undo and
remove three equally spaced bolts from the
centre of the converter. Leave the other three
bolts in position.
17 Knock back the lockwasher securing the
large converter centre retaining bolt. Using a
large socket and bar, undo and remove the
torque converter centre bolt and withdraw the
driving collar. Use a screwdriver inserted
through the hole in the top of the converter
housing and engaged with the ring gear teeth
to prevent the torque converter from turning.
18 Rotate the crankshaft until the timing
marks on the converter periphery are at
approximately the 3 o’clock position.
19 The torque converter is a taper fit on the
end of the crankshaft and it will be necessary
to obtain Rover special tool 18G1086 to
remove it. The tool is bolted to the torque
converter through the holes of the three
previously removed converter retaining bolts.
With the adapter in position on the end of the
crankshaft, tighten the tool centre bolt until
the torque converter breaks free of the taper,
and then lift it off the crankshaft.
Refitting
20 Set the engine with No 1 piston at TDC on
compression as described in Section 3.
21 Before fitting the torque converter, it will be
first necessary to refit the three central bolts
removed to allow the special converter removal
tool to be used during dismantling. Then
remove each pair of bolts in turn from the
converter centre and fit new locking plates.
Tighten the six bolts to the specified torque
wrench setting and bend over the lock tabs. On
no account remove all six bolts at any one time.
22 Slide the torque converter onto the end of
the crankshaft, with the timing marks
uppermost. Refit the driving collar, a new
lockwasher and the retaining bolt. Tighten the
retaining bolt to the specified torque then
knock back the lockwasher.
23 The remainder of refitting is the reverse
sequence to removal.
12 Engine/transmission
mountings - renewal
3
General information
1 The engine/transmission is supported on
two rubber mountings which are in turn bolted
to the sides of the front subframe. One
mounting is located under the radiator (left-
hand mounting), and the other at the base of
the flywheel or torque converter housing cover,
to which it is attached (right-hand mounting).
Fore-and-aft movement of the power unit is
controlled by a tie-bar, one end of which is
attached to the engine, and the other to a
bracket on the bulkhead. Rubber bushes are
used at each end to absorb vibration. On later
models an additional lower tie-bar is used, one
end of which is bolted to the subframe and the
other to a bracket on the transmission. A point
worth noting is that the engine tie-bar rubber
bushes are prone to wear and this is usually
noticed as severe judder as the clutch is
engaged on manual transmission models, or
excessive movement of the complete power
unit when accelerating and decelerating.
Right-hand mounting renewal
2 Chock the rear wheels then jack up the
front of the car and support it on axle stands
(see “Jacking and vehicle support”).
3 Disconnect the battery negative lead. If
greater working clearance is required, remove
the bonnet as described in Chapter 11.
4 Remove the front grille, referring to Chap-
ter 11 if necessary.
5 Detach the heater air duct from the air inlet
under the right-hand front wing. Remove the
air inlet from the inner wing panel.
6 Remove the starter motor as described in
Chapter 5A.
7 On fuel injection models carry out the
following:
a) Remove the air cleaner assembly, the
engine management ECU and the
crankshaft sensor as described in Chapter
4B.
b) Disconnect the oil separator breather
hose from the right-hand end of the
cylinder head, then undo the two bolts
securing the separator to the
flywheel/torque converter housing.
Remove the separator and hose assembly
from the engine, along with its gasket.
c) Slacken and remove the screw, situated
just to the right of the brake servo unit,
securing the earth leads to the bulkhead.
d) Undo the bolts securing the wiring
harness retaining clip and starter motor
lead brackets to the flywheel/converter
housing, then position the wiring clear of
the engine.
8 On early models, undo and remove the
screws securing the starter solenoid to the
inner wing panel. Lift off the solenoid and
position it out of the way.
9 If the ignition coil is mounted on the
flywheel/converter housing, or on a bracket
secured to one of the cylinder head studs,
remove the coil and mounting bracket and
position it well clear.
10 On manual transmission models, detach
the clutch slave cylinder mounting plate from
the flywheel housing, taking care to retain the
spacer. Withdraw the cylinder from the
pushrod and place the cylinder and mounting
plate to one side.
11 On later Mini 850 and 1000 models,
remove the horn and place it to one side.
12 Undo and remove the two bolts securing
the engine tie-bar and bracket to the side of
the cylinder block. Note that on later models
one of the bolts also retains the engine earth
strap.
13 Undo and remove the nuts and/or bolts
securing the radiator upper support bracket to
the radiator and thermostat housing.
Withdraw the bracket. Note: It is not
necessary to remove the support bracket if a
large clearance exists between the radiator
and left-hand inner wing panel, as is the case
on later Mini 850 and 1000 models.
14 Place a jack beneath the flywheel/torque
converter housing end of the transmission
casing and just take the weight of the power
unit. Use a block of wood interposed between
the casing and the jack to spread the load.
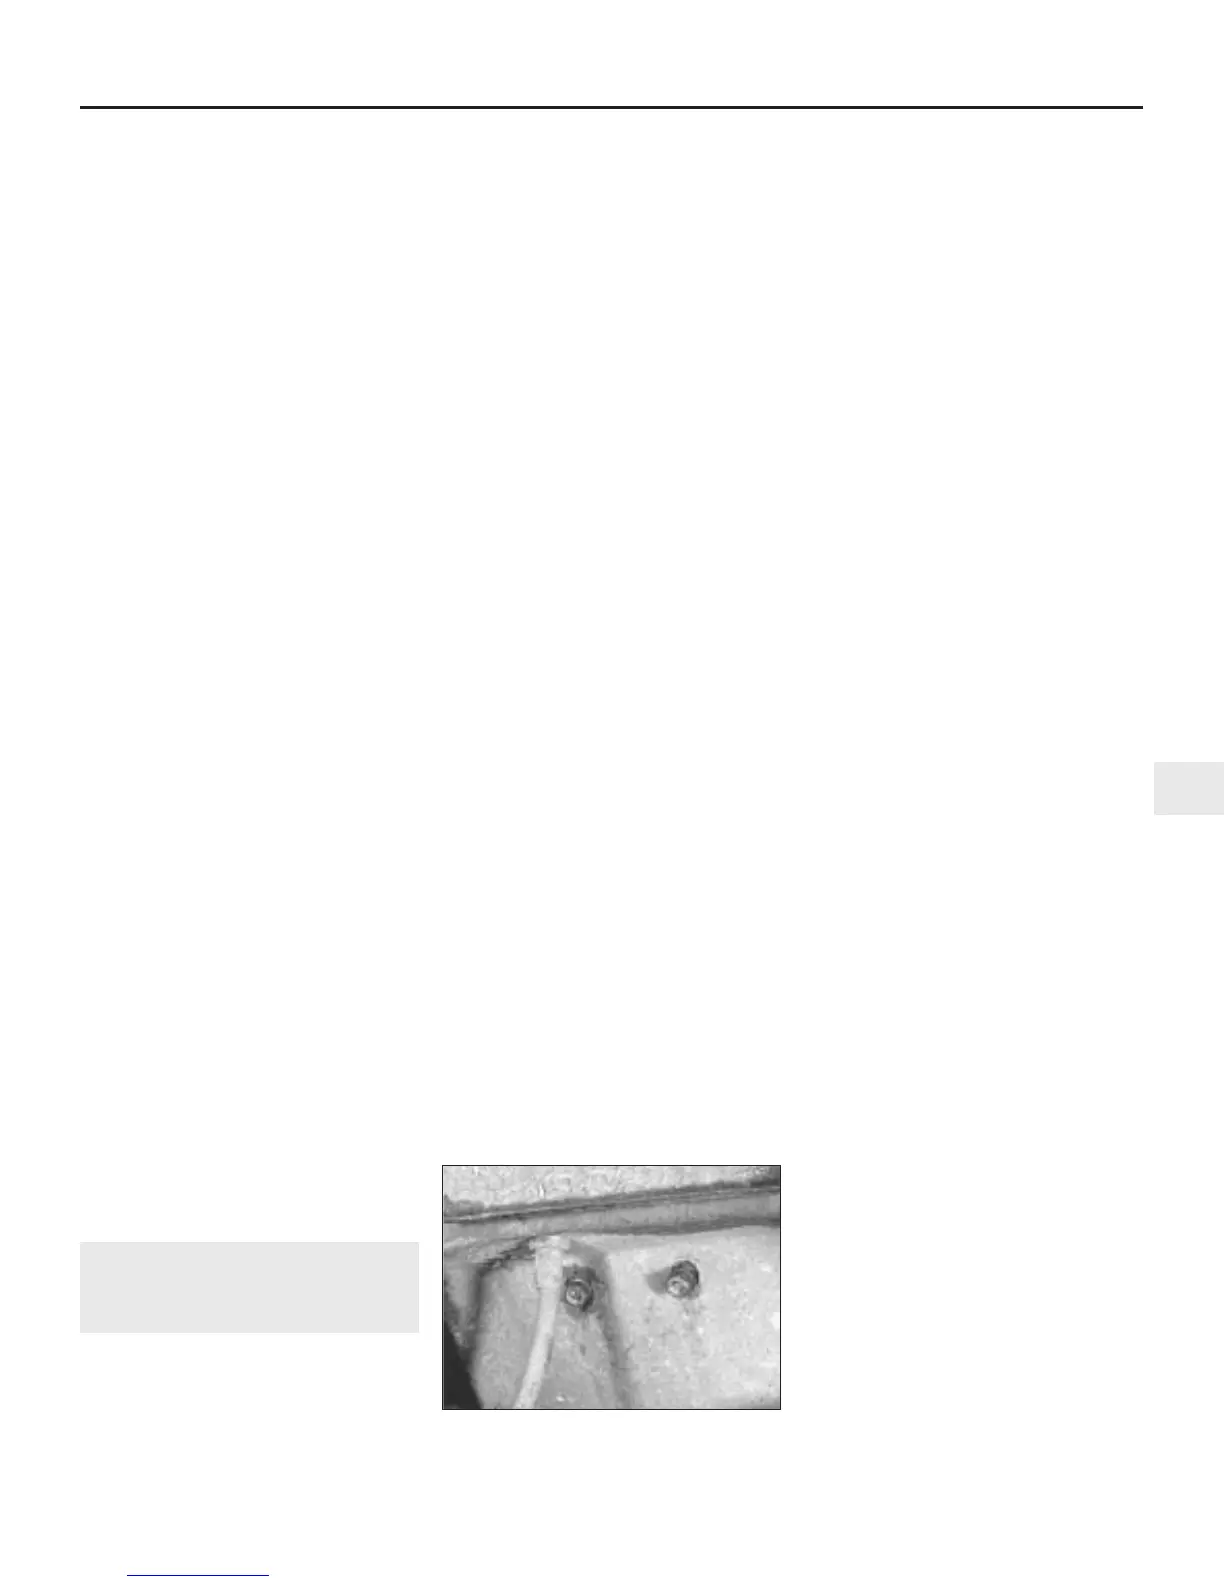
15 From beneath the car undo and remove
the two nuts and bolts securing the right-hand
engine mounting to the subframe side
members (see illustration). The best way to
do this is to engage the help of an assistant to
hold the bolts from above while the nuts are
undone from below. The bolt heads are
tucked away and can only be reached with a
small open-ended spanner.
16 Having released the mounting, jack up the
power unit sufficiently to enable the nine bolts
securing the flywheel/converter housing cover
to be removed. Note that on early models one
of the front bolts also retains the engine earth
strap. On all models the rear bolts are quite
inaccessible, requiring a good deal of
patience and a short spanner.
17 When all the bolts are undone, lift off the
flywheel/converter housing cover.
18 With the cover removed, undo the bolts
securing the engine mounting and lift off the
mounting.
19 Refitting is the reverse sequence to
removal.
Left-hand mounting renewal
20 Remove the radiator as described in
Chapter 3.
21 Position a jack beneath the left-hand side
of the transmission casing, and, using a block
of wood to spread the load, just take the
weight of the power unit.
Engine in-car repair procedures 2A•11
2A
12.15 Right-hand engine mounting-to-
subframe retaining nuts
 Loading...