4 Radiator - removal and
refitting
2
Note: Refer to the warnings given in Section 1
of this Chapter before proceeding.
Removal
1 Drain the cooling system as described in
Chapter 1.
2 Refer to Chapter 11 and remove the
bonnet.
3 Slacken the two retaining clips and
completely remove the radiator top hose.
4 If the bottom hose was not removed for
draining, slacken the retaining clip, using a
long thin screwdriver, and pull the hose off the
radiator outlet.
5 Undo and remove the bolts and nuts
securing the radiator upper support bracket to
the fan cowling and thermostat housing. Lift
away the bracket (see illustration).
6 On later 1275 cc engines (except
carburettor engine Cooper models)
disconnect the wiring connectors at the
auxiliary cooling fan thermostatic switch in the
bottom corner of the radiator.
7 At the base of the radiator undo and
remove either the long through-bolt or the two
short bolts (depending on model) that secure
the lower support bracket to the engine
mounting (see illustration). If necessary
remove the front grille panel as described in
Chapter 11 to provide greater access.
Cooling, heating and ventilation systems 3•3
3
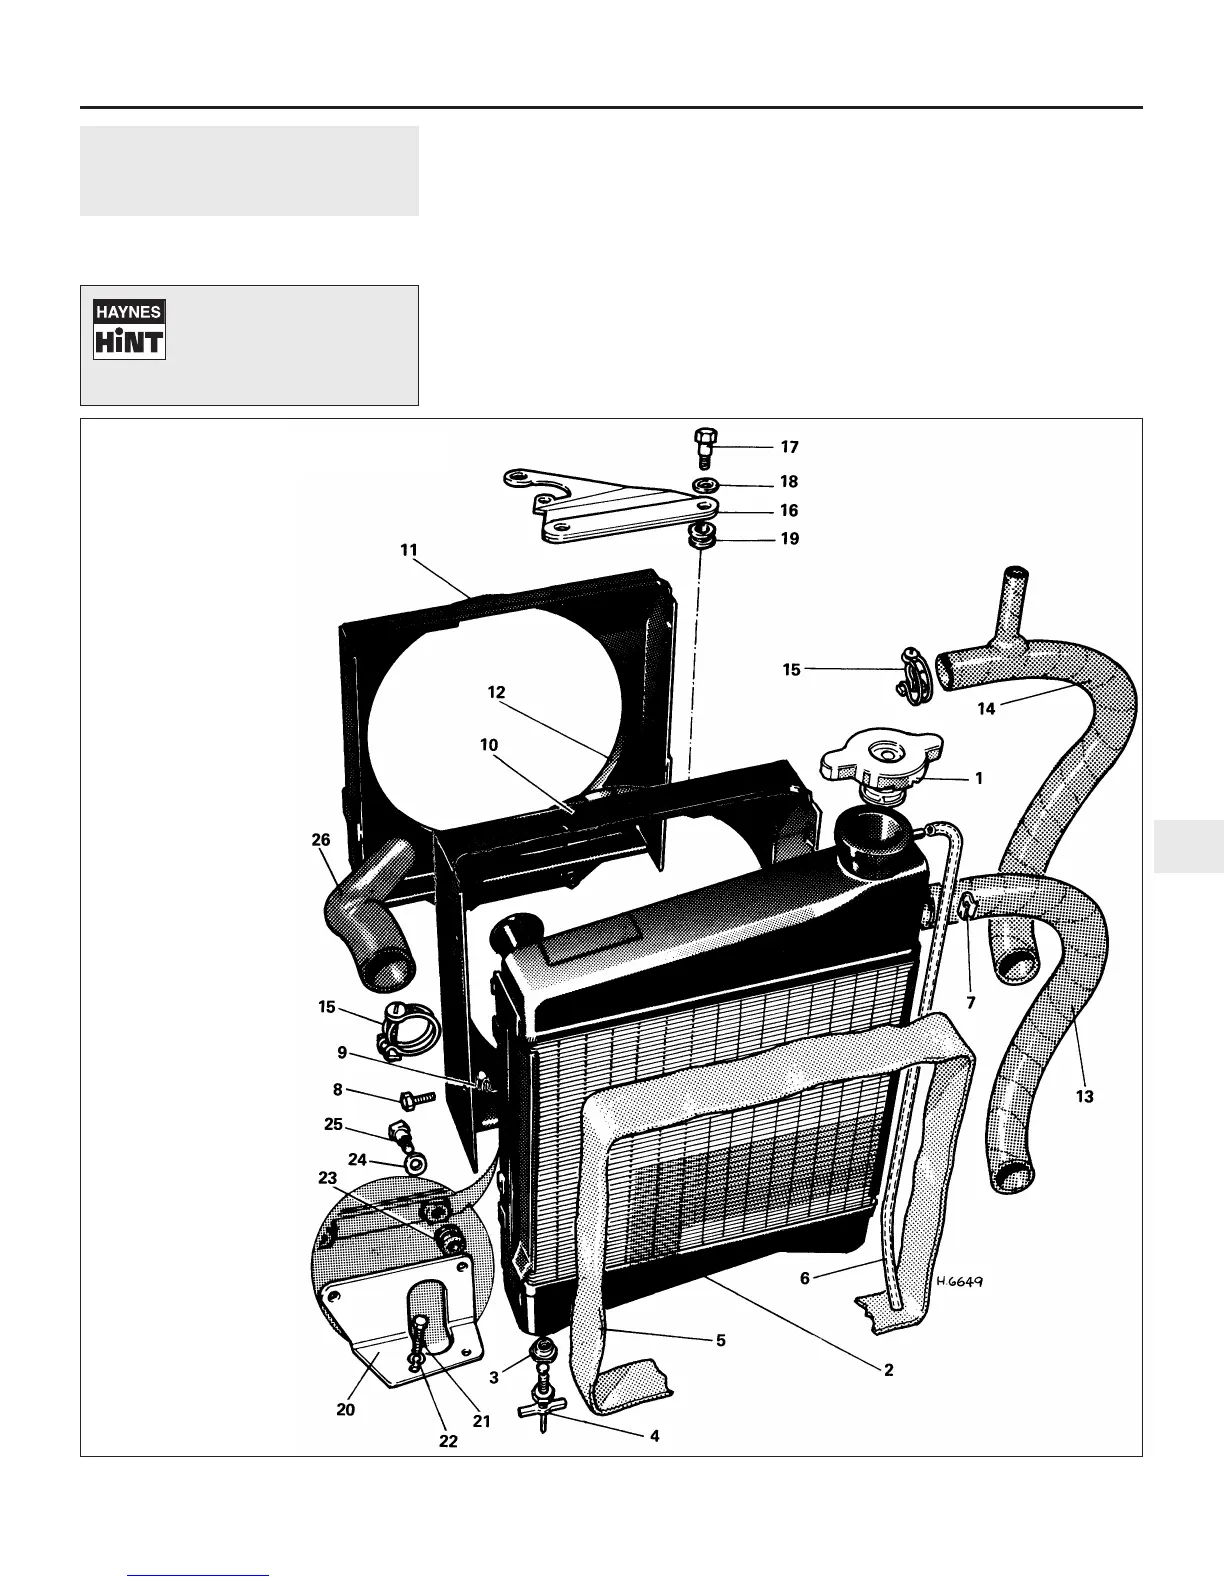
4.5 Exploded view of radiator and
attachments
1 Filler cap
2 Radiator
3 Drain tap adapter
4 Drain tap or plug
5 Rubber surround
6 Overflow pipe
7 Retaining clip
8 Cowl fixing screw
9 Nut
10 Cowl (one piece type)
11 Cowl (upper - two piece
type)
12 Cowl (lower - two-piece
type)
13 Bottom hose (non-
heater type)
14 Bottom hose (heater
type)
15 Hose clip
16 Upper mounting
17 Bolt
18 Washer
19 Rubber grommet
20 Lower mounting
21 Bolt
22 Washer
23 Rubber grommet
24 Washer
25 Bolt
26 Top hose
If leakage is the reason for
wanting to remove the radiator,
bear in mind that minor leaks
can often be cured using a
radiator sealant with the radiator in situ.
 Loading...